


Table of Contents
- What Is the Smith Machine Good Morning
- The Benefits of the Smith Machine Good Morning
- Muscles Worked by the Smith Machine Good Morning
- How To Do the Smith Machine Good Morning
- Smith Machine Good Morning Workout Routine for Beginners
- Smith Machine Good Morning Tips
- Common Mistakes to Avoid in the Smith Machine Good Morning
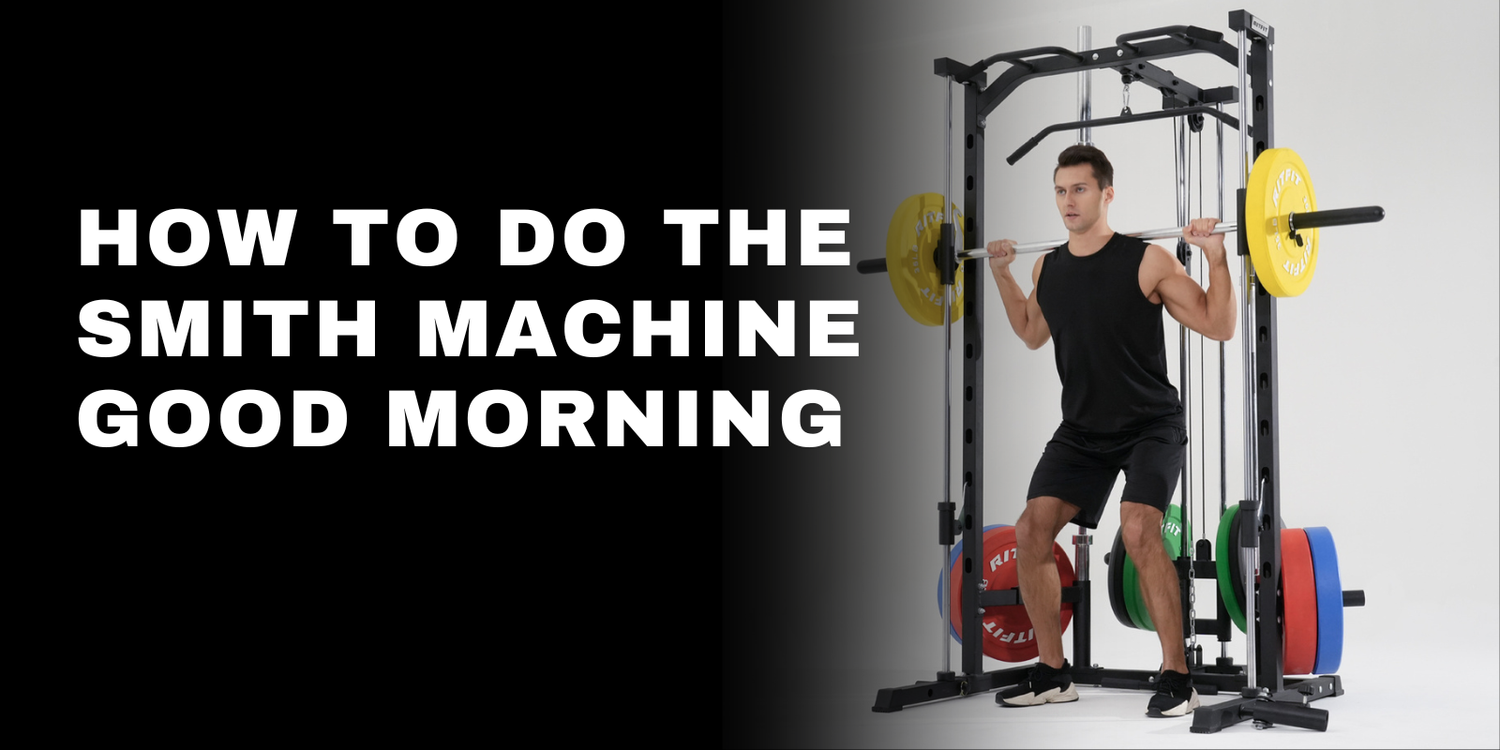
How to Do the Smith Machine Good Morning
The Smith machine good morning is a hip hinge that trains the hamstrings, glutes, and spinal erectors while giving you a fixed bar path to manage balance more easily. It works best as a technique first posterior chain exercise, not as a shortcut to heavy loading.
Key Takeaways
- 1. The Smith machine good morning is a posterior chain hinge. It mainly trains the hamstrings, glutes, and spinal erectors when you keep the bar stable and drive the hips back.
- 2. Light loading is the right starting point. Most lifters get more value from clean reps, steady tempo, and repeatable range than from chasing heavy plates early.
- 3. Foot position is individual. A slight forward stance often feels better on a Smith machine, but the right setup is the one that keeps the bar stacked over your midfoot.
- 4. Range of motion is earned, not forced. Stop the descent when you can no longer keep a neutral spine, steady brace, and even foot pressure.
- 5. This move is useful, but not mandatory. If you cannot feel the target muscles well, a Smith machine Romanian deadlift may fit you better.
What Is the Smith Machine Good Morning
The Smith machine good morning is a bar on back hip hinge that emphasizes posterior chain loading through controlled hip flexion and hip extension. Musculoskeletal modeling in females found that good mornings produce high gluteal force with meaningful hamstring demand, which supports their role as a serious hinge pattern rather than a filler accessory.[1]
If you are new to the equipment itself, read what a Smith machine is first, or browse the RitFit Smith machine collection to understand the different rail and home gym setups.
The Benefits of the Smith Machine Good Morning
The main benefit of the Smith machine good morning is that it lets you rehearse a loaded hip hinge in a more repeatable setup. Load still changes good morning mechanics and lumbar motion, so the real benefit comes from control, not from treating the fixed bar path as automatic protection.[2]
- Posterior chain focus: This exercise helps you train the hamstrings, glutes, and spinal erectors together. That makes it useful for lifters who want a hinge that complements a Smith machine squat or deadlift day.
- Better setup consistency: The bar path stays fixed, so each rep starts from the same track. That can help you notice whether your brace, stance, and range are actually repeatable from set to set.
- Useful for solo training: You do not need a spotter to practice the pattern. You still need safeties, careful loading, and a stopping point you can control.
- Good hypertrophy support: The lift can add high quality volume for hamstrings and glutes when you keep reps smooth and submaximal. It is especially useful when you want posterior chain work without the fatigue cost of pulling heavy from the floor.
- Simple progression options: You can progress by load, tempo, pause length, or range of motion. Most beginners should earn those changes in that order.
Muscles Worked by the Smith Machine Good Morning

The Smith machine good morning is still a hinge family exercise, so the primary muscle story is the same even though the rail changes balance demands. Hip extension research in trained women also shows strong gluteus maximus, biceps femoris, and erector spinae involvement across similar hinge patterns, which supports this overall muscle map.[5]
- Hamstrings: The hamstrings help control the lowering phase and extend the hips on the way up. Most lifters feel them best when the knees stay softly bent and the hips travel back instead of down.
- Gluteus maximus: The glutes help drive the torso back to standing. They usually feel strongest when you finish tall without leaning back into an exaggerated lockout.
- Erector spinae: The erector spinae stabilize the trunk throughout the set. They should feel involved, but they should not be the only tissue you notice after every rep.
- Adductor magnus: This large inner thigh muscle contributes to hip extension, especially in deeper hip flexion. It helps the movement feel stronger out of the bottom half of the rep.
- Deep core: The abdominals and obliques create trunk stiffness so the hinge happens at the hips, not through spinal collapse. A better brace usually improves both control and muscle targeting.
How To Do the Smith Machine Good Morning
Proper execution starts with a neutral spine, a firm brace, and a hip hinge that stays organized from the first inch of the rep. Wearable sensor research on lifting practice supports the value of teaching a clean hip hinge with controlled pelvic and spinal position rather than relying on load to force the pattern.[3]
- Step 1, Set the bar and safeties: Place the bar around upper chest to armpit height so you can unrack it without shrugging or tiptoeing. Set the safeties just below your expected bottom range so the bar has somewhere safe to land if you lose position.
- Step 2, Build your stance: Put the bar on your upper traps, not on your neck, and stand with feet about shoulder width apart. If your machine is angled, adjust your foot position until the bar still feels centered over the midfoot.
- Step 3, Brace before you move: Unrack the bar, take air into the torso, and lock in a full trunk brace. Your ribs should stay down, your neck should stay neutral, and your knee bend should stay slight and steady.
- Step 4, Hinge the hips back: Push your hips back while keeping the chest long and the spine neutral. Think about sending the glutes toward the wall behind you instead of squatting down.
- Step 5, Stop at your real bottom: Lower only as far as you can keep your brace, spinal position, and foot pressure. Your bottom position is the deepest point you can own, not the deepest point you can reach once the low back starts to round.
- Step 6, Stand back up with control: Drive the hips forward and return to standing without jerking the bar. Finish by squeezing the glutes and staying tall, not by leaning back.
Smith Machine Good Morning Workout Routine for Beginners
Beginners should use this lift to learn a controlled hinge before treating it like a strength test. The best starting plan is low to moderate effort, slower tempo, and enough rest to keep every rep technically clean.
- Warm up: Start with cat cow, bodyweight hip hinges, glute bridges, and a few unloaded practice reps. If you need more leg day prep, use this Smith machine leg workout guide as a related progression path.
- Sets and reps: Perform 3 sets of 10 to 12 reps with the empty bar or very light load. Stop with about 3 reps left in reserve so form stays stable.
- Tempo: Lower for 3 seconds, pause for 1 second near the bottom, and stand up in 1 to 2 seconds. The slower descent makes it easier to feel whether the hamstrings are actually taking the load.
- Rest: Rest 60 to 90 seconds between sets. Take longer if your brace or balance starts to drift.
- Weekly progression: Train the movement 1 to 2 times per week after a squat or lower body main lift. Add a small amount of load only after every rep looks the same and your low back is not taking over.
Smith Machine Good Morning Tips
Small technical changes usually decide whether this exercise feels like a hamstring hinge or a lower back grind. The goal is not to copy a textbook shape, it is to find the stance and range that let your target muscles own the rep.
- Let the feet move slightly forward if needed: Many lifters feel more balanced when the feet sit a little in front of the bar line. The right spot is the one that makes the rep feel like hips back over midfoot, not like falling backward.
- Use an upper trap shelf: Keep the bar on the muscular shelf of the upper back. Higher neck placement usually makes the rep less comfortable and less stable.
- Respect your active range: Stop when you lose spinal position or foot pressure, even if that happens well above parallel. A shorter clean range builds more useful skill than a deeper rep you cannot control.
- Keep the knees soft, not moving: Start with a small knee bend and hold it there. More knee travel usually turns the movement into a squat and reduces the hinge emphasis.
- Use the right hinge variation for the goal: If you want a related pattern that often feels easier in the hamstrings, try a Smith machine Romanian deadlift, which fits with systematic review evidence showing hinge variants can differ meaningfully in posterior chain activation profiles.[4]
- Choose the right machine for home training: A stable setup matters more than fancy wording. If you are still building your garage or basement layout, this best Smith machine with weight stack guide can help you compare options.
Common Mistakes to Avoid in the Smith Machine Good Morning
Most problems with this lift come from forcing range, loading it too fast, or turning the hinge into a different pattern. If the rep stops feeling repeatable, the fix is usually less ego and more control.
- Rounding the low back: This is the most common error and the one that changes the whole stress profile of the movement. Shorten the range, re brace, and keep the chest and pelvis organized.
- Turning the lift into a squat: Too much knee bend shifts the pattern away from the hinge. Keep the shins relatively quiet and send the hips back instead.
- Standing in the wrong place on the rails: If your feet are too far under or too far forward, the bar path will fight your balance. Adjust until the rep feels stacked and repeatable.
- Loading too heavy too soon: This is a poor trade for most home gym lifters because technique usually breaks before the target muscles are fully trained. Stay submaximal and let clean repetition quality drive progress.
- Chasing depth instead of tension: More depth is not better if the hamstrings stop owning the rep. Your real bottom is where you still have tension, position, and control.
- Ignoring better alternatives: If this movement never feels right, use another hinge such as Smith machine deadlifts or an RDL pattern. A good program fits the lifter, not the other way around.
FAQs
Is the Smith machine good morning safe for beginners?
Yes. The Smith machine good morning can work for beginners when the load is light, the safeties are set correctly, and the goal is to learn a controlled hip hinge. It is not a beginner movement for chasing heavy weight, deep range, or fast reps before technique is stable.
What muscles does the Smith machine good morning work most?
The Smith machine good morning mainly trains the hamstrings, glutes, and erector spinae, with the adductor magnus and deep core helping stabilize the movement. Most lifters feel the stretch most in the hamstrings when the knees stay softly bent and the hips move back under control.
How low should you go on a Smith machine good morning?
You should lower the Smith machine good morning only as far as you can keep a neutral spine and steady foot pressure. For some lifters that is just above parallel, while for others it is higher, because the safest bottom position is the deepest range you can control.
Should your feet be forward on the Smith machine good morning?
Yes. Many lifters do better with the feet slightly forward on a Smith machine good morning because the fixed bar path changes balance demands. The exact distance is individual, so adjust until the bar feels stacked over the midfoot and the movement feels like hips back, not falling backward.
Can the Smith machine good morning replace Romanian deadlifts?
No. The Smith machine good morning does not fully replace Romanian deadlifts because the loading position, balance demands, and training feel are different. It can still be a useful hinge option when you want more upper back support from the setup or a controlled way to practice posterior chain work.
Why do I feel the Smith machine good morning in my lower back?
You usually feel the Smith machine good morning too much in the lower back when the load is too heavy, the brace is loose, or the descent goes past your controllable range. A shorter range, lighter weight, and steadier knee angle usually shift the work back toward the hamstrings and glutes.
Conclusion
The Smith machine good morning can be a useful posterior chain builder when you treat it as a controlled hinge, respect your real range of motion, and progress slowly. Start light, keep the spine neutral, and use it only as long as it helps you feel the right muscles without turning the set into a lower back grind.
Disclaimer: This article is for general education only and is not medical advice. Stop if you feel sharp pain, numbness, dizziness, or symptoms that worsen during the set, and consult a qualified clinician before training if you have a current back, hip, hamstring, or spinal condition.
References
- Jaeggi JS Achermann B Lorenzetti SR. Female Lower Body Muscle Forces: A Musculoskeletal Modeling Comparison of Back Squats, Split Squats and Good Mornings. Journal of Functional Morphology and Kinesiology. 2024;9(2):68. doi:10.3390/jfmk9020068
- Vigotsky AD Harper EN Ryan DR Contreras B. Effects of load on good morning kinematics and EMG activity. PeerJ. 2015;3:e708. doi:10.7717/peerj.708
- Michaud F Pérez Soto M Lugrís U Cuadrado J. Lower Back Injury Prevention and Sensitization of Hip Hinge with Neutral Spine Using Wearable Sensors during Lifting Exercises. Sensors. 2021;21(16):5487. doi:10.3390/s21165487
- Martín-Fuentes I Oliva-Lozano JM Muyor JM. Electromyographic activity in deadlift exercise and its variants. A systematic review. PLoS One. 2020;15(2):e0229507. doi:10.1371/journal.pone.0229507
- Andersen V Pedersen H Fimland MS et al. Comparison of Muscle Activity in Three Single Joint Hip Extension Exercises in Resistance Trained Women. Journal of Sports Science and Medicine. 2021;20(2):181-187. doi:10.52082/jssm.2021.181


