


Table of Contents
- What Is a Resistance Band?
- Benefits of Using a Resistance Band
- Types of Resistance Bands and Choosing the Right One
- Safety Tips Before You Start
- How to Use a Resistance Band: Basic Techniques
- Full-Body Resistance Band Exercises (With Step-by-Step Instructions)
- Sample Resistance Band Workouts
- Progression: How to Get Better Results with a Resistance Band
- Common Mistakes to Avoid
- Care, Maintenance, and Storage
- FAQs About How to Use a Resistance Band
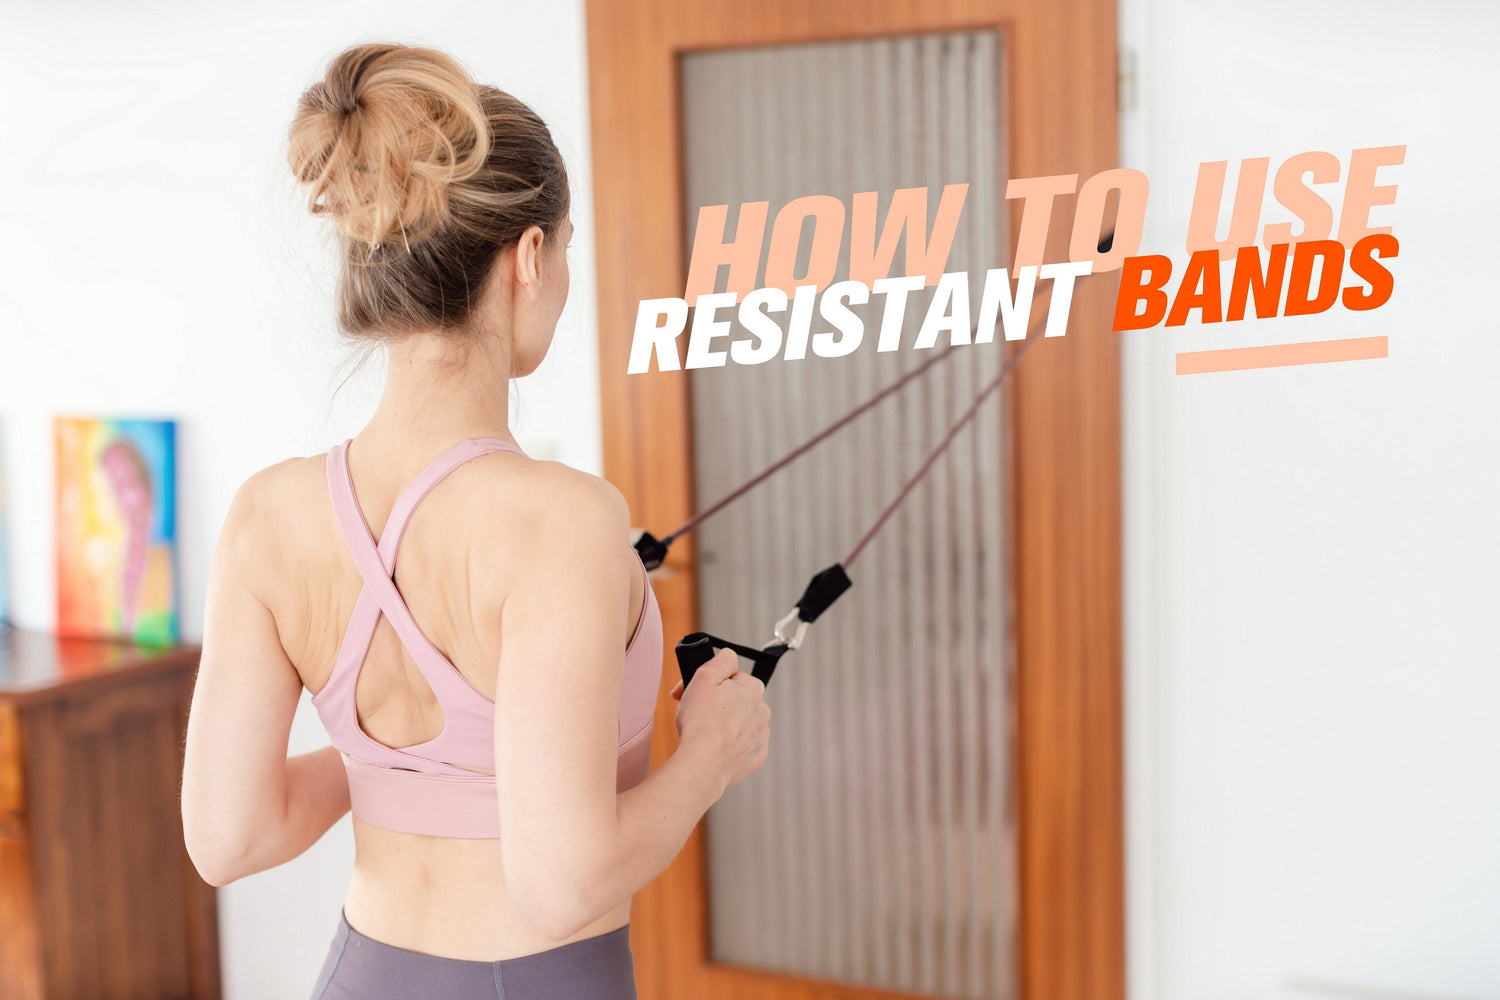
Looking for an effective, low-cost way to strengthen your body without leaving home? Resistance bands are a fantastic solution! These versatile, portable tools offer a full-body workout that can help improve strength, balance, and overall physical function. Whether you're new to exercise, managing a heart condition, or simply seeking convenient ways to stay active, resistance bands can be a game-changer. In this guide, you’ll learn exactly how to use a resistance band safely and effectively, transforming your fitness routine with this simple yet powerful equipment.
Key Takeaways
- Resistance bands are a safe and effective way to build strength at home when you use controlled form, steady breathing, and the right resistance.
- Choose a band based on the exercise and your current strength, not by color alone, since color coding is not standardized across brands.
- Anchor bands carefully and inspect them every session to reduce the risk of snapping or slipping.
- If you have a heart condition, high blood pressure, are pregnant, are recovering from injury or surgery, or feel unwell, get clearance from a qualified clinician before starting.
- Stop immediately if you feel chest pressure or pain, unusual shortness of breath, dizziness, faintness, or symptoms that rapidly worsen.
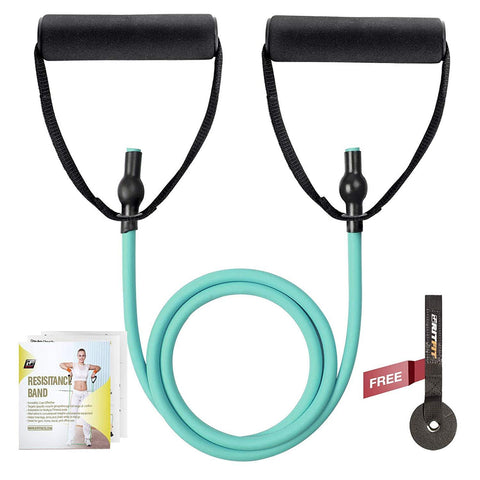
What Is a Resistance Band?
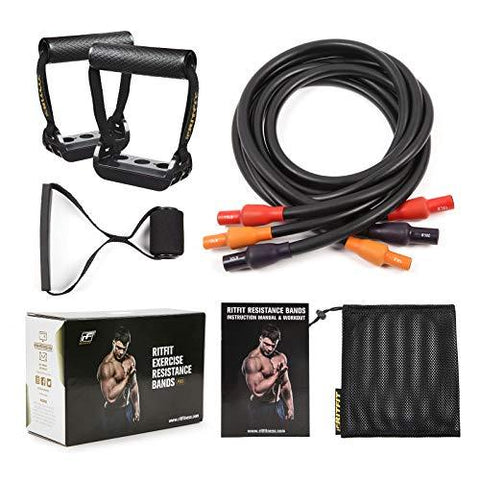
A resistance band is an elastic band used for strength training. It comes in various forms, including long loop bands, tube bands with handles, flat therapy bands, and smaller mini bands. The core principle is simple: the band provides tension, which your muscles work against, creating resistance similar to that of weights. This progressive resistance allows for an effective workout that can be easily adjusted to your fitness level.
Benefits of Using a Resistance Band
- Strength Training and Muscle Toning: Build and tone muscles across your entire body.
- Joint-Friendly, Low-Impact: Offers resistance without the impact often associated with free weights, making it ideal for those with joint concerns or during rehabilitation.
- Useful for Warm-ups, Mobility, Rehabilitation: Great for preparing your body for activity, improving range of motion, and supporting recovery.
- Flexibility and Range-of-Motion Improvements: Helps in stretching and increasing joint flexibility.
- Space-Saving, Travel-Friendly Equipment: Lightweight and compact, perfect for small spaces or taking on the go, eliminating the need for an expensive gym membership.
- Improved Balance and Functional Fitness: Regular use can enhance your stability, reducing the risk of falls and making everyday tasks like carrying groceries or climbing stairs easier.
Types of Resistance Bands and Choosing the Right One
Understanding the different types of bands will help you choose the best tools for your goals:
- Long Loop Bands: Continuous loops, often used for pull-up assistance, heavy lifting assistance, or full-body exercises.
- Tube Bands with Handles: Feature handles at each end, making them comfortable for exercises like rows, chest presses, and bicep curls.
- Flat Therapy Bands: Wide, flat strips of latex, often used in rehabilitation settings and for a variety of exercises where you can tie them or wrap them.
- Mini Loop Bands: Small, circular bands typically used around the legs for glute and hip activation exercises.
Bands come in various resistance levels, usually indicated by color codes (e.g., yellow for light, red for medium, green for heavy). To choose the right band:
- Consider your fitness level: Beginners should start with lighter resistance to master form.
- Think about your goal: Lighter bands for mobility or high-rep toning, heavier bands for strength building.
- If you have a heart condition or high blood pressure, check with your medical team before you get started. They can provide guidance on appropriate intensity levels.
Safety Tips Before You Start
- Inspect the band: Always check for cracks, tears, or signs of wear before each use to prevent snapping.
- Anchor safely: If using a door anchor, ensure the door is securely closed. When anchoring around furniture, verify its stability. You can also anchor the band safely with your own body.
- Proper body alignment and posture basics: Maintain a neutral spine, engaged core, and avoid locking your joints.
- Foot placement and grip basics: Ensure your feet are firmly planted when standing on a band, and grip handles or wrapped bands securely.
- General warm-up recommendation: A few minutes of light cardio or dynamic stretches will prepare your muscles.
How to Use a Resistance Band: Basic Techniques
Mastering these basics will ensure you get the most out of your band exercises:
-
How to hold the band:
- With handles: Simply grasp them firmly.
- Wrapped around hands: Wrap the band around your hands one or more times to shorten it and increase tension.
- Under feet/around legs: Position the band securely under your feet or around your thighs/ankles.
-
Understanding the tension:
- Adjusting resistance: Shorten the band by wrapping it further around your hands or feet to increase resistance; lengthen it to decrease.
- Maintaining tension: Keep a slight tension in the band throughout the entire movement, avoiding any slack.
- Breathing technique: Exhale on exertion (when you're pushing or pulling) and inhale on release.
- Tempo and control: Perform movements slowly and with control. Avoid jerky motions that can cause injury or lose tension.
Full-Body Resistance Band Exercises (With Step-by-Step Instructions)
Here’s how to use a resistance band for a comprehensive workout, with step-by-step instructions for each move. Perform 10-15 repetitions for 2-3 sets of each exercise, unless otherwise specified. If you feel wobbly, hold the wall or the back of a chair for support. You can also do most of these exercises seated.
Upper Body
Banded Biceps Curls
Setup: Stand with feet hip-width apart, one or both feet on the center of a long loop or tube band. Hold the ends of the band (or handles) with palms facing forward, arms extended down. Alternatively, perform seated with the band under your feet. This exercise helps you carry the shopping home or lift a heavy laundry basket.
Movement: Keeping elbows close to your sides, slowly curl the band up towards your shoulders. Squeeze your biceps at the top. Slowly lower back to the starting position with control.
Triceps Extensions
Setup: Stand with one foot slightly forward, stepping on the middle of a long loop or tube band. Hold one end of the band in each hand, bringing your hands behind your head with elbows bent and pointing forward. Alternatively, you can anchor the band to a door and face away from it. This helps with pushing doors open or lifting yourself up.
Movement: Extend your forearms overhead, straightening your arms. Feel the squeeze in your triceps. Slowly lower your hands back behind your head.
Shoulder Presses
Setup: Stand or sit with feet on the center of a long loop or tube band. Hold the ends or handles at shoulder height, palms facing forward. Your elbows should be bent at 90 degrees. This strengthens your shoulders for reaching and lifting.
Movement: Press the band overhead until your arms are straight, but don't lock your elbows. Slowly lower back to the starting position.
Lateral Raises
Setup: Stand with feet on the center of a long loop or tube band. Hold the ends or handles with arms at your sides, palms facing your thighs. Alternatively, perform seated. This supports carrying items at your sides.
Movement: Keeping a slight bend in your elbows, slowly raise your arms out to the sides to shoulder height, forming a "T" shape. Control the movement as you lower your arms back down.
Rows (Seated or Standing, Anchored Band)
Setup: For seated rows, sit on the floor with legs extended, looping a band around your feet. Hold the ends or handles. For standing rows, anchor the band to a sturdy object at chest height. Stand facing the anchor, holding the band ends or handles with arms extended forward. This helps with pulling tasks, like opening heavy drawers or doors.
Movement: Pull the band towards your torso, squeezing your shoulder blades together. Keep your elbows close to your body. Slowly release back to the starting position.
Chest Press / Chest Fly (Band Anchored Behind)
Setup: Anchor a long loop or tube band securely behind you (e.g., to a door anchor or sturdy post). Stand or sit facing away from the anchor, holding the ends or handles of the band with arms bent, hands at chest height. This strengthens muscles for pushing.
Movement: Extend your arms straight forward, pushing against the band’s resistance. Slowly bring your hands back to the starting position.
Lower Body
Squats with Band Under Feet
Setup: Stand with feet hip-width apart, placing the center of a long loop or tube band under your feet. Hold the ends or handles at shoulder height, or cross them in front of your chest. This builds leg strength for getting out of a chair or climbing stairs.
Movement: Keeping your chest up and core engaged, lower your hips as if sitting into a chair, ensuring your knees track over your toes. Go as low as comfortable. Push through your heels to return to the starting position.
Deadlifts with Band Under Feet
Setup: Stand with feet hip-width apart, on the center of a long loop or tube band. Hold the ends or handles with arms extended down in front of you, palms facing your thighs. Keep a slight bend in your knees. This helps with lifting objects from the floor.
Movement: Hinge at your hips, keeping your back straight and chest up, as you lower the band towards the floor. Feel the stretch in your hamstrings. Squeeze your glutes as you return to a standing position.
Glute Bridges with Band Around Thighs
Setup: Lie on your back with knees bent, feet flat on the floor hip-width apart. Place a mini loop band just above your knees. This helps strengthen your glutes, important for walking and balance.
Movement: Press your knees outwards against the band’s resistance. Lift your hips off the floor until your body forms a straight line from shoulders to knees. Squeeze your glutes at the top. Slowly lower your hips back down.
Lateral Band Walks (Mini Band Around Legs)
Setup: Place a mini loop band around your ankles or just above your knees. Stand with feet hip-width apart, knees slightly bent, and a slight tension in the band. This improves hip stability and balance.
Movement: Step sideways with one foot, maintaining tension in the band and keeping your feet parallel. Bring the other foot to meet it, maintaining a slight bend in your knees. Take 10-15 steps in one direction, then switch directions.
Standing Hip Abductions/Adductions
Setup: For abductions, place a mini loop band around your ankles. For adductions, anchor a tube band to a sturdy object, loop the other end around your inner ankle. Stand tall, holding onto a wall or chair for support. These exercises support hip strength and stability.
Movement:
- Abduction: Slowly move one leg out to the side against the band’s resistance, keeping your body stable. Return with control.
- Adduction: Slowly bring the leg with the band attached across your body, pulling against the resistance. Return with control.
Core
Pallof Press (Anti-Rotation Press with Anchored Band)
Setup: Anchor a tube band at chest height to a sturdy object. Stand perpendicular to the anchor, holding the band handles with both hands at your chest. Step away from the anchor until there’s tension. This helps build core stability and protect your back.
Movement: Press the band straight out in front of you, resisting the urge for your torso to rotate towards the anchor. Hold for a moment, then slowly bring the band back to your chest. Perform on both sides.
Standing Woodchoppers
Setup: Anchor a tube band high (e.g., in a doorway) or low (e.g., near the floor). Stand facing the anchor, slightly offset, holding the band with both hands. This targets your obliques and rotational strength.
Movement:
- High to Low: Starting with the band high and to one side, pull it diagonally across your body down towards the opposite hip, rotating your torso.
- Low to High: Starting with the band low and to one side, pull it diagonally up and across your body towards the opposite shoulder.
Perform with control, engaging your core, then switch sides.
Banded Dead Bug or Leg Lowers
Setup: Lie on your back with knees bent at 90 degrees, feet lifted. Place a mini loop band around your feet or just above your knees. Alternatively, you can hold a band between your hands and feet. These exercises strengthen deep core muscles.
Movement: Keeping your lower back pressed into the floor, slowly extend one leg (or both, for leg lowers) forward, stretching against the band. Bring it back with control. For dead bugs, simultaneously extend the opposite arm overhead. Perform slowly and deliberately.
Seated Band Rotations
Setup: Sit on the floor with legs extended, knees slightly bent. Loop a long loop or tube band around your feet. Hold the ends or handles with both hands in front of your chest. This strengthens your core for rotational movements.
Movement: Keeping your core engaged and back straight, slowly rotate your torso to one side, pulling against the band’s resistance. Return to center, then rotate to the other side. Focus on controlled movement rather than speed.
Sample Resistance Band Workouts
Here are structured routines to help you integrate bands into your fitness journey:
Beginner Full-Body Routine
Perform each exercise for 10-12 repetitions, completing 2 sets. Rest 30-60 seconds between sets.
- Banded Biceps Curls
- Squats with Band Under Feet
- Seated Rows
- Glute Bridges with Band Around Thighs
- Shoulder Presses (seated or standing)
- Pallof Press (10 reps each side)
Focus on learning how to use a resistance band with good form before increasing resistance.
Intermediate Strength & Toning Workout
Perform each exercise for 12-15 repetitions, completing 3 sets. Rest 30-45 seconds between sets. Use a slightly stronger band or shorten the band for increased resistance.
-
Circuit 1:
- Deadlifts with Band Under Feet
- Chest Press / Chest Fly
- Lateral Band Walks (15 steps each direction)
-
Circuit 2:
- Triceps Extensions
- Lateral Raises
- Standing Woodchoppers (12 reps each side)
- Finisher: Banded Dead Bug (15 reps each side)
Travel / At-Home Quick Routine (10-Minute Workout)
Perform each exercise for 15 repetitions, moving directly from one to the next with minimal rest. Complete 2 rounds.
- Squats with Band Under Feet
- Banded Biceps Curls
- Glute Bridges with Band Around Thighs
- Shoulder Presses
- Seated Band Rotations (15 reps each side)
This routine emphasizes convenience and can be done with minimal space.
Progression: How to Get Better Results with a Resistance Band
To continue challenging yourself and seeing results:
- Increase resistance: Move to a thicker/stronger band, or shorten your current band by wrapping it more.
- Increase volume: Add more sets or repetitions to your workouts.
- Advance to more complex exercises: Once you master the basics, explore more challenging band exercises.
- Track progress: Keep a simple log of the resistance level, sets, and reps you complete to see how you’re improving.
Common Mistakes to Avoid
- Letting the band snap back / losing control: Always control the eccentric (lowering) phase of the movement.
- Poor posture: Avoid rounding your back, flaring your ribs, or locking your joints. Maintain proper form throughout.
- Using resistance that’s too heavy or too light: If you can’t maintain form, the band is too heavy. If you don’t feel challenged, it’s too light.
- Inconsistent tension: Ensure there’s always some tension in the band. Don't let it go slack at the start or end of a movement.
Care, Maintenance, and Storage
- How to clean bands and avoid damage: Wipe bands with a damp cloth if needed. Avoid contact with sharp edges, excessive sun exposure, or extreme heat, which can degrade the material.
- Safe storage: Store bands in a cool, dry place, away from direct sunlight. Do not store them overstretched or in tight knots.
- When to replace a band: Look for signs of wear such as small tears, nicks, or loss of elasticity. Replace bands promptly to prevent injury.
FAQs About How to Use a Resistance Band
- “How often can I train with resistance bands?” Aim for 2-3 times per week, allowing a day of rest in between for muscle recovery.
- “Can resistance bands build muscle?” Yes, absolutely! They provide progressive resistance that effectively stimulates muscle growth and strength.
- “Are bands enough for a full workout?” Yes, with the right selection of exercises and proper progression, resistance bands can provide a comprehensive full-body workout.
- “What if I’m a complete beginner / older / in rehabilitation?” Resistance bands are excellent for all levels. Start with lighter bands, focus on controlled movements, and if you have specific health concerns, consult with your healthcare team. Many exercises can be adapted to be seated for increased stability.
Conclusion
Learning how to use a resistance band opens up a world of accessible and effective strength training right in your own home. They are a fantastic tool for improving muscle tone, functional strength, balance, and overall well-being, catering to a wide range of fitness levels and needs. Remember to start with the basics, prioritize good form, and progress gradually. Incorporate these tips and exercises into your routine, and you’ll be well on your way to a stronger, more active you. Ready to get started? Pick up a band and begin your journey today!
