


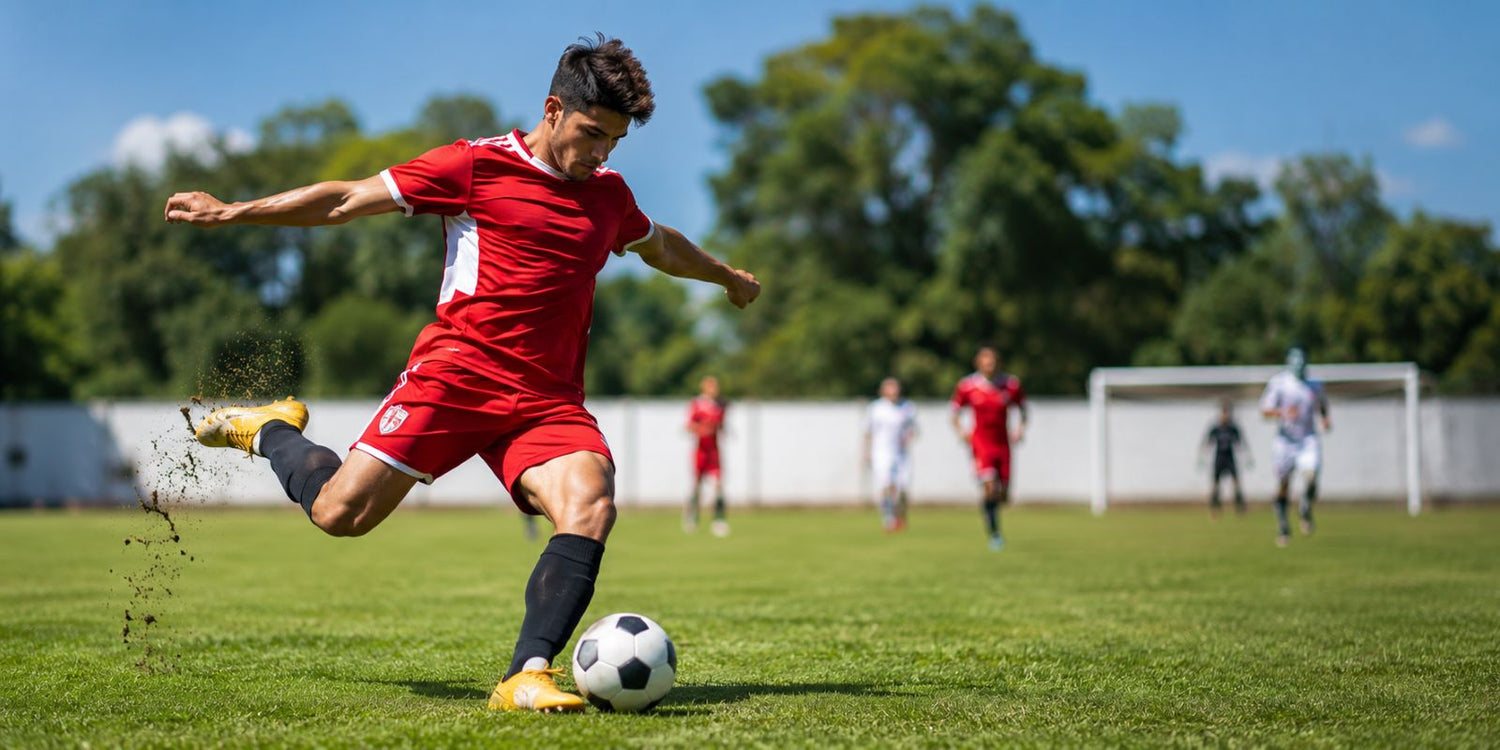
To shoot a soccer ball properly, beginners need four basics first, a steady plant foot, a locked ankle, clean contact, and a balanced follow through. Once these foundations are consistent, power and accuracy become much easier to build.
This guide explains beginner shooting form, common shot types, simple drills, quick fixes, strength training, and practice tips for players who want to strike the ball with more confidence.
Key Takeaways
- Accuracy comes before power: Beginners should learn to hit the target consistently before trying to shoot harder.
- Your plant foot controls direction: Point your non kicking foot toward the target before striking the ball.
- A locked ankle creates clean contact: Keep your toes down and your ankle firm when using the laces.
- Body lean controls height: Lean slightly over the ball to keep shots lower and more controlled.
- Progressive practice works best: Start with stationary shots, then add movement, passes, pressure, and fatigue.
Table of Contents
- What Makes a Good Soccer Shot?
- How to Shoot a Soccer Ball Step by Step
- Best Types of Soccer Shots for Beginners
- Best Soccer Shooting Drills for Beginners
- 4 Week Beginner Soccer Shooting Practice Plan
- Common Soccer Shooting Mistakes and Fixes
- How to Shoot With Your Weaker Foot
- How to Shoot in Game Situations
- Strength Training for Better Soccer Shooting Power
- Equipment for Soccer Shooting Practice
What Makes a Good Soccer Shot?
A good soccer shot is accurate first, powerful second, and timed well enough to challenge the goalkeeper. For beginners, a well placed shot into the corner is usually more useful than a hard shot hit straight at the keeper.
- Power: Power comes from clean technique, hip rotation, and firm contact, not just swinging harder.
- Accuracy: Accuracy comes from plant foot direction, steady eyes, balanced posture, and repeatable contact.
- Timing: Timing means choosing the right moment to shoot before defenders block the angle.
- Decision making: A quick controlled shot is often better than waiting for a perfect setup that never comes.
How to Shoot a Soccer Ball Step by Step
Proper shooting form helps beginners strike the ball with better power, accuracy, and control. Start slowly, focus on clean contact, and increase speed only after the movement feels consistent.
Step 1: Approach the Ball at an Angle
Approach the ball from a slight angle so your hips can rotate naturally through the strike. Biomechanics research describes the instep kick as a coordinated sequence where movement travels from the thigh to the shank and then to the foot.[1]
Step 2: Place Your Plant Foot Beside the Ball
Put your non kicking foot about 4 to 6 inches beside the ball and point it toward your target. Keep the plant knee slightly bent so your body stays stable through contact.
Step 3: Lock Your Ankle Before Contact
Point your toes down and keep your ankle firm when shooting with the laces. A soft ankle absorbs force and often causes weak or unpredictable shots.
Step 4: Lean Slightly Over the Ball
Keep your chest slightly over the ball if you want a low driven shot. Leaning back usually sends the ball too high, especially when beginners try to add power too early.
Step 5: Follow Through Toward the Target
Let your kicking leg continue naturally after contact instead of stopping the motion. For a powerful laces shot, your momentum may carry you forward onto your kicking foot.
Best Types of Soccer Shots for Beginners
Beginners should learn the inside foot shot first for control, then the instep drive for power. More advanced shots such as chips, volleys, and curves become easier once basic contact is reliable.
Instep Drive
The instep drive is the best beginner shot for learning power because it uses the laces area with a locked ankle. Strike through the center of the ball and follow through toward the target.
Inside Foot Shot
The inside foot shot is the best beginner option for accuracy because it uses a wider and more controlled contact surface. Open your hips slightly, guide the ball toward the corner, and avoid over swinging.
Chip Shot
The chip shot lifts the ball over a goalkeeper who has moved off the line. Strike under the lower half of the ball with a short controlled motion rather than a full power swing.
Volley
A volley is a shot taken before the ball touches the ground. Beginners should practice with gentle tosses first because timing matters more than power.
Half Volley
A half volley is struck just after the ball bounces. Watch the bounce closely and meet the ball as it rises so the shot stays controlled.
Best Soccer Shooting Drills for Beginners
The best beginner drills move from simple contact to game like pressure. Use short focused sets instead of long unfocused sessions so every shot teaches your body a repeatable pattern.
Stationary Ball Striking
Place the ball 12 to 15 yards from goal and take 20 to 30 controlled shots. Focus on one cue at a time, such as plant foot direction, ankle lock, or follow through.
Dribble and Shoot
Start 20 to 25 yards from goal, dribble at moderate speed, and take one final setup touch before shooting. The setup touch should place the ball slightly ahead and to the side of your shooting foot.
Pass and Shoot
Have a partner pass the ball into your path, take one touch to set it, and shoot. Progress to first time shooting only after your first touch finishing feels controlled.
Cone Target Practice
Place cones near the corners of the goal and aim for one target at a time. Start with inside foot placement shots, then add controlled laces shots once accuracy improves.
Light Pressure Shooting
Ask a defender to apply light pressure after you receive the ball. This teaches you to shoot before the angle disappears without rushing your technique.
4 Week Beginner Soccer Shooting Practice Plan
A simple 4 week plan helps beginners build skill without overtraining. Practice 3 times per week and rest if you feel pain in the hip, groin, knee, ankle, or lower back.
Week 1: Clean Contact
Take 30 stationary shots per session from 10 to 12 yards. Focus only on plant foot placement, locked ankle, and watching the ball through contact.
Week 2: Accuracy Before Power
Take 40 shots per session from 12 to 15 yards and aim at the bottom corners. Use inside foot placement first, then add controlled laces shots.
Week 3: Shooting After Movement
Add dribble and shoot reps, pass and shoot reps, and one touch finishes. Keep the final setup touch close enough that your next step can become the plant foot.
Week 4: Game Speed Shooting
Add light pressure, fatigue reps, and first time shots from passes. Research on approach angle suggests recreational players do not automatically improve accuracy or ball speed simply by forcing a new approach angle, so keep the angle natural and repeatable.[2]
Common Soccer Shooting Mistakes and Fixes
Most beginner shooting problems come from poor contact, poor balance, or trying to hit the ball too hard too soon. Fix the cause first, then add power gradually.
- Toe poking: Use the laces or inside foot instead of the tip of the toe. Practice slow locked ankle touches until the contact point feels natural.
- Looking up too early: Pick your target before the shot, then keep your eyes on the ball through contact. Looking up early often causes mishits.
- Plant foot too far away: Place your plant foot close enough that your kicking leg can swing through the ball cleanly. A far plant foot forces you to reach and lose balance.
- Shot going too high: Lean slightly over the ball and strike through the center. Avoid planting too far behind the ball unless you want lift.
- Weak contact: Lock your ankle and rotate from the hip. Swinging only from the knee usually creates a soft strike.
- Trying too hard: Start at 50 to 60 percent effort and focus on clean contact. Add power only when the shot is accurate and repeatable.
How to Shoot With Your Weaker Foot
The best way to improve your weaker foot is to use lower power, more repetitions, and simple targets. Do not judge your weak foot by the same standard as your dominant foot during the first few weeks.
- Start close: Shoot from 8 to 10 yards before moving farther away.
- Use double reps: Take two weak foot shots for every dominant foot shot.
- Control the setup touch: Place the ball slightly ahead of the weaker foot so the strike feels smooth.
- Train in warm ups: Pass, dribble, and juggle with the weaker foot during the first 10 minutes of practice.
- Stay patient: Noticeable progress often takes several weeks of consistent practice.
How to Shoot in Game Situations
Game shooting is harder than practice shooting because defenders, fatigue, and time pressure change your technique. The goal is not perfect form every time, but clean contact before the chance disappears.
One Touch Shooting
Shoot first time when the pass already gives you a good angle. Keep the ankle firm, watch the ball into contact, and guide the follow through toward the target.
Shooting Under Pressure
Use fewer touches when defenders are closing space. A quick controlled shot often creates more danger than an extra touch that lets the defender recover.
Shooting From Crosses
Focus on redirecting the ball instead of overpowering it. Use the inside foot, laces, or a controlled header depending on the height and speed of the cross.
Shooting When Fatigued
Practice some shots near the end of training so you learn to keep technique under tired conditions. Studies on fatigue and kicking show that intense running can temporarily affect soccer kick performance, which makes controlled fatigue practice useful when done safely.[3]
Strength Training for Better Soccer Shooting Power
Strength training can support shooting power by improving leg drive, hip control, core stability, and balance. Technique still matters most, so strength work should support the shot rather than replace skill practice.
For home training, players can build a simple setup with dumbbells for lower body strength, an adjustable weight bench for split squats and step ups, and home gym flooring for safer training space.
- Lower body strength: Squats, split squats, lunges, Romanian deadlifts, and calf raises build the legs and hips used during shooting.
- Core stability: Planks, dead bugs, side planks, and controlled rotations help transfer power from the lower body into the strike.
- Hip mobility: Hip flexor stretches, hamstring mobility, and dynamic leg swings help the kicking leg move freely.
- Explosive power: Low volume jumps and step ups can improve athletic coordination when performed with good landing control.
- Recovery: Rest days help protect the hip flexors, groin, knees, and ankles from overuse.
Equipment for Soccer Shooting Practice
You do not need expensive equipment to practice soccer shooting well. A good ball, safe space, simple targets, and consistent repetitions matter more than a complex setup.
- Soccer ball: Use a properly inflated size 5 ball for adults and a size 4 or size 3 ball for younger players.
- Cones or markers: Use cones to create target zones, shooting lanes, and dribble approaches.
- Goal or wall: A wall can be an excellent target if it is safe, durable, and allowed in your practice space.
- Cleats: Practice in the shoes you use for games so contact feels familiar.
- Rebounder or net: A rebounder can help you practice more shots in less time.
- Home strength tools: Soccer players who train at home can explore RitFit adjustable benches, plyo boxes for explosive training, and strength machines for lower body support work.
Age Specific Shooting Tips
Different age groups need different training priorities because strength, coordination, and attention span change with development. Keep youth training safe, playful, and technically simple.
Ages 6 to 10
Focus on fun, confidence, and simple contact with a smaller ball. Avoid heavy coaching and let kids experiment with movement.
Ages 11 to 14
Teach the five shooting basics and prioritize accuracy over power. Neuromuscular warm up programs have shown value for reducing acute noncontact lower extremity injuries in children's soccer, so warm up quality matters.[4]
Ages 15 to 18
Add pressure drills, one touch shots, crosses, and strength training with good supervision. Keep total shooting volume reasonable to avoid hip flexor and groin overload.
Adults
Adult beginners can learn proper shooting technique at any age. Start with slower repetitions, mobility work, and gradual practice volume.
How This Guide Was Created
This guide was structured around common beginner shooting problems, including poor plant foot placement, toe poking, shots going too high, weak contact, and poor balance. It combines practical coaching principles with selected peer reviewed research on soccer kicking biomechanics, fatigue, and injury prevention.
FAQs
How do beginners shoot a soccer ball with more power?
Beginners shoot with more power by using a firm plant foot, locked ankle, hip rotation, and clean laces contact. Start at moderate effort, because maximum effort before clean technique usually causes toe pokes, high shots, poor balance, and inconsistent contact.
What part of the foot should beginners use to shoot a soccer ball?
Beginners should use the laces for power shots and the inside of the foot for accurate placement shots. The toe is usually less reliable because it gives a smaller contact surface, less control, and a higher chance of unpredictable direction.
Why does my soccer shot keep going over the goal?
Your shot usually goes over the goal because you lean back, plant too far behind the ball, or strike under the center. Keep your chest over the ball, place your plant foot beside it, and contact the middle of the ball.
How can I shoot a soccer ball more accurately?
You shoot more accurately by pointing your plant foot at the target, keeping your head still, and using controlled effort. Choose a corner before the shot, watch the ball into contact, and follow through toward the exact area you want to hit.
Can I practice soccer shooting without a goal?
Yes. You can practice soccer shooting with a safe wall, fence target, rebounder, or cone target. Mark small target zones, shoot from short distance first, and focus on clean contact before increasing power or moving farther away.
Should beginners learn power shots or placement shots first?
Beginners should learn placement shots first because accuracy builds better habits than uncontrolled power. Once you can hit corners with the inside foot, add laces shots at moderate effort, then gradually increase speed while keeping the same contact quality.
How often should beginners practice soccer shooting?
Beginners should practice shooting 2 to 4 times per week depending on age, fitness, and recovery. Keep sessions short and focused, stop if pain appears, and avoid high volume shooting on back to back days when the hip or groin feels sore.
How do I stop toe poking the ball when I shoot?
You stop toe poking by slowing down, pointing your toes down, and striking with the laces or inside foot. Practice stationary shots at low power, check your contact point after each strike, and increase speed only when contact feels repeatable.
Conclusion
Learning how to shoot a soccer ball starts with simple fundamentals, plant foot placement, locked ankle, body lean, clean contact, and follow through. Practice accuracy first, add power gradually, and build from stationary shots to game speed drills.
For players training at home, a balanced routine that includes ball work, mobility, and strength support from RitFit home gym equipment can help build the physical foundation behind a stronger shot.
Disclaimer
This article is for general educational purposes only and is not medical, coaching, or injury treatment advice. If you have pain, a recent injury, or a medical condition, consult a qualified coach, physical therapist, or healthcare professional before starting intense shooting practice.
References
- Kellis E, Katis A. Biomechanical characteristics and determinants of instep soccer kick. J Sports Sci Med. 2007;6(2):154-165.
- Scurr J, Hall B. The effects of approach angle on penalty kicking accuracy and kick kinematics with recreational soccer players. J Sports Sci Med. 2009;8(2):230-234.
- Katis A, Amiridis I, Kellis E, Lees A. Recovery of powerful kick biomechanics after intense running fatigue in male and female soccer players. Asian J Sports Med. 2014;5(4):e24013. doi:10.5812/asjsm.24013.
- Hilska M, Leppanen M, Vasankari T, et al. Neuromuscular training warm up prevents acute noncontact lower extremity injuries in children's soccer, a cluster randomized controlled trial. Orthop J Sports Med. 2021;9(4):23259671211005769. doi:10.1177/23259671211005769.


