


Table of Contents
- Product Overview: What Is the RitFit PWM02?
- Design & Build Quality
- Key Features & Attachments
- Installation & Setup
- Safety Considerations
- Exercises You Can Do with the RitFit PWM02
- Programming Ideas for Different Users
- Maintenance & Longevity
- Pros, Cons, and Ideal User Profile
- Comparison with Other Models
- Buying Tips, Warranty & Support
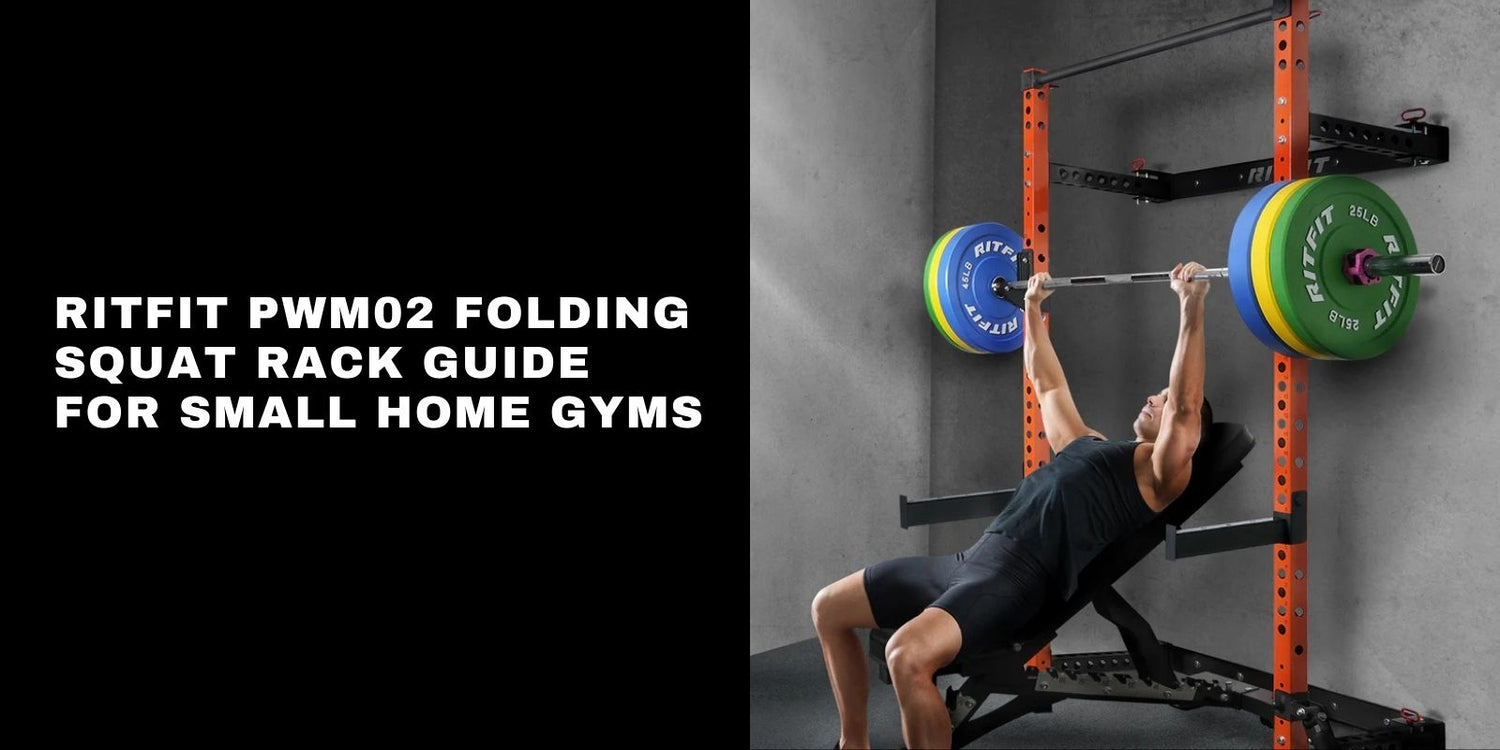
Building a home gym often involves a difficult trade-off: you want professional-grade equipment, but you also need to preserve usable living or storage space. Enter the RitFit PWM02 Multi-Functional Folding Squat Rack. Designed specifically for garage gyms, apartments, and limited-space setups, this rack promises the stability of a standard rig with the unique ability to fold away when not in use.
This guide is crafted for everyone from renters and homeowners to beginners and intermediate lifters looking to maximize their square footage. In the following sections, we will explore the features, safety considerations, installation requirements, and workout potential of the PWM02, ensuring you have all the information needed to elevate your home training experience.
Key Takeaways
- RitFit PWM02 gives you a real barbell rack without permanently sacrificing floor space by folding flat against the wall when stored.
- Safe performance depends on proper stud or concrete mounting plus regular bolt and hinge checks, especially in garages.
- Your “fit check” is simple: confirm ceiling height, wall structure, and enough floor depth for the rack, barbell, and bench.
- PWM02 supports the core home-gym big lifts and pull-ups, and it can expand with compatible accessories when specs match.
- If you lift alone, prioritize spotter arms and conservative setup habits to reduce risk during squats and bench presses.
Product Overview: What Is the RitFit PWM02?
The RitFit PWM02 distinguishes itself within the RitFit lineup as a dedicated wall-mounted, folding rack solution. Unlike standalone power cages that permanently occupy a large footprint, the PWM02 is engineered to retract against the wall, reclaiming your floor space for parking a car or other activities.
Key Selling Points:
- Space-Saving Design: The primary draw is its ability to fold inward or outward to sit flush against the wall.
- Multi-Functionality: Despite its compact nature, it supports essential compound movements like squats, bench presses, and pull-ups.
- Home-Gym Friendly: It strikes a balance between heavy-duty performance and residential practicality.
Quick Specs Checklist (Verify on the product page or manual before purchase):
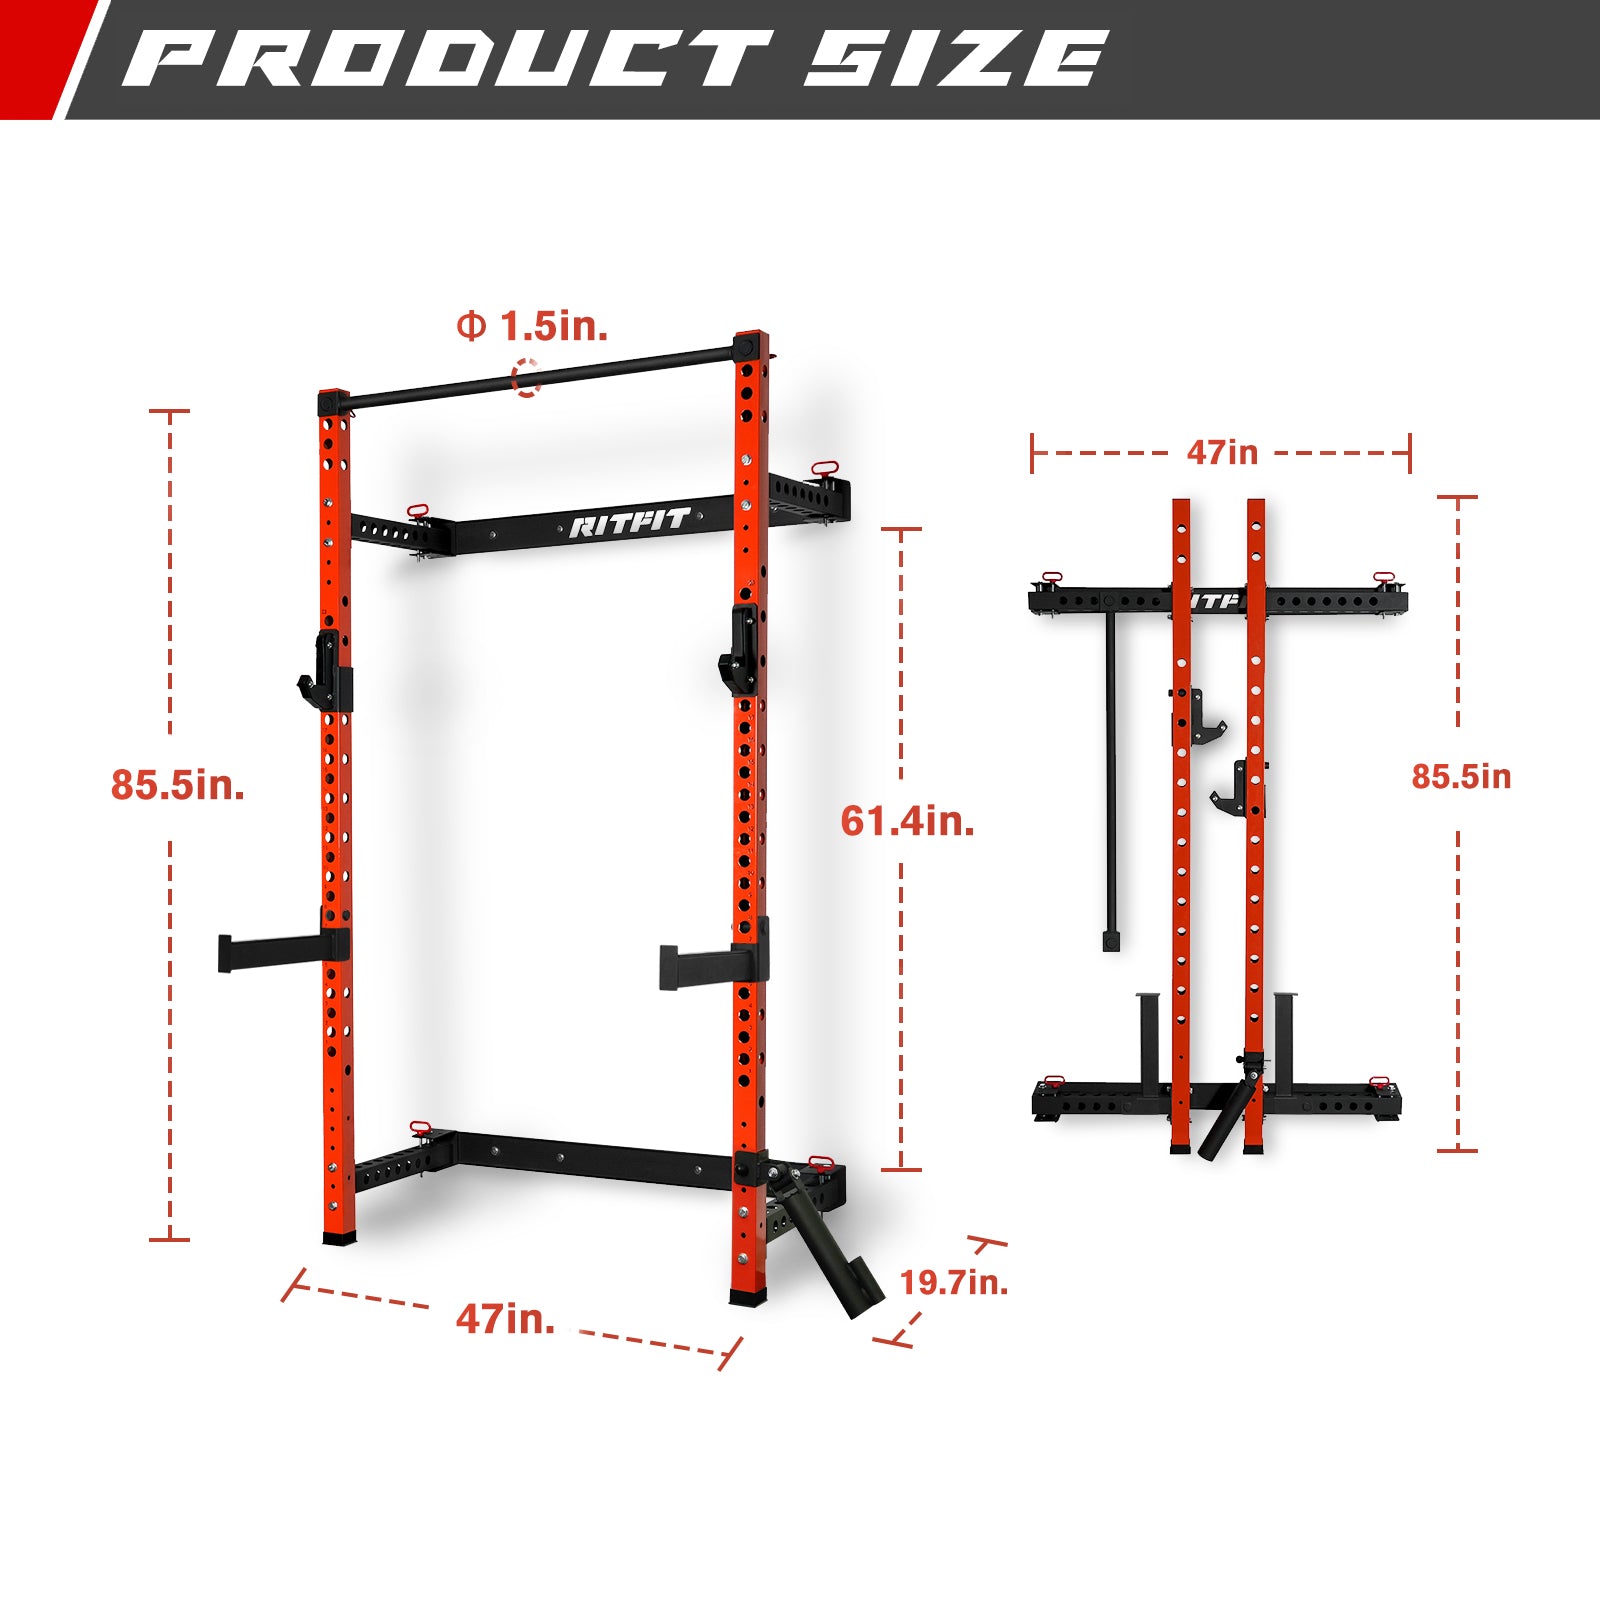
- Rack height and pull-up clearance: confirm ceiling height and overhead obstructions like garage door tracks.
- Unfolded depth plus barbell clearance: ensure room for the rack depth, your bar path, and a full-length barbell.
- Folded depth: confirm the stored profile against the wall matches your parking or storage needs.
- Upright hole spacing and hardware size: confirm J-cup and safety accessory compatibility.
- Weight ratings: confirm separate limits for the rack, pull-up bar, J-cups, and optional spotter arms.
While specific specifications regarding dimensions and weight capacity should always be verified on the product page, you should treat the PWM02 as a structural system: the rack rating only matters if the wall, hardware, and installation method can safely support it.
Design & Build Quality
Frame Construction
The core of the PWM02 is its steel frame. Built to withstand the rigors of daily training, the uprights are typically constructed from heavy-gauge steel. This ensures that the rack remains stable even when racking heavy barbells. The hole spacing on the uprights is designed to accommodate various heights for different lifters and exercises. For the most reliable accessory fit, match the upright dimensions, hole diameter, and hole spacing to the attachment requirements before you buy add-ons.
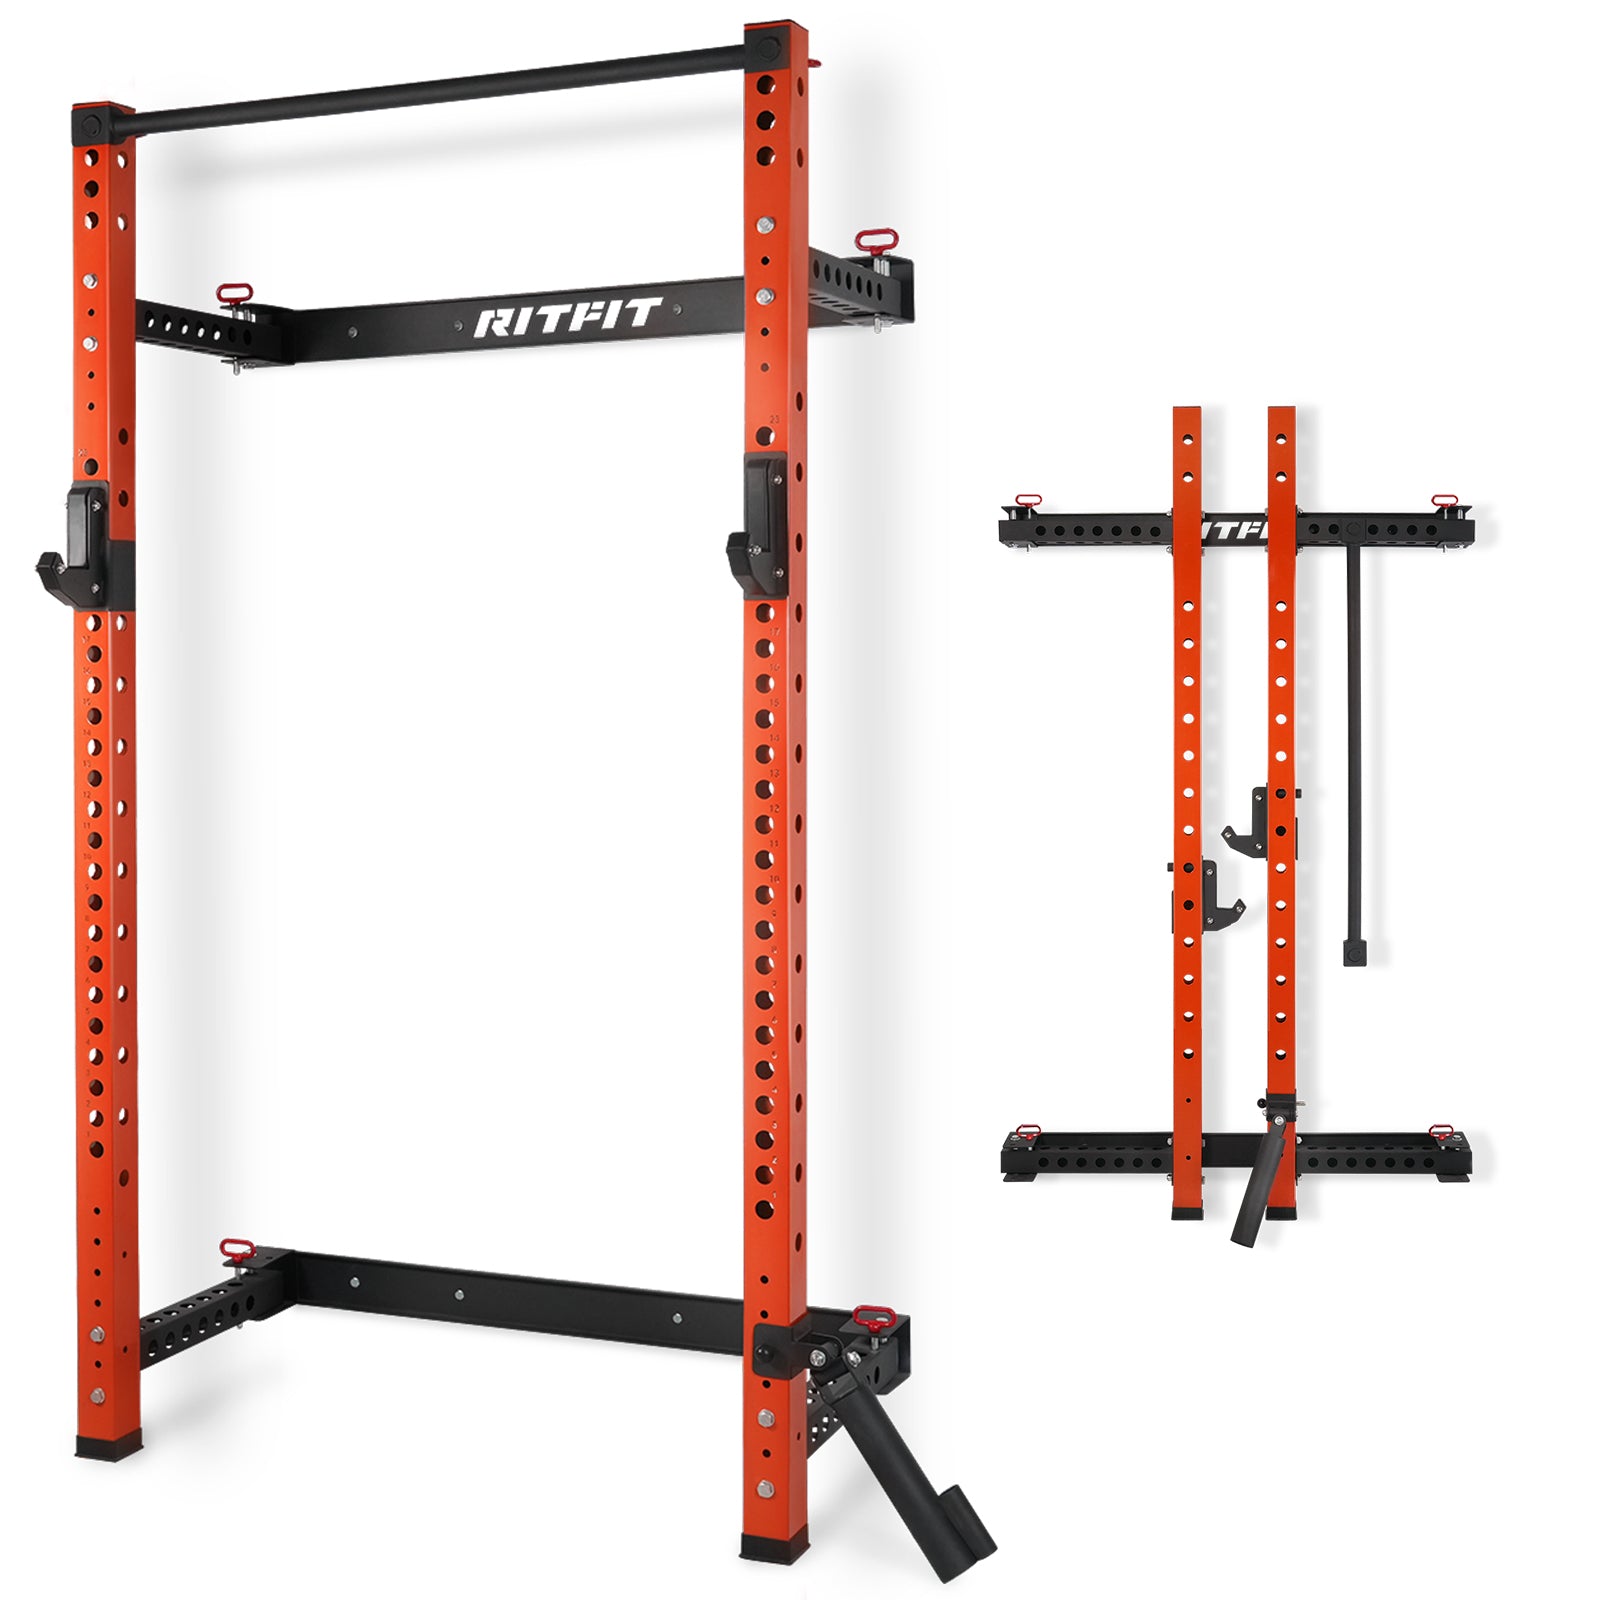
Folding Mechanism
The magic of the PWM02 lies in its hinge and pin system. Users can remove locking pins to swing the uprights inward. This process transforms a bulky piece of equipment into a low-profile unit that extends only inches from the wall. The transition from "storage mode" to "workout mode" is quick, usually taking less than a minute, making it highly practical for daily use. Before every session, confirm the pins are fully seated, the pull-up bar is secured, and the uprights are locked square; small setup errors can create big safety issues under load.
Finish & Aesthetics
To prevent rust and wear, especially important in non-climate-controlled environments like garages, the steel is treated with a durable powder coating. This finish not only protects the metal but also gives the rack a sleek, professional look that fits well in modern home gym aesthetics. If your garage is humid or coastal, plan on routine wipe-downs and occasional corrosion prevention to protect the hinge points.
Key Features & Attachments
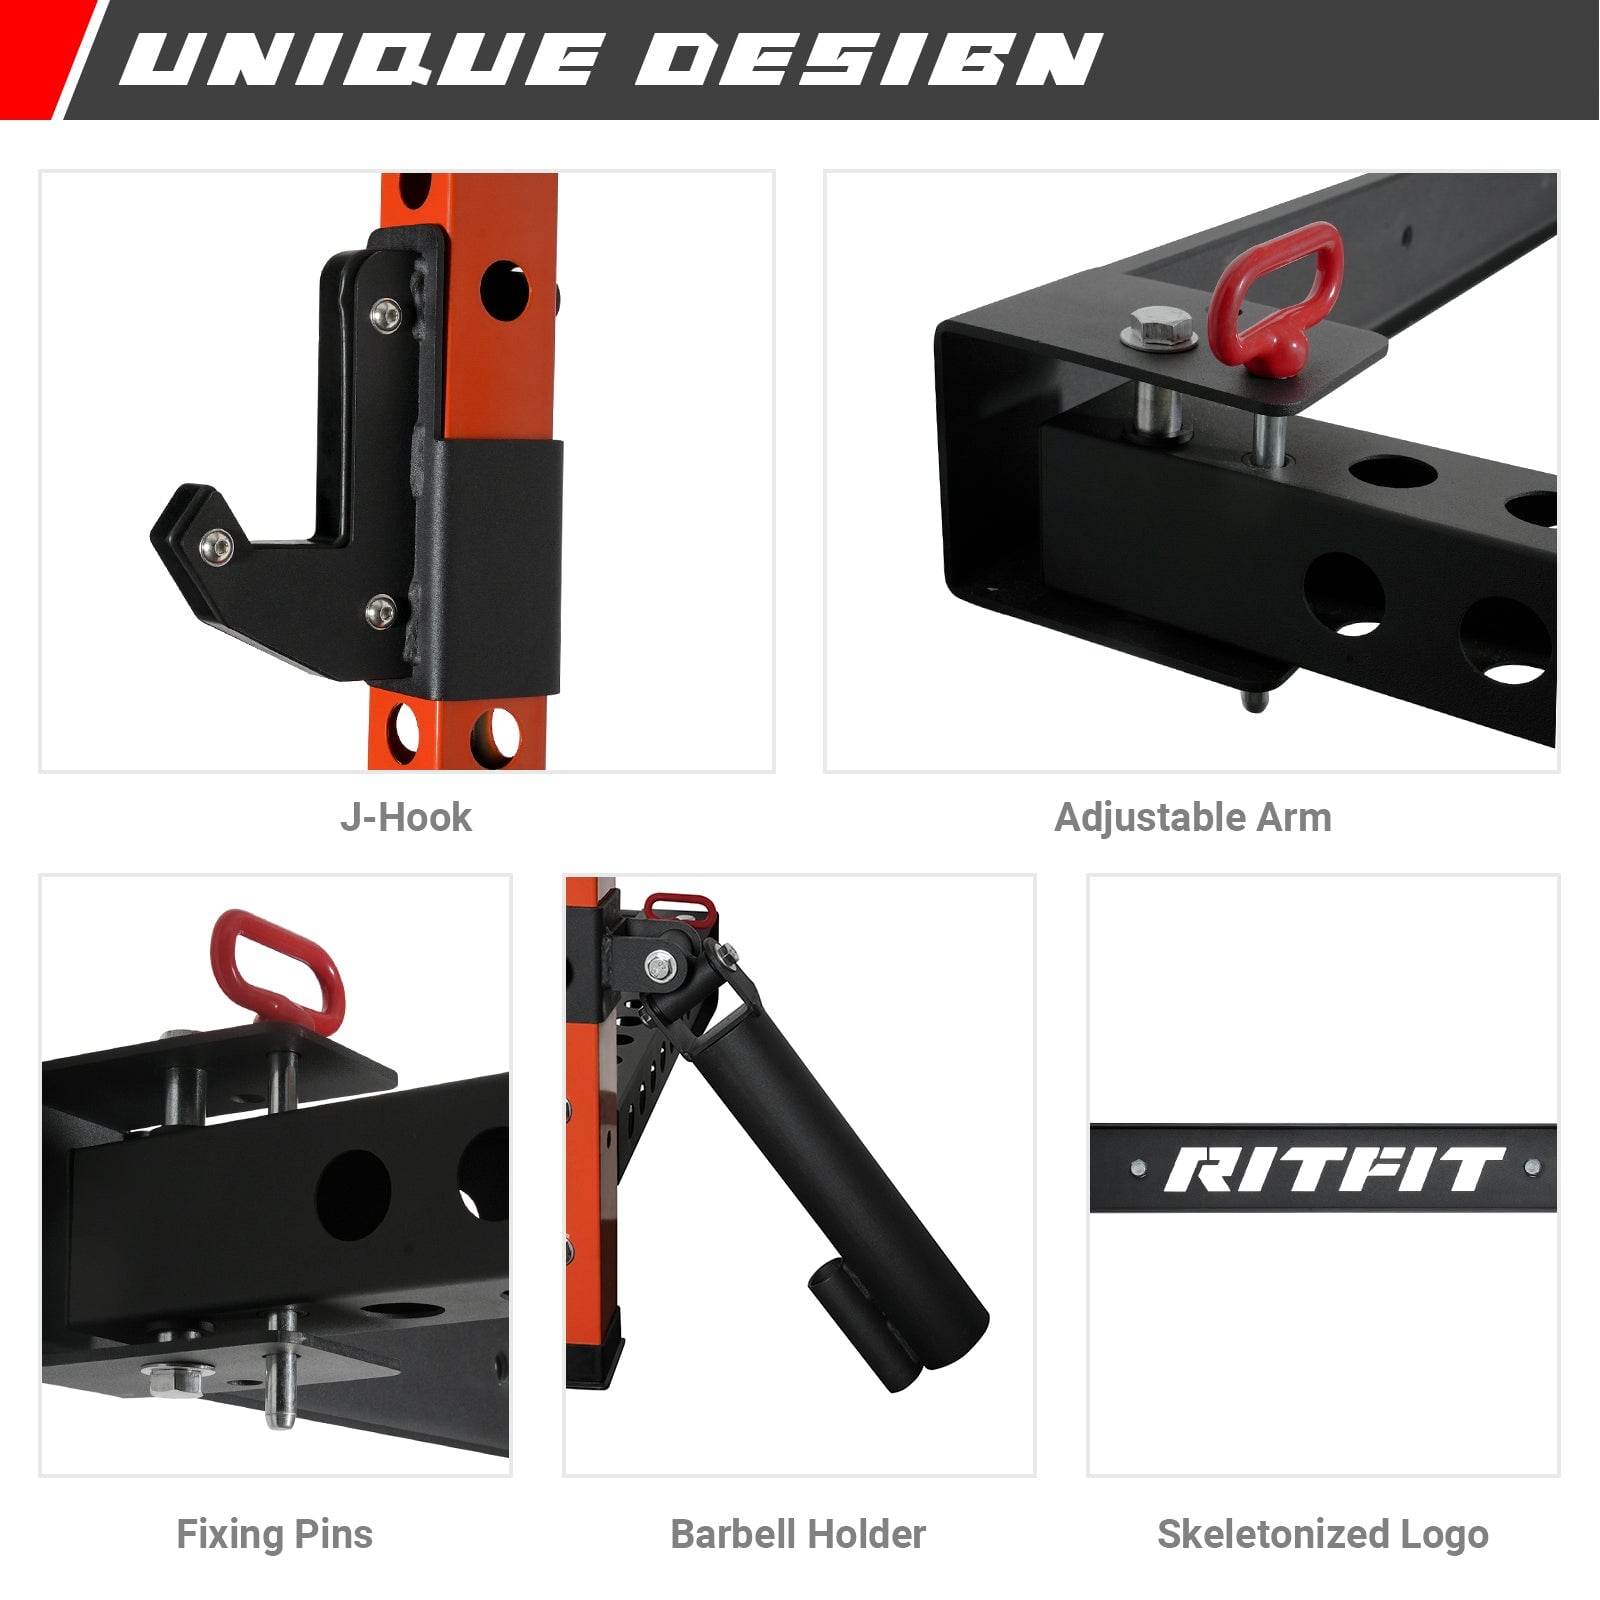
J-Cups & Safety Options
The rack comes equipped with adjustable J-cups, which are essential for holding the barbell. These attachments can be moved up and down the uprights to suit your height for squats or bench presses. Depending on the specific package, compatibility with spotter arms is a crucial feature to look for, providing safety for solo lifters. If you bench or squat alone, spotter arms are the first “must-have” upgrade; set them just below your deepest safe range of motion.
Pull-Up Bar
A detachable or adjustable pull-up bar is a standard component of the PWM02. Once the rack is unfolded and locked into position, the pull-up bar connects the two uprights, adding structural rigidity and allowing for bodyweight training. It is designed to handle standard bodyweight movements and weighted pull-ups. Treat the pull-up bar as both a training station and a stabilizer; always recheck fasteners after the first few sessions and monthly thereafter.
Compatibility with Accessories
Versatility is key for a small gym. The PWM02 is compatible with flat and adjustable benches, allowing for a complete chest and shoulder workout. Users can often expand the rack's utility with add-ons like dip bars or landmine attachments, provided they fit the upright specifications. Only buy accessories after confirming upright specs, hole sizing, and loading direction, because wall-mounted racks can be more sensitive to leverage than freestanding cages.
Installation & Setup
Space & Wall Requirements
Before purchasing, it is vital to measure your ceiling height to ensure the uprights will fit. Additionally, because this is a wall-mounted unit, you must have a wall capable of bearing the load, typically wood studs or concrete. Ensure there is enough floor space extending from the wall to accommodate the rack's depth plus the length of a barbell and a bench.
Hard Safety Rules for Mounting:
- Do not mount into drywall alone, metal studs, or unknown wall structures.
- Use wood studs or properly rated concrete anchors, and stop if you cannot confirm the structure.
- If you see wall cracking, anchor movement, or shifting under load, stop training and reinstall correctly.
- If you rent, get written permission and confirm stud type and wall condition before drilling.
Tools & Hardware Needed
Installation is a DIY project. You will likely need a stud finder, a power drill, a socket wrench set, and a level. While the rack comes with the necessary assembly hardware, mounting hardware (such as lag bolts for the stringers) may sometimes need to be purchased separately depending on your wall type. A torque wrench is strongly recommended so you can tighten bolts consistently and recheck them over time.
Step-by-Step Assembly Overview
- Unboxing: Verify all parts against the manual.
- Stringer Installation: Secure strong wooden stringers to your wall studs (highly recommended for load distribution).
- Frame Assembly: Attach the hinge brackets to the stringers/wall.
- Uprights: Connect the uprights to the brackets.
- Final Touches: Attach the pull-up bar to lock the width and insert J-cups.
Installation “Fit Check” Before Your First Lift:
- Studs located and marked, stringers level, and fasteners seated into structure, not just sheathing.
- Uprights open evenly and lock without binding.
- Pins fully inserted, J-cups level, pull-up bar tight, and hardware re-checked after your first session.
Safety Considerations
Proper Mounting & Load Limits
Safety starts with installation. If the rack is not securely anchored to studs, it can pull away from the wall under load. Always respect the maximum weight capacity specified by RitFit and check the mounting bolts periodically. Also respect directional loading: heavy leverage movements can stress wall-mounted systems differently than freestanding racks.
Safe Lifting Practices
When lifting alone, use spotter arms if available. Always ensure the barbell is centered when racking it to prevent tipping. For beginners, it is advisable to practice the motion of walking the bar out of the rack with light weights before progressing to heavier loads. If you are new to barbell work, keep early sets submaximal, prioritize stable walkouts, and progress load only after your setup feels repeatable and controlled.
Folding & Storage Safety
When folding the rack, ensure the floor path is clear of obstacles. Always engage the locking pins when the rack is stored to prevent the uprights from swinging out accidentally, keeping children and pets safe. Consider adding a “no-access zone” during folding and unfolding, especially in shared garages with kids, pets, or parked vehicles.
Exercises You Can Do with the RitFit PWM02
Lower Body Movements
The rack is perfect for the king of all exercises: the back squat. You can also perform front squats, lunges (using the rack for balance), and rack pulls to build posterior chain strength. For rack pulls, confirm your spotter arms or supports are rated for the movement and set at a consistent height for repeatable pulls.
Upper Body Movements
Wheel in a bench to perform flat, incline, or seated overhead presses. The open front design allows for plenty of room to execute standing overhead presses, provided your ceiling height permits. For overhead work in garages, confirm clearance above the bar path and avoid lifting under garage door tracks.
Pull-Up & Bodyweight Training
The pull-up bar supports chin-ups, pull-ups, and hanging leg raises for core development. It effectively turns the rack into a bodyweight power station. Start with controlled reps and avoid swinging until you are confident the rack is fully locked and stable.
Programming Ideas for Different Users
Beginner Full-Body Routine
New users can perform a simple full-body workout three times a week. Focus on one main push (bench press), one main pull (pull-ups or rows), and one leg exercise (squats) per session. Keep 1–3 reps in reserve on most sets and add weight only when form stays consistent.
Intermediate Strength Split
Intermediate lifters might use an upper/lower split, utilizing the rack four days a week. This allows for higher volume and the inclusion of accessory movements like rack pulls or close-grip bench presses. Use gradual progressions and rotate intensity so your hinge and mounting hardware are not constantly stressed at maximal loads.
Time-Efficient Workouts
For the busy parent or professional, the quick setup of the PWM02 allows for 30-minute circuit sessions. Alternate between squats and pull-ups to keep the heart rate up and maximize training density. Keep circuits technically simple and avoid rushed re-racking; most accidents happen during fatigue and sloppy setup.
Maintenance & Longevity
Routine Checks
Monthly inspections are recommended. Tighten any loose nuts on the hinge mechanism and check the wall anchors for any signs of movement or drywall cracking. Add a “first-month recheck”: inspect after the first week, then again after one month, because hardware can settle after initial use.
Cleaning & Corrosion Prevention
Wipe down the uprights and pull-up bar after sweaty sessions. If your garage is humid, consider a light application of 3-in-1 oil on the steel to prevent surface rust. Keep lubricant off gripping surfaces and focus on hinge points and exposed hardware where moisture collects.
Pros, Cons, and Ideal User Profile
Advantages
The biggest pro is the space reclamation; you get a real squat rack without sacrificing the garage. It is also generally more affordable than full commercial power cages. For many home gyms, it’s the best “function per square foot” option when you have a solid wall and want real barbell training.
Potential Drawbacks
It requires a solid wall structure, meaning it is not suitable for all rental properties or rooms with metal studs. It also lacks the enclosed safety of a 4-post cage. Because it’s wall-mounted, it can be less forgiving of poor installation and high-leverage accessory work than a freestanding rack.
Who Should Buy It?
The RitFit PWM02 is ideal for homeowners with a garage or basement where space is at a premium but strength training is a priority. It is best for lifters who want core barbell movements, value clean storage, and are willing to install it properly or hire help if needed.
Comparison with Other Models
Compared to a standard standalone squat stand, the PWM02 offers superior stability due to the wall mounting. Compared to a full power rack, it offers significantly better space efficiency. It sits in the "sweet spot" for general fitness enthusiasts who need functionality without the bulk. If your top priority is maximum solo-lifting safety and accessory expansion, a 4-post cage still wins. If your top priority is reclaiming garage space, a folding rack is hard to beat.
FAQs
Can I mount the PWM02 on drywall or metal studs?
No, mount to wood studs or properly rated concrete only. Drywall alone and many metal-stud walls are unsafe for heavy training loads. If you cannot confirm your wall structure, stop and consult a professional before installing.
How much space do I need for unfolded use with a barbell and bench?
Plan for rack depth plus full barbell clearance and a bench footprint. Measure from the wall to ensure you can walk out squats safely and press without hitting vehicles, shelves, or garage door tracks.
Do I need spotter arms if I lift alone?
Yes, they are strongly recommended for solo benching and squatting. Set safeties just below your deepest controlled position so missed reps can be safely caught without pinning you or stressing the rack.
How often should I check bolts, hinges, and pins?
Check pins every session, then inspect hardware weekly at first and monthly long-term. New installations can settle. If you notice movement, noise, or wall cracking, stop using the rack until corrected.
Will standard rack accessories fit the PWM02?
Only if the upright dimensions and hole sizing match. Confirm hole diameter, spacing, and loading direction before buying add-ons like dip handles or landmines, because wall-mounted racks are more sensitive to leverage.
Conclusion
The RitFit PWM02 Multi-Functional Folding Squat Rack represents a smart investment for the modern home gym. It solves the spatial challenges of home workouts without compromising on the quality of the training session. If you are ready to stop paying gym memberships and start lifting at home, this rack offers the versatility, safety, and convenience to make that goal a reality. Make the purchase decision with measurements in hand, mount it correctly, and treat setup and inspections as part of training; your results and safety depend on it.
