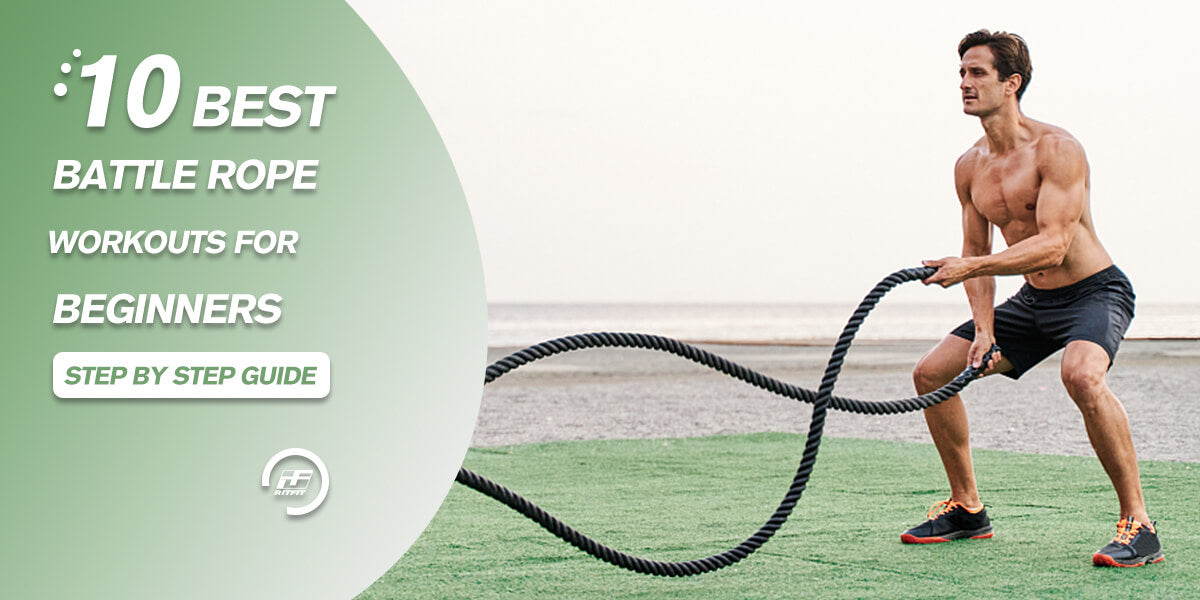
Battle rope workouts for beginners deliver full-body conditioning that combines cardio and strength in one tool, making them one of the most efficient additions to any fitness routine. Whether you train at home, in a garage gym, or at a commercial facility, battle ropes are accessible, scalable, and genuinely fun.
This guide covers everything a beginner needs: how to choose the right rope, the 10 best foundational exercises with step-by-step technique, a 4-week progressive workout plan, and the most common mistakes to avoid so you train safely from day one.
Quick Answer: The best battle rope workouts for beginners start with alternating waves, double-arm waves, and power slams using a 30-foot, 1.5-inch rope. Begin with 20 seconds of work and 40 seconds of rest per exercise, train 2-3 times per week, and progress to 30s on/30s off after 2-4 weeks as your conditioning improves.
Key Takeaways
- Rope specs: Beginners should start with a 30-foot, 1.5-inch diameter rope anchored with at least 15 feet of working distance.
- Work-rest ratio: Start at 20s on / 40s off, then progress to 30s on / 30s off after 2-4 weeks of consistent training.
- Muscle recruitment: Battle ropes engage the shoulders, arms, core, and legs simultaneously, with double-arm waves producing greater core and leg activation than alternating waves.
- Frequency: Train 2-3 times per week with at least one rest day between sessions for beginners.
- Safety: Stop immediately if you feel sharp shoulder or lower back pain, lose your athletic stance, or your grip fails completely during a set.
Why Are Battle Ropes Great for Beginners?
Battle ropes are an excellent starting point for beginners because they provide simultaneous cardiovascular and muscular conditioning with low impact on the joints, making them accessible for people at nearly any fitness level. Research on high-intensity functional training that includes battle rope exercises has found elevated energy expenditure and vigorous-intensity heart rate responses, confirming that even short sessions produce meaningful cardiovascular demand.[1]
What Muscles Do Battle Ropes Work?
Battle ropes primarily target the shoulders, biceps, triceps, forearms, and grip. Core muscles including the rectus abdominis, obliques, and multifidus are engaged to stabilize each wave, and performing exercises in an athletic squat stance recruits the glutes, hamstrings, quadriceps, and calves as secondary movers.
What Benefits Do Battle Ropes Offer Beyond Cardio?
Battle ropes combine aerobic conditioning with unilateral and bilateral resistance training in a single tool. Key benefits include improved grip strength, enhanced shoulder stability, core bracing under dynamic load, and full-body coordination.
- Low impact: Unlike running or jumping, rope waves are joint-friendly and can even be performed seated for those with lower-body limitations.
- Scalable intensity: Adjusting wave speed, rest intervals, and rope length lets beginners control difficulty without changing equipment.
- Time efficient: A 10-20 minute session using a 20s on / 40s off protocol delivers both strength and cardio stimulus.
- Functional carry-over: Rotational, pulling, and pushing patterns translate directly to everyday movement and other athletic activities.
- Minimal space: A 30-foot rope folded in half needs only about 15 feet of floor space, fitting most garage or basement home gym setups.
As Jeff Cavaliere, MSPT, CSCS, explains, combining functional movements that elevate heart rate and engage the largest muscle groups is the foundation of effective full-body conditioning. Battle ropes deliver exactly that in a beginner-friendly format. For a broader conditioning approach, pairing rope training with best HIIT workouts for beginners builds a complete cardio foundation.
How Do You Choose the Right Battle Rope?
Beginners should start with a 30-foot (9-meter) rope that is 1.5 inches (3.8 cm) in diameter, as this length and thickness provide enough resistance to feel the wave pattern without overwhelming grip or shoulder endurance. Fitness coaching guides consistently recommend this spec as the ideal entry point before progressing to longer or thicker ropes.
What Rope Length and Diameter Should a Beginner Use?
A 30-foot rope folded in half gives a 15-foot working distance from the anchor point, which fits most training environments. As strength and conditioning improve, progress to longer ropes up to 50 feet or a thicker 2-inch diameter for increased resistance.
- 30 ft / 1.5 in (beginner): Manageable wave resistance, easier on grip, enough feedback to learn proper mechanics.
- 40 ft / 1.5 in (intermediate): More rope mass increases the demand on shoulders and cardiovascular system.
- 50 ft / 2 in (advanced): Maximum resistance for experienced users seeking peak conditioning stimulus.
How Do You Set Up an Anchor Point?
Loop the rope around a sturdy fixed anchor such as a heavy post, wall-mounted anchor bracket, or the base of a squat rack. The anchor point should be at or near ground level, and the rope should have just enough slack to create visible waves without dragging on the floor when pulled taut.
- Wall anchor bracket: The most secure option for permanent home gym setups, rated for dynamic loads.
- Squat rack base: Loop the rope around a lower crossbar or foot of a rack for a versatile temporary anchor.
- Heavy post or beam: Any structural post rated for load can work; confirm it is fixed and will not shift under tension.
- Floor clearance: Leave at least 2-3 inches of rope slack at rest so waves can travel freely along the full length.
To complement your battle rope training with additional functional tools, the RitFit M1 Multi-Functional Home Gym pairs well with rope conditioning for a complete strength and cardio setup.
What Are the Basics of Battle Rope Form?
Correct battle rope form starts with an athletic stance: feet hip-width apart, knees slightly bent, hips hinged back slightly, and core braced throughout every repetition. Maintaining this position ensures the shoulders, arms, and core do the work rather than the lower back.
What Is the Correct Athletic Stance for Battle Ropes?
Stand with your feet hip-width apart and toes pointing slightly outward. Push your hips back as if beginning a squat, keep your chest up, and pull your shoulders back and down before gripping the rope ends.
- Grip: Hold one rope end in each hand with a neutral grip, thumbs pointing up. Do not over-grip; a firm but relaxed grip reduces forearm fatigue.
- Core engagement: Brace your abs as if you are about to take a punch, and maintain that tension throughout the set.
- Shoulder position: Keep shoulders packed down and back; avoid shrugging them toward your ears.
- Breathing: Exhale forcefully on the downward phase of each wave, inhale on the upward phase.
What Are the Most Common Beginner Form Mistakes?
The most common battle rope mistakes for beginners involve losing the athletic base, rounding the lower back, or swinging the arms too high rather than generating true wave energy from the wrists and forearms.
- Standing too upright: Without the hip hinge, all rotational force transfers directly to the lower back. Always maintain the slight squat position.
- Swinging arms above shoulder height: Waves should travel from the wrists, not the shoulders. Keep arm motion controlled, raising hands to about chest height at most.
- Letting the rope go slack: Slack rope means no resistance. Keep a consistent tension in the rope at all times during the work interval.
- Holding your breath: Apnea under load elevates blood pressure and accelerates fatigue. Establish a consistent breathing rhythm from the first rep.
- Going too hard too soon: Beginners often sprint at maximum effort and burn out in 10 seconds. Sustainable moderate-intensity wave generation outperforms a single all-out burst followed by collapse.
- Gripping too tightly: A death-grip fatigues the forearms in the first 20 seconds. Maintain firm but relaxed contact and let the rope move naturally.
Mastering these fundamentals before adding complexity makes learning the exercises in the next section far easier. Consider pairing your rope sessions with core workouts for beginners to reinforce the bracing mechanics battle ropes demand.
What Are the 10 Best Battle Rope Exercises for Beginners?
The 10 best battle rope exercises for beginners progress from simple bilateral and alternating wave patterns to more dynamic movements that challenge coordination, power, and full-body conditioning. Each exercise below includes setup, execution cues, and the primary muscles targeted.
1. Alternating Waves
Alternating waves are the foundational battle rope movement that every beginner should master first, driving one arm up while the other drives down to create continuous individual rope waves. Stand in your athletic stance, hold one rope end per hand, and alternate raising each hand to roughly chest height in a smooth rhythmic pattern.
Primary muscles: shoulders, biceps, forearms, core.
2. Double-Arm (Bilateral) Waves
Double-arm waves involve raising both rope ends simultaneously to chest height, then driving them down explosively to send a single large wave toward the anchor. One study found that double-arm rope waves activated the vastus medialis, vastus lateralis, rectus abdominis, and multifidus significantly more than alternating waves, making this a powerful core and leg activation exercise.[2]
Primary muscles: shoulders, core, quadriceps, hamstrings.
3. Power Slams
Power slams involve raising both rope ends overhead, then slamming them to the floor with maximum force to generate a large impact wave. The hip extension during the downward slam recruits the glutes and hamstrings alongside the upper body.
Primary muscles: shoulders, lats, glutes, hamstrings.
4. Side-to-Side Waves
Side-to-side waves involve moving both rope ends laterally in unison, creating horizontal waves rather than vertical ones. Hold both ends together and swing them left, then right, keeping the movement controlled and the stance stable.
This targets the obliques and lateral shoulder stabilizers more than traditional up-down waves. Primary muscles: obliques, lateral deltoid, forearms.
5. Alternating Waves with Squat
Alternating waves with a squat combine the standard alternating pattern with a simultaneous bodyweight squat to add lower-body recruitment and cardiovascular demand. As you descend into the squat, continue alternating waves, then drive through your heels to stand.
Primary muscles: quadriceps, glutes, shoulders, core.
6. Hip Toss (Lateral Whips)
The hip toss involves holding both rope ends together and swinging them from side to side in a whipping arc, rotating through the hips and torso. Imagine throwing something from one side of your body to the other without stopping.
Primary muscles: obliques, hip rotators, shoulders.
7. Jumping Jacks with Ropes
Rope jumping jacks combine the standard jumping jack leg pattern with bilateral rope waves, raising the ropes as the feet jump out and bringing them down as the feet come together. This adds a coordination challenge and elevates heart rate rapidly.
Primary muscles: shoulders, inner and outer thighs, core.
8. In-and-Out Waves
In-and-out waves involve moving both rope ends outward away from each other, then back inward toward center in a rhythmic spreading and closing motion. This variation challenges the chest, inner shoulders, and forearms from a different angle than standard up-down patterns.
Primary muscles: pectoralis, medial deltoid, forearms.
9. Circles (Clockwise and Counterclockwise)
Rope circles involve moving each hand in a small circular pattern, creating a corkscrew wave that travels down the rope. Rotate both wrists clockwise for 15-20 seconds, then switch to counterclockwise.
This drill builds wrist stability, forearm endurance, and rotator cuff control. Primary muscles: rotator cuff, forearms, wrists.
10. Rope Slams with Reverse Lunge
Rope slams with a reverse lunge add a unilateral lower-body element to the power slam pattern: as both arms slam down, step one foot back into a lunge, then return to standing for the next rep, alternating legs. This challenges balance, hip stability, and coordination alongside upper-body power.
Primary muscles: glutes, quadriceps, hamstrings, shoulders.
For a complementary explosive conditioning tool, medicine ball workouts for beginners pair well with battle rope training to build rotational power from multiple angles.
What Does a 4-Week Beginner Battle Rope Workout Plan Look Like?
A well-structured 4-week beginner battle rope plan progresses from a foundation phase with longer rest intervals in weeks 1-2 to a build phase with equal work-rest ratios in weeks 3-4, allowing the cardiovascular system and connective tissue to adapt before increasing density. Research on 16-week high-intensity cardioresistance training programs that include battle rope exercises found significant improvements in fitness markers for sedentary adults, confirming that progressive overload principles apply directly to rope training.[3]
Weeks 1-2: Foundation Phase (20s Work / 40s Rest)
Perform 3 exercises per session, rotating through the alternating waves, double-arm waves, and power slams. Do 3 rounds total with the 20s on / 40s off protocol, followed by a 2-minute full rest between rounds.
- Day 1: Alternating waves x 20s, rest 40s. Double-arm waves x 20s, rest 40s. Power slams x 20s, rest 40s. Repeat 3 rounds.
- Day 2: Rest or light stretching.
- Day 3: Side-to-side waves x 20s, rest 40s. Squat with alternating waves x 20s, rest 40s. Hip toss x 20s, rest 40s. Repeat 3 rounds.
- Days 4-7: Rest or active recovery (walking, mobility work).
- Total session time: Approximately 12-15 minutes including warm-up.
Weeks 3-4: Build Phase (30s Work / 30s Rest)
Increase the work interval to 30 seconds and reduce rest to 30 seconds, and expand to 4-5 exercises per session for a more complete full-body stimulus.
- Day 1: Alternating waves, double-arm waves, power slams, side-to-side waves. Each 30s on / 30s off, 3 rounds.
- Day 2: Rest.
- Day 3: Squat waves, hip toss, jumping jacks, in-and-out waves, rope circles. Each 30s on / 30s off, 3 rounds.
- Day 4: Rest.
- Day 5 (optional): Full circuit mixing 5-6 favorite exercises, 30s on / 30s off, 2-3 rounds.
- Total session time: Approximately 15-20 minutes including warm-up.
How Often Should Beginners Train with Battle Ropes?
Two to three sessions per week is the ideal frequency for beginners, with at least one full rest day between sessions. Battle ropes place significant demand on the shoulders, forearms, and cardiovascular system, and beginners need 48-72 hours of recovery between sessions to allow adaptation and prevent overuse.
To build a complete beginner program around these sessions, a beginner workout plan can provide the broader structure to organize your weekly training schedule. For circuit-style programming that pairs well with battle ropes, full body circuit training workouts for beginners offer ready-to-follow templates.
How Do You Progress with Battle Ropes?
Progressing with battle ropes means systematically increasing work density, exercise complexity, or rope resistance once the current level feels consistently manageable across all sessions in a training week. Progression should be gradual, as the shoulders, elbows, and wrists adapt more slowly than the cardiovascular system.
What Are the Signs You Are Ready to Advance?
You are ready to advance when you can complete all sets in a session with controlled form, maintain consistent wave quality in the final 10 seconds of each work interval, and feel only moderate fatigue rather than complete exhaustion at session end.
- Wave quality holds through the set: If your waves are still crisp and consistent in the last 5 seconds of a 30-second interval, you have adapted to that duration.
- Heart rate recovers quickly: When your heart rate drops back to conversational level within 60 seconds of rest, your cardiovascular system has adapted and is ready for a shorter recovery period.
- No next-day soreness after session 3: Persistent soreness signals incomplete recovery; absence of soreness by session 3 of a given week indicates readiness to progress.
What Progression Options Are Available?
Progression with battle ropes can take several forms depending on your goals, and combining multiple variables simultaneously is rarely necessary or beneficial for beginners.
- Reduce rest intervals: Move from 20s on / 40s off to 30s on / 30s off, then eventually to 40s on / 20s off as endurance builds.
- Add rounds: Increase from 3 rounds to 4, then 5 rounds of a given circuit before changing the exercises themselves.
- Increase exercise complexity: Replace stationary alternating waves with squat variations, lunge variations, or lateral shuffles to add coordination demand.
- Progress rope length or thickness: Move from a 30-foot rope to a 40-foot or 50-foot version, or increase from 1.5-inch to 2-inch diameter for more resistance per wave.
- Add a strength pairing: Superset battle rope intervals with complementary exercises such as push-ups or rows to build a more complete conditioning circuit.
For a challenging conditioning benchmark to work toward after completing the beginner plan, the Murph workout beginner guide offers an excellent progressive goal. Pairing rope training with push-up workouts for beginners builds the upper-body strength that supports more demanding rope progressions.
To track your overall conditioning foundation, a beginner kettlebell workout guide provides another excellent functional training complement.
"Real fat loss requires total-body strength training and conditioning that drives results. That means combining functional movements with compound lifts, aiming for the largest muscle groups that elevate heart rate and improve energy expenditure the most."
Jeff Cavaliere, MSPT, CSCS, Physical Therapist and Strength Coach, Athlean-X, How To Get Six Pack Abs Guide (Athlean-X) ↗
When Should You Stop and How Do You Stay Safe?
Beginners should stop a battle rope session immediately when they experience sharp or stabbing pain in the shoulder, elbow, wrist, or lower back, as these are signs of injury rather than normal training fatigue. Burning muscle sensation and elevated heart rate are expected; joint pain and sudden weakness are not.
What Are the Key Safety Signals to Stop?
Stopping early is always the right choice when any of these conditions occur, as training through them risks turning a minor issue into a chronic injury.
- Sharp shoulder pain: Distinct from shoulder fatigue or muscle burn. If the joint itself feels sharp, stabbing, or clicking with pain, stop immediately and rest for 48 hours before assessing further.
- Lower back strain: If you feel your lower back rounding or experience a pulling sensation in the lumbar spine, stop, reset your stance, and reduce the work interval length before continuing.
- Grip failure: When grip strength is completely exhausted and you cannot maintain safe control of the rope ends, the set is over. Dropping the rope under load risks injury from the rebound.
- Dizziness or nausea: Stop and sit down if you feel lightheaded. This can indicate insufficient warm-up, dehydration, or working at an intensity too high for your current fitness level.
- Loss of stance control: If you can no longer maintain the athletic base and your knees are caving inward or your hips are shifting laterally, the session is compromised. Rest and resume with shorter work intervals.
How Do You Prevent Battle Rope Injuries?
Preventing battle rope injuries involves a thorough warm-up, progressive loading, and paying attention to recovery quality between sessions.
- Warm up the shoulders: Perform 2-3 minutes of arm circles, band pull-aparts, and shoulder rotations before picking up the rope.
- Start below your maximum: Your first session should feel almost too easy. The shoulders and forearms need time to adapt to the repetitive dynamic load of rope training.
- Prioritize sleep and hydration: Connective tissue repair happens during sleep, and dehydration dramatically reduces grip endurance and increases injury risk.
- Do not train through sharp pain: Dull muscle soreness 24-48 hours after training is normal delayed onset muscle soreness. Sharp pain during training is not.
For additional exercises that complement your battle rope routine, explore ab roller workout for beginners to reinforce core stability. To build the shoulder and tricep strength that supports rope training, dips workout is an excellent pairing.
FAQs About Battle Rope Workouts for Beginners
How long should a beginner battle rope workout be?
Beginners should aim for 10-20 minutes total. Start with 20 seconds of work followed by 40 seconds of rest per exercise. As conditioning improves over 2-4 weeks, increase the work interval to 30 seconds and reduce rest to 30 seconds for a more challenging session.
What length and thickness battle rope is best for beginners?
A 30-foot rope with a 1.5-inch diameter is the standard starting recommendation for beginners. This provides enough resistance to feel the wave without overwhelming grip endurance. As strength improves, progress to longer ropes up to 50 feet or a thicker 2-inch diameter for greater challenge.
How many times a week should beginners use battle ropes?
Two to three sessions per week is ideal for beginners. Battle ropes place significant demand on the shoulders, core, and cardiovascular system. Allow at least one full rest day between sessions so muscles and connective tissue can recover and adapt to reduce injury risk.
Do battle ropes build muscle or just improve cardio?
Battle ropes deliver both cardiovascular and muscular benefits simultaneously. Research on functional training including battle rope exercises shows elevated heart rate alongside significant engagement of the arms, shoulders, core, and legs. The combination makes them an efficient full-body conditioning tool for beginners seeking multi-dimensional fitness improvement.
Can I do battle rope workouts at home?
Yes. You can anchor a battle rope around a sturdy post, heavy furniture base, or a dedicated wall anchor bracket rated for dynamic load. A 30-foot rope folded in half gives a 15-foot working distance, which fits most garage or basement setups without difficulty.
What muscles do battle ropes primarily work?
Battle ropes primarily target the shoulders, biceps, triceps, forearms, and grip. Secondary muscles engaged include the rectus abdominis, obliques, and multifidus, plus the glutes and hamstrings when performed in an athletic squat stance. One study found double-arm waves activate the vastus lateralis and core muscles more than alternating waves.
Conclusion
Battle rope workouts for beginners are one of the most accessible and effective ways to build simultaneous cardiovascular endurance and functional strength. Starting with a 30-foot, 1.5-inch rope, a 20s on / 40s off protocol, and 2-3 sessions per week gives the body the progressive stimulus it needs without risking overuse injury.
Begin with the 10 foundational exercises in this guide, follow the 4-week progression plan, and advance intensity only when form and recovery are both consistently strong. Browse the functional training equipment collection to build out your home gym setup.
Disclaimer
This article is intended for general informational and educational purposes only and does not constitute medical advice, diagnosis, or a personalized training prescription. Consult a qualified healthcare provider or certified fitness professional before beginning any new exercise program, particularly if you have a pre-existing shoulder, wrist, or cardiovascular condition.
Save on your next RitFit order
Tap the button to copy your code, then paste it at checkout.
References
1. Willis EA, Szabo-Reed AN, Ptomey LT, et al. Energy Expenditure and Intensity of Group-Based High-Intensity Functional Training: A Brief Report. J Phys Act Health. 2019;16(6):470-476. doi:10.1123/jpah.2017-0585. https://pmc.ncbi.nlm.nih.gov/articles/PMC6746154/
2. Marín PJ, García-Gutiérrez MT, Da Silva-Grigoletto ME, Hazell TJ. The addition of synchronous whole-body vibration to battling rope exercise increases skeletal muscle activity. J Musculoskelet Neuronal Interact. 2015;15(3):240-8. https://pmc.ncbi.nlm.nih.gov/articles/PMC5601236/
3. Greenlee TA, Greene DR, Ward NJ, et al. Effectiveness of a 16-Week High-Intensity Cardioresistance Training Program in Adults. J Strength Cond Res. 2017;31(9):2528-2541. doi:10.1519/JSC.0000000000001976. https://pmc.ncbi.nlm.nih.gov/articles/PMC5566168/