The leg press is one of the most effective lower body machines for building quad and glute strength, but poor setup and sloppy depth choices turn productive sets into wasted reps or avoidable joint stress.
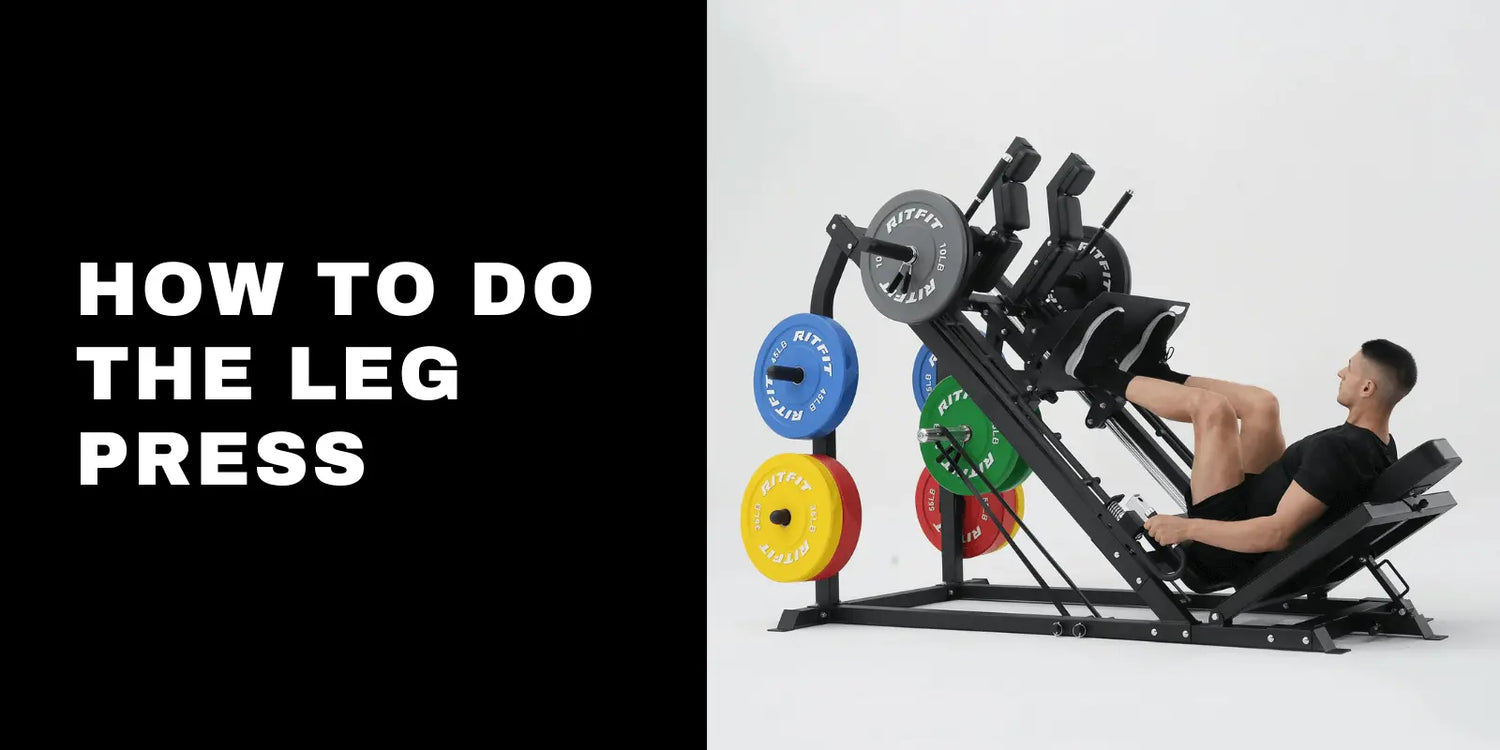
This guide covers how to do the leg press correctly, from machine setup and foot placement to depth, programming, and the mistakes that stall most lifters on the RitFit Gazelle Pro 3-in-1 Leg Press and Hack Squat Machine or any 45-degree sled.
Quick Answer: To do the leg press, sit with your back fully against the pad, place your feet shoulder-width apart at mid-platform with toes slightly turned out, lower the sled under control until your knees reach approximately 90 degrees while keeping your hips pinned, then press smoothly back up without snapping your knees into full lockout.
Key Takeaways
- Primary target: The leg press primarily drives the quadriceps, with a systematic review confirming vastus lateralis and vastus medialis produce the greatest muscle activation during the movement.[1]
- Foot placement as a bias tool: A study found no significant difference in overall muscle activation between narrow and wide foot stances, so treat placement as a way to shift emphasis rather than isolate muscles perfectly.[2]
- Depth rule: Lower only as far as your hips stay pinned to the pad, which for most lifters means roughly 90 degrees of knee flexion before the pelvis begins to tuck.
- Never hard-lock the knees: Stopping just short of full extension keeps tension on the quads and reduces joint stress from slamming the sled under load.
- Programming baseline: Trainers commonly recommend 3 to 4 sets of 10 to 15 reps for hypertrophy, slotted after compound movements like squats or lunges when CNS fatigue is already accumulated.
What Muscles Does the Leg Press Work?
The leg press primarily targets the quadriceps, with a systematic review of sEMG studies confirming that the vastus lateralis and vastus medialis produce the greatest activation, followed closely by the rectus femoris, and peak quad activation occurs at approximately 90 degrees of knee flexion.[1] Glutes, adductors, hamstrings, and calves also contribute, with their involvement shifting based on foot placement and depth.
- Quadriceps (primary driver): All four quad heads work throughout knee extension, with activation peaking near the deepest point of the press and decreasing as the knee approaches full extension.
- Gluteus maximus: The glutes contribute more as hip flexion increases at deeper ranges and when feet are placed higher on the platform.
- Adductors: The adductor magnus becomes more involved with wider stances and deeper positions, often producing noticeable inner-thigh fatigue.
- Hamstrings: Hamstrings stabilize the movement but are not a primary growth target in the standard leg press setup, making curls and hip hinges necessary companions for balanced posterior chain development.
- Calves: Calves stabilize the ankle and transfer force into the footplate, and can be targeted directly with a leg press calf raise variation.
"There's no better machine for the quads. The tilted foot plate promotes normal biomechanics at the knee and hip."
Jeff Cavaliere, MSPT, CSCS, Physical Therapist and Strength Coach, former Head Physical Therapist for the NY Mets, Athlean-X, 5 Worst Machine Exercises and 23 Better Alternatives, BarBend ↗
How to Set Up the Leg Press Machine
Correct machine setup controls safety before the first rep, and getting it wrong is the most common reason lifters develop low back pain or knee irritation from the leg press. Adjust the backrest angle so you have enough depth to reach 90 degrees of knee flexion without your pelvis tucking, then set the safety stops just below your working depth.
- Backrest position: A lower backrest angle gives more range of motion and helps prevent lower back rounding at the bottom. Adjust until your torso is at a comfortable recline that lets your hips stay pinned through the full descent.
- Safety stop placement: Set the stops just below your deepest controlled rep position. This is especially important when training alone, so the sled cannot trap you at the bottom if form breaks down.
- Even loading: Load both sides of the sled with equal plates before every set. An uneven sled twists the carriage and shifts the force path asymmetrically through the knees and hips.
- Dry run first: Unload or use light weight to practice the full range once before adding your working load. Confirm your hips stay pinned at the bottom and your heels stay flat throughout.
Watch the setup walkthrough for the Gazelle Pro below to see each adjustment point in action.
Proper Leg Press Form: Step-by-Step
Proper leg press form comes down to keeping your torso anchored, your feet flat, and your depth honest throughout every rep. Follow these steps from setup to rack, and the leg press becomes a reliable quad and glute builder with minimal spinal demand.
Starting Position and Torso Cues
Sit deep in the seat with your glutes and lower back pressed firmly into the pad. Grab the side handles, brace your core lightly, and keep your head against the headrest before disengaging the safety locks.
The Descent: Controlled Eccentric
Lower the sled over approximately 2 to 3 seconds, letting the knees bend in line with the toes. Use the deepest range you can control with hips pinned, stopping when the knees approach 90 degrees or when the pelvis begins to tuck, whichever comes first.
The Press: Drive and Finish Without Hard Lockout
Push through the full foot, heel to toe, to extend the legs back toward the start position. Stop just short of aggressive lockout, keeping a slight bend in the knees to maintain tension on the quads.
Leg Press Foot Placement Guide
Foot placement on the leg press shifts which muscles feel the most demand, though a study found no statistically significant difference in overall muscle activation between narrow and wide stances or between 0 and 45 degrees of external foot rotation, meaning placement works as a bias tool rather than an isolation switch.[2] The best starting point is the position that lets you keep heels flat, knees tracking cleanly, and hips pinned through the full rep.
| Foot Placement | Primary Bias | Key Cue | Watch Out For |
|---|---|---|---|
| Mid-platform, shoulder-width | Balanced quads and glutes | Track knees over toes | Rushing the descent |
| Lower placement | Quad emphasis | Lower slowly, keep heels flat | Knee irritation if form is sloppy |
| Higher placement | Glute and hamstring emphasis | Keep hips pinned, avoid pelvis tuck | Pelvis tucking under at depth |
| Wider stance | Adductors and glutes | Toes slightly turned out | Forcing a range you do not control |
| Narrower stance | Outer quad emphasis | Keep knees from collapsing inward | Loss of heel contact with platform |
Placement guidance based on sEMG literature and practical training cues. Individual anatomy affects results.
For balanced lower body development, consider rotating between foot positions across training sessions rather than locking into one setup permanently. Explore which leg press muscles are worked in more detail to match foot placement with your training goals.
How Deep Should You Go on the Leg Press?
The right leg press depth is the deepest position where your glutes and lower back stay pinned to the pad, which for most lifters means stopping around 90 degrees of knee flexion before the pelvis begins to tuck under. Going deeper than that does not add productive muscle work and usually turns hip flexion into lumbar flexion under load.
- Hip position is the cue, not a number: Watch for the moment your glutes begin to lift or your lower back starts to round. That is your real depth limit, regardless of what the sled travel allows.
- Fuller range supports better development: Trainers consistently recommend working through the deepest range you can control cleanly, since fuller range of motion generally supports better muscle development than partial reps when technique stays honest.
- Heels as a feedback tool: If your heels start to lift off the platform before your hips tuck, your depth is already past your functional limit. Reset and reduce range until heels stay flat.
- Depth varies by anatomy: Hip socket depth, femur length, and ankle mobility all affect how deep each lifter can go without compensating. There is no universal standard depth.
Common Leg Press Mistakes and How to Fix Them
Most leg press errors fall into a small number of patterns that are easy to recognize and fix once you know what to look for. Correcting these protects your joints and ensures your muscles do the work the movement is designed for.
Hips Rising Off the Pad
Hips rising off the pad means you have gone past your usable depth and are compensating with lumbar flexion. Reduce the range of motion until the pelvis stays flat against the support on every rep, then only add range back as mobility improves.
Locking Out the Knees
Slamming the knees into full extension removes tension from the quads and puts abrupt stress on the joint. Stop the press just short of lockout to keep continuous tension on the working muscles and avoid hyperextension under a loaded sled.
Bouncing at the Bottom
Using momentum to bounce out of the bottom position reduces the time the muscles are under load and can force the lower back into a loaded flexion position. Lower under full control over 2 to 3 seconds and pause briefly at the bottom before pressing.
Too Much Weight, Too Little Control
Excessive load forces shortened range of motion and rushed eccentrics. Choose a weight you can lower slowly, stop with hips pinned, and press with clean tracking, then increase load only when every rep stays within those standards.
Leg Press Variations Worth Knowing
The standard two-leg press covers most development needs, but two variations are worth adding when specific training goals call for them.
Single-Leg Press
The single-leg press addresses left-right strength imbalances and adds a functional element since force must be produced and stabilized through one limb at a time. Use significantly lighter load than your bilateral press, and keep the hips pinned the same way.
Leg Press Calf Raise
At the top of a standard leg press rep, extend through the ankle to raise the heels into a loaded calf raise position. This allows heavier calf loading than most standing calf raise machines without changing equipment.
You can also explore a vertical leg press on the Smith machine as an alternative setup for targeting similar movement patterns.
How to Program the Leg Press: Sets, Reps, and Progression
The leg press works best as a complement to compound movements, slotted third or fourth in a lower body session after squats or lunges have already accumulated significant quad fatigue. Programming it as a finisher allows heavy loading with less central nervous system demand than free-weight movements require.[3]
Choosing Your Starting Weight
Start with the sled alone or one plate per side and complete 15 reps with full control: hips pinned, heels flat, and 2 to 3 second descent. If form holds across all reps, you have found a baseline to build from.
Rep Ranges by Goal
- Strength: 4 to 6 reps per set with heavier loading and longer rest (2 to 3 minutes between sets).
- Hypertrophy: Trainers commonly recommend 3 to 4 sets of 10 to 15 reps with moderate load and 60 to 90 seconds of rest, which keeps time under tension high and metabolic stress elevated.
- Endurance or finisher: 15 to 20 reps with lighter load at the end of a session, useful for accumulating volume without adding joint stress.
When to Add Weight
Add weight only when you complete all target reps in a set with clean form on every rep, not just the first few. A common approach is to add one plate per side when you hit the top of your rep range for two consecutive sessions.
When to Stop a Set (Pain Red Flags)
Stop a set immediately if you feel sharp knee pain, a pinching sensation in the hip crease, or lower back ache during the press. These are signs of too much load, excessive range of motion, or a muscle imbalance that needs attention before continuing.
RitFit Leg Press Machine Options
RitFit offers two purpose-built leg press machines designed for serious home and garage gym use, both engineered to deliver commercial-grade performance at a compact footprint.
- RitFit Gazelle Pro 3-in-1: The RitFit Gazelle Pro 3-in-1 Leg Press and Hack Squat Machine supports leg press, hack squat, and calf raise in one footprint, with an adjustable back pad and high weight capacity suited for intermediate to advanced lifters.
- RitFit BLP01: The RitFit BLP01 Leg Press and Hack Squat Machine is a 3-in-1 platform offering similar versatility in a design optimized for home gym spaces with tighter budgets or dimensions.
- Footplate accessory: The RitFit foot plate for leg press is a dedicated accessory that enhances foot positioning and platform stability for both machines.
Browse the full leg press machine collection to compare specs, or explore the broader leg machines lineup to add complementary equipment like a leg extension or hamstring curl.
Watch the comparison video below to see how the Gazelle Pro and BLP01 differ in design and function side by side.
For buyers comparing machines by space and setup, see our guides on the best home leg press machine for women and the best leg press machine for basement gyms.
FAQs About How to Do the Leg Press
Where should I place my feet on the leg press for the best results?
Start with feet shoulder-width apart at mid-platform, toes slightly turned out, for balanced quad and glute work. From there, place feet higher for more glute emphasis, lower for more quad demand, wider for adductor involvement, or narrower for a stronger outer quad feel.
How deep should I go on the leg press?
Lower until your knees reach approximately 90 degrees of flexion while your hips and lower back stay pinned to the pad. If your hips begin to tuck or heels lift, you have passed your functional depth limit and need to reduce range before adding more load.
Should I lock my knees out at the top of the leg press?
Avoid a hard snap lockout. Press until your legs are nearly extended but keep a slight bend in the knees, which maintains quad tension throughout the set and reduces joint stress from slamming into full extension under a loaded sled.
How much weight should I start with on the leg press?
Start light enough to complete 15 reps with full control, hips pinned, heels flat, and no bouncing at the bottom. For most beginners, that means the sled alone or one plate per side, increasing load only when every rep stays clean throughout the full set.
Is the leg press a good substitute for squats?
The leg press targets the quads, glutes, and adductors effectively but does not replicate the core demand, hip stability, or full-body coordination that free-weight squats develop. Use it as a complement to squats and lunges rather than a full replacement.
Can beginners use the leg press machine?
Yes. The leg press is one of the most beginner-friendly lower body machines because the fixed movement path reduces technical demand compared to barbell squats. Start at a manageable depth, use the safety stops every set, and focus on keeping hips pinned and feet flat throughout each rep.
Conclusion
The leg press is a serious lower body growth tool when setup, depth, and loading are handled honestly. Keep your hips pinned, treat foot placement as a bias tool, and load only what you can control through a full, clean range of motion.
Start with the shoulder-width mid-platform setup, build your depth gradually, and slot the movement after compound lifts. Compare leg press vs squat rack options to build the right lower body combination for your training goals.
Disclaimer
This article is for general fitness and educational purposes only and does not constitute medical or professional training advice. Consult a qualified healthcare provider or certified strength coach before beginning any new exercise program, especially if you have existing joint, back, or mobility concerns.
Save on your next RitFit order
Tap the button to copy your code, then paste it at checkout.
References
1. Martínez-Fuentes I, Oliva-Lozano JM, Muyor JM. Evaluation of the Lower Limb Muscles' Electromyographic Activity during the Leg Press Exercise and Its Variants: A Systematic Review. Int J Environ Res Public Health. 2020;17(13):4626. doi:10.3390/ijerph17134626. Available from: https://pmc.ncbi.nlm.nih.gov/articles/PMC7369968/
2. Martínez-Fuentes I, Oliva-Lozano JM, Muyor JM. Influence of Feet Position and Execution Velocity on Muscle Activation and Kinematic Parameters During the Inclined Leg Press Exercise. Sports Health. 2021;14(3):317-327. doi:10.1177/19417381211016357. Available from: https://pmc.ncbi.nlm.nih.gov/articles/PMC9112713/
3. Migliaccio GM, Dello Iacono A, Ardigo LP, et al. Leg Press vs. Smith Machine: Quadriceps Activation and Overall Perceived Effort Profiles. Front Physiol. 2018;9:1481. doi:10.3389/fphys.2018.01481. Available from: https://pmc.ncbi.nlm.nih.gov/articles/PMC6206431/