


Table of Contents
- The Benefits of the Smith Machine Deadlift
- Free Weight Deadlift vs. Smith Machine Deadlift
- What Muscles Does The Deadlift Work
- Muscle Activation Roles in Smith Machine Deadlift
- How To Do Smith Machine Deadlifts
- Step-by-Step Technical Cueing
- Beginners' Smith Machine Deadlift Routine
- Progression Model
- Common Smith Machine Deadlift Mistakes
- Tips for the Smith Machine Deadlift
Deadlifts are the king of posterior chain exercises, but for many, they bring a genuine fear of lower back injury. Enter the Smith machine. While often dismissed by purists, this tool significantly reduces shear force on the spine. It allows you to safely target your glutes and hamstrings without the complex balance demands of the traditional free-weight barbell.
Are you avoiding heavy lifting because of nagging pain or the fear of bad form? You are not alone. What if I told you that the machine often labeled as "cheating" is actually a clinically superior tool for hypertrophy and rehabilitation? Let’s move past the stigma and explore how to master this movement for a stronger, safer, and more muscular physique.
Key Takeaways
- Enhanced Hypertrophy Focus: By removing the requirement for tri-planar stabilization, the Smith machine allows for higher output from prime movers (glutes and hamstrings). This stability enables lifters to safely approach true muscular failure, a key driver of mechanical tension and growth.
- Spinal Safety Advantage: The fixed vertical bar path prevents forward drift, significantly reducing dangerous shear forces on the lumbar spine, making it a safer option for lifters with rehabilitating injuries.
- Range of Motion Adjustment: Standard Smith machines often have safety stops that prevent the bar from reaching the floor. To replicate a conventional deadlift, you must stand on a stable platform or weight plates.
- Ideal for Variations: The adjustable stops and guided rails make this tool superior for partial-range movements like Rack Pulls (for upper back strength) and controlled Romanian Deadlifts (for hamstring isolation).
The Benefits of the Smith Machine Deadlift
The Smith machine deadlift has a unique biomechanical advantage because it gives lifters external stability, which lets them focus completely on producing force without having to worry about balance. This unique setting puts muscle growth and safety first, making it a great tool for both rehabilitation patients and advanced bodybuilders who want to grow specific muscles.
This machine is more than just a stable alternative to free weights; it also has a number of specific physiological benefits that can greatly improve your training results.
- Enhanced Hypertrophy Through Stability: The Smith machine increases external stability and reduces coordination/stabilization demands for controlling the bar path. Research confirms that the Smith machine allows for higher peak activation in prime movers like the gluteus maximus due to this increased stability, safely bringing them closer to true muscular failure[1].
- Reduced Lumbar Shear Force: The machine's fixed vertical path keeps the bar from moving forward, which is a common mistake in free-weight deadlifts that puts dangerous shear stress on the lower back. By making sure the load is always in line with your center of mass, you change harmful shear forces into manageable compressive forces. This makes the loading profile for the spinal discs safer.
- Customizable Range of Motion: The Smith machine has adjustable safety stops that let you set the starting height of the lift exactly how you want it to fit your current flexibility levels or training goals. This feature lets you do partial range movements like "rack pulls" or work around anatomical limitations, making sure you train in a range that is pain-free and biomechanically efficient.
-
Unmatched Safety for Solo Training: The built-in hook-and-latch system lets you "self-spot" the weight and put it back on the rack right away with a simple wrist rotation. This safety net gives you the freedom to train harder and feel more confident in your mind, knowing that you can safely leave the lift at any time if you start to feel tired.
Free Weight Deadlift vs. Smith Machine Deadlift
| Parameter | Free Weight Deadlift | Smith Machine Deadlift | Implication |
| Degrees of Freedom | 3 (Vertical, Sagittal, Frontal) | 1 (Vertical - fixed) | The Smith machine provides external stability, reducing stabilization and coordination demands, which can help emphasize the prime movers. |
| Bar Path | Curvilinear (S-curve) | Linear (Vertical or Fixed Angle) | Free weight requires skill to keep path efficient; Smith enforces strict linearity. |
| Shear Force Risk | High (if bar drifts forward) | Moderate to Low (path constrained) | Smith machine is safer for populations with lumbar instability or disc pathology. |
| Muscle Activation | High Total Body & Stabilizer | High Prime Mover (Agonist) | Free weight is better for functional transfer; Smith is better for targeted hypertrophy. |
| Safety Mechanism | None (requires dropping bar) | Mechanical Stops & Hooks | Smith machine allows safer training to failure without a spotter. |
What Muscles Does The Smith Machine Deadlift Work
The Smith machine deadlift is a powerful exercise that works multiple joints at once. It works the lower body by pushing against the floor and holding the upper body in place. This variation changes the way traditional activation profiles work by using a fixed bar path. This lets for targeted hypertrophy and safer heavy loading.
This one-of-a-kind mechanical structure mostly uses the posterior chain to move, but it also uses the anterior chain and upper body to keep things stable and give them initial power.
Primary Muscles
Gluteus Maximus
The gluteus maximus is the main muscle that extends the hip. It is responsible for the strong "lockout" phase that moves the hips from a bent position to a straight standing position. Because the machine is stable, lifters can really focus on peak contraction without having to worry about balance. This makes this variation especially good for gluteal hypertrophy.
Hamstrings
These muscles help keep the knee stable and help the hip extend by putting a lot of stress on them as the weight is lowered. The Smith machine's fixed path means that the quadriceps don't have to stabilize as much, which puts more direct tensile stress on the hamstring muscle belly while lifting.Research indicates that the Smith machine may allow for greater hamstring isolation by reducing the quadriceps' role in knee stabilization during RDL variations[2].
Erector Spinae
These muscles run vertically along the spine and contract isometrically to keep the back from rounding (flexing) under the heavy weight of the barbell. When done with neutral mechanics, this exercise is a great way to strengthen the lower back because it uses a lot of force to keep the natural curve of the lumbar spine.
Accessory Muscles
Quadriceps
The quadriceps help extend the knee and help the weight "break" from the floor, but how much they work depends a lot on how you stand. Putting the feet forward mimics a "hack squat" movement that is a mix of two different types of squats. This greatly increases the recruitment of the quadriceps while putting less stress on the lower back.
Upper Back and Forearms
The Latissimus Dorsi and Trapezius work isometrically to keep the bar pressed against the legs and the scapulae pulled back, which stops the shoulders from rounding forward. At the same time, the forearm flexors keep a strong grip, and they often get more work done because they don't have to worry about managing the bar's rotation.
Muscle Activation Roles in Smith Machine Deadlift
| Muscle Group | Action | Role | Specific Smith Machine nuance |
| Gluteus Maximus | Hip Extension | Agonist (Prime Mover) | High activation at lockout; stability allows for forceful peak contraction. |
| Hamstrings | Hip Extension / Knee Flexion | Synergist / Agonist | Primary mover in RDL variations; high eccentric loading. |
| Erector Spinae | Spinal Extension | Stabilizer (Isometric) | Prevents spinal flexion; highly active despite machine stability. |
| Quadriceps | Knee Extension | Synergist | Activation increases with forward foot placement or deeper starting knee flexion. |
| Latissimus Dorsi | Shoulder Extension | Stabilizer | Keeps bar close to body; stabilizes lumbar spine via thoracolumbar fascia. |
| Trapezius | Scapular Retraction / Elevation | Stabilizer | Resists scapular depression and protraction; heavily loaded isometrically. |
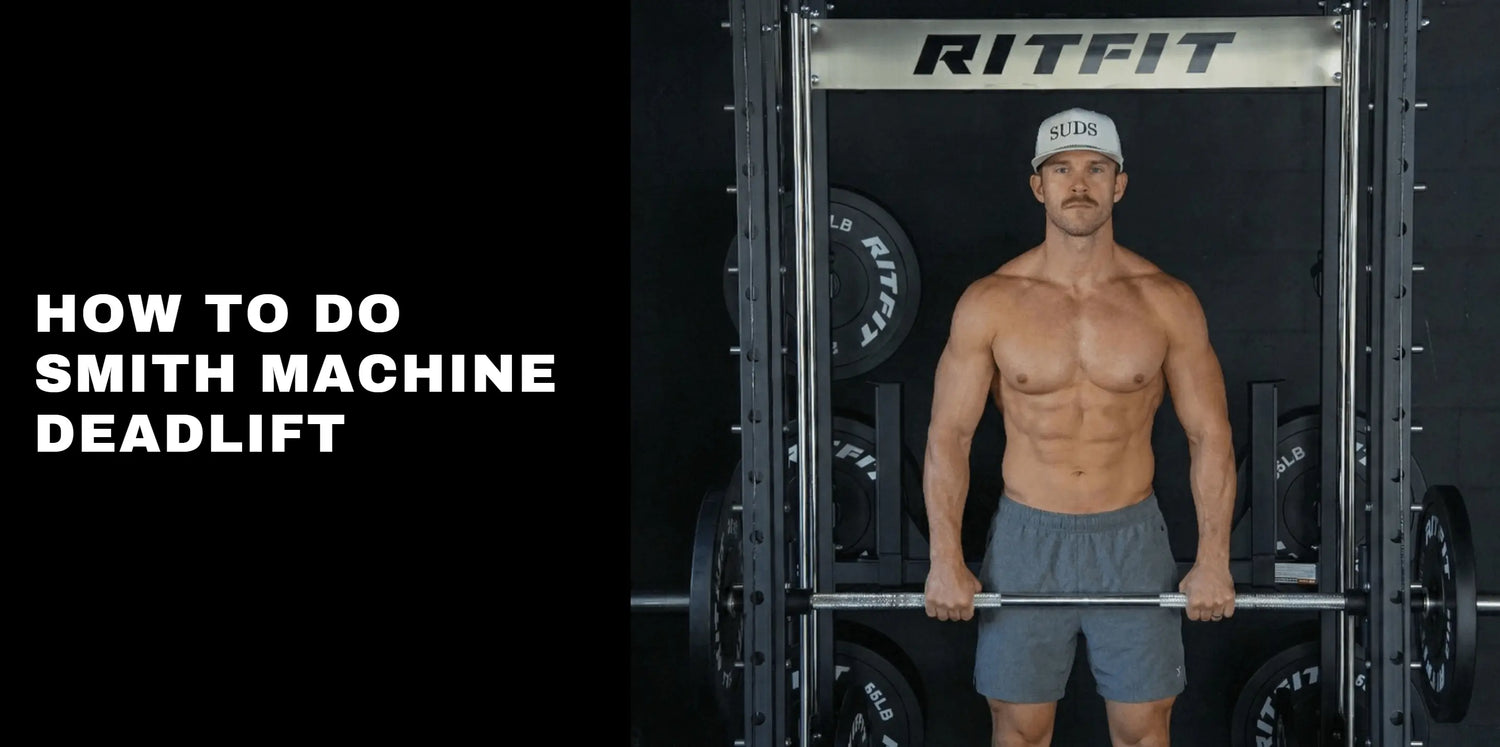
How To Do Smith Machine Deadlifts
Executing the Smith machine deadlift requires a meticulous setup. Because the machine's path is fixed, the lifter must adjust their body to the machine, rather than manipulating the bar to fit their body. This constraint demands precision.
Step 1: The Setup and Environmental Check
Before attempting the lift, a thorough inspection of the equipment is mandatory for safety.
-
Determine the Bar Path: Check if the Smith machine is vertical or angled.
- Vertical Path: You can face either direction.
- Angled Path (7-12 degrees): This is critical. You must stand inside the machine such that the bar path travels up and back toward your torso (mimicking the natural extension of the hips). If you face the wrong way, the bar will travel away from you, increasing the moment arm and shear stress on the lower back.
- Set the Safety Stops: Adjust the safety latches to a height just below your intended bottom range of motion (ROM). If you are doing full repetitions, this might be the lowest setting. This ensures that if you lose grip or suffer a muscle spasm, the bar will not crush you.
- Establish ROM Height: Standard Smith machines often do not lower the bar all the way to the floor (the bar stops at shin or knee height). To perform a deadlift that mimics the floor-pull of a conventional deadlift, you must stand on a secure, elevated surface such as a dedicated platform or wide bumper plates. This restores the full range of motion.
Step 2: Stance and Address
- Foot Placement: Stand with feet hip-width apart. Your shins should be touching or less than an inch from the bar. Always stand as close to the bar as possible; even a few inches of distance exponentially increases the lever arm acting on the lower back[3].
- Proximity: This is the most common error. Stand as close to the bar as possible. Your shins should be touching or less than an inch from the bar. In the Smith machine, you cannot pull the bar into you; you must put yourself into the bar.
- Toe Angle: Point toes forward or slightly outward (10-15 degrees) to allow for comfortable femoral rotation and glute engagement.
Step 3: The Hinge and Grip
- The Hip Hinge: Initiate the movement by pushing the hips backward (posteriorly). Do not simply squat down. Imagine trying to touch a wall behind you with your glutes. This pre-loads the hamstrings.
- Knee Bend: Bend the knees only as much as necessary to reach the bar after the hips have traveled back.
- Grip Width: Grasp the bar just outside the thighs. Arms should be perfectly vertical to maximize mechanical efficiency.
-
Grip Type:
- Double Overhand: Recommended for warm-ups and lighter sets to build grip strength.
- Mixed Grip: One palm facing you, one away. This prevents bar rotation in the hands.
- Straps: Highly recommended for hypertrophy or max-strength sets on the Smith machine to eliminate grip as a limiting factor.
Step 4: Tension and "The Wedge"
Before the bar leaves the stops, you must create systemic tension.
- Un-racking: Rotate the wrists to disengage the safety hooks. Be prepared to support the load immediately.
- Pull the Slack Out: Even on a machine, apply upward pressure without lifting the weight. This "takes the slack out" of your body.
- Lat Engagement: Visualize "bending the bar around your shins" or "putting your shoulder blades in your back pockets." This engages the lats (depression and retraction), which stabilizes the spine.
- The Brace (Valsalva Maneuver): Take a deep diaphragmatic breath (into the belly, not the chest). Hold this breath to create high intra-abdominal pressure (IAP). This acts as a pneumatic splint for your lumbar spine.
Step 5: The Concentric Pull
- Push the Floor: Do not think about pulling the bar up. Think about leg pressing the floor away. Drive through the mid-foot and heels.
- Torso Angle: Ensure the hips and shoulders rise at the same rate. If the hips shoot up first, the legs have extended without moving the load, shifting all the stress to the lower back (the "stripper deadlift" error).
- Bar Path Tracking: Keep the bar skimming the legs. Since the machine path is fixed, you must actively keep your body close to that line.
- Exhale: Exhale forcefully through pursed lips only after you have passed the most difficult point of the lift (usually knee height) or at the very top.
Step 6: The Lockout
- Glute Drive: As the bar passes the knees, drive the hips forcefully forward into the bar. Squeeze the glutes maximally.
- Tall Posture: Finish tall. The knees should be locked, hips neutral, and shoulders back. Avoid hyperextending (leaning back excessively), as this compresses the posterior elements of the spine.
Step 7: The Eccentric Descent
- Hips First: Unlock the hips and push them back to initiate the descent. Do not bend the knees first, or the bar will crash into your patellas.
- Control: Lower the weight under control (2-3 seconds). Do not drop it. The eccentric phase is a potent stimulus for muscle growth and tendon strengthening.
- Reset: Once the bar touches the stops (or hovers just above), reset your air, re-brace, and begin the next rep. Do not bounce the weight.
Step-by-Step Technical Cueing
| Phase | Key Cue | Purpose |
| Setup | "Shave the legs" | Ensures bar proximity to reduce lower back moment arm. |
| Grip | "Bend the bar" | Engages lats to stabilize the spine. |
| Brace | "Belly punch" | Activates intra-abdominal pressure (Valsalva). |
| Drive | "Push the floor away" | Encourages leg drive over back pulling. |
| Lockout | "Stand tall" | Prevents lumbar hyperextension. |
| Descent | "Hips back first" | Clears the knees for a safe bar path. |
Beginners' Smith Machine Deadlift Routine
For the novice, the primary objective is motor learning, ingraining the hip hinge pattern rather than maximal loading. The Smith machine is an ideal tool for this due to its stability. This routine utilizes a periodized approach focusing on linear progression and volume to build tissue tolerance.
Principles of the Routine
- Frequency: 2 nonconsecutive days per week (e.g., Monday and Thursday), which typically provides ample recovery time for most lifters.
- Volume: Moderate rep ranges (8-12) are utilized to provide enough "practice reps" to solidify technique without using weights that are dangerously heavy.
- Intensity Management (RPE): We will use the Rate of Perceived Exertion (RPE) scale (1-10). Beginners should train at an RPE of 7-8, meaning they should finish a set feeling like they could have done 2-3 more reps with perfect form. This "buffer" is crucial for safety.
- Progressive Overload: The goal is to add small increments of weight (2.5 - 5 lbs) or repetitions each session.
The Workout Structure
Warm-Up (Mandatory):
- 5 minutes light cardio (rowing or brisk walk) to raise core temp.
-
Dynamic Stretching:
- Leg Swings: 15 reps/leg.
- Cat-Cow: 1 minute (spinal mobility).
- Bird-Dog: 10 reps/side (core activation).
The Main Lift:
Exercise: Smith Machine Conventional Deadlift (standing on platform if needed).
- Set 1 (Warm-up): Empty bar x 15 reps. Focus purely on cues.
- Set 2 (Warm-up): 50% of estimated working weight x 10 reps.
- Set 3 (Working): 10 reps @ RPE 7.
- Set 4 (Working): 10 reps @ RPE 8.
- Set 5 (Working): 10 reps @ RPE 8.
Accessory Work:
These exercises address common weak points that limit deadlift performance.
| Exercise | Sets | Reps | RPE | Rationale |
| Smith Machine Split Squat | 3 | 10-12/leg | 7 | Fixes left/right strength asymmetries and builds quad strength. |
| Lat Pulldowns (Wide Grip) | 3 | 12-15 | 8 | Strengthens lats for better spinal stability during the deadlift. |
| Plank (Weighted if easy) | 3 | 45-60 sec | 9 | Builds isometric core endurance essential for maintaining IAP. |
| Seated Hamstring Curl | 3 | 15 | 9 | Direct hypertrophy for the hamstrings to support the hip hinge. |
Progression Model
- Week 1-4: Focus on form. If you hit all reps at the target RPE, add 5 lbs (2.5 kg) to the bar the next session.
- Week 5-8: Drop reps to 6-8 range and increase intensity to RPE 8-9 for strength development.
- Deload: Every 8th week, reduce volume by 50% to allow full systemic recovery.
Common Smith Machine Deadlift Mistakes
Despite the guided nature of the machine, errors are rampant. In my clinical practice, I often treat injuries resulting from these specific biomechanical faults. Understanding the pathomechanics of these errors is the first step to prevention.
The "Squat" Deadlift
- The Error: The lifter drops their hips too low at the start, attempting to keep the torso completely upright.
- Pathomechanics: This alters the lever arm, shifting the load almost entirely to the quadriceps. In the Smith machine, this often causes the knees to travel forward excessively, crashing into the bar path. This prevents the bar from moving in a straight line relative to the body's center of mass.
- Correction: Raise the hips. The armpits should be directly over the bar. You should feel tension in the hamstrings before the weight leaves the floor. The deadlift is a hinge, not a squat.
Facing the Wrong Direction (Angled Machines)
- The Error: On an angled Smith machine, the lifter faces the direction where the bar travels away from them as it rises.
- Pathomechanics: This creates a progressively increasing moment arm. As the bar moves up and away, the leverage acting on the L4-L5 lumbar segment increases dramatically. This creates massive anterior shear force, one of the primary mechanisms for disc herniation.
- Correction: Always inspect the track. If angled, stand so the bar moves up and back toward your head.
Excessive Lumbar Flexion (Rounding the Back)
- The Error: Lifting with a rounded lower back (kyphosis).
- Pathomechanics: When the spine is flexed, the hydraulic pressure in the nucleus pulposus (the center of the disc) is directed posteriorly, pushing against the annulus fibrosus (the outer ring). Under heavy load, this can cause the annulus to tear, leading to a herniation. It also disables the protective force-generating capacity of the erector spinae.
- Correction: Reduce the weight. Focus on the cue "chest proud" and "locking the lats down." If mobility prevents a neutral spine, raise the starting height of the bar (rack pull) until flexibility improves.
Lumbar Hyperextension at Lockout
- The Error: Leaning way back at the top of the movement.
- Pathomechanics: This causes "facet imbrication," where the articular facets of the vertebrae jam together. It places immense stress on the posterior elements of the spine (pars interarticularis) and can lead to spondylolysis (stress fractures) or spondylolisthesis.
- Correction: Finish "tall." Think about growing taller at the top, squeezing the glutes to neutral. The shoulders should be over the hips, not behind them.
Bar Drift (Standing Too Far Away)
- The Error: Setting up with the feet too far back, so the arms reach forward to the bar.
- Pathomechanics: Even a few inches of distance increases the lever arm acting on the lower back significantly. This forces the spinal erectors to work exponentially harder to prevent flexion, often leading to muscular strain or spasm.
- Correction: "Shave the legs." The bar should be in contact with, or fractions of an inch from, the shins and thighs throughout the entire lift.
"Jerking" the Weight
- The Error: Yanking the bar off the stops to generate momentum.
- Pathomechanics: This creates a spike in peak force that can exceed the tensile strength of tendons and ligaments (specifically the biceps tendon). It also causes a momentary loss of spinal bracing.
- Correction: "Pull the slack out." Build tension gradually (over 0.5 seconds) until the bar breaks contact with the stops smoothly.
Tips for the Smith Machine Deadlift
To optimize the Smith machine deadlift for advanced hypertrophy or specific rehabilitation goals, we can employ several nuanced strategies that go beyond basic technique.
Utilize Lifting Straps for Hypertrophy
In free-weight powerlifting, grip strength is a competitive requirement. However, in the context of the Smith machine, where the goal is often posterior chain isolation or hypertrophy, the grip should not be the limiting factor. If your hands give out before your glutes, you have failed to stimulate the target muscle.
Recommendation: Use figure-8 or standard lifting straps. This allows you to focus purely on the neural drive to the hips and hamstrings, ensuring the prime movers reach true failure.
The Platform "Deficit" Hack
Stand on a 2-4 inch platform to lengthen the glutes and hamstrings further. Muscle growth is highly correlated with mechanical tension at long muscle lengths[4].
Physiological Benefit: This increases the amount of knee and hip flexion required, lengthening the glutes and hamstrings further. Muscle growth is highly correlated with mechanical tension at long muscle lengths.
Controlled Eccentrics (Negatives)
The safety of the Smith machine makes it the perfect tool for eccentric overload. The eccentric phase (lowering) causes more micro-trauma to muscle fibers than the concentric phase, which is a key driver of repair and growth.
Technique: Lift the weight at a normal speed (1 second), but lower it very slowly (3-4 seconds). This also strengthens the tendon-bone junction, making it an excellent protocol for treating tendinopathy.
Single-Leg Variations (Unilateral Training)
The Smith machine eliminates the balance constraints that make single-leg deadlifts (SLDL) frustrating with free weights.
- Rehab Application: For patients recovering from ACL reconstruction or ankle sprains, the Smith SLDL is a gold-standard exercise. It allows for heavy loading of the injured limb's posterior chain without the risk of falling.
- Execution: Place one foot under the bar and extend the other leg back. Perform the hinge pattern. This corrects bilateral strength asymmetries.
Footwear Selection
Do not deadlift in running shoes with compressible gel or air soles.
- Why: The soft sole acts as a shock absorber, dissipating the force you produce before it reaches the floor. It also creates an unstable surface, increasing the risk of ankle rolling.
- Recommendation: Wear flat, hard-soled shoes (like Converse Chuck Taylors), wrestling shoes, or specialized deadlift slippers. This ensures maximum force transfer and stability.
Monitor Breathing and Hemodynamics
The Valsalva maneuver causes a temporary spike in blood pressure. While essential for spinal safety, it can cause dizziness in some individuals during high-rep sets on the Smith machine.
Tip: If you feel lightheaded, release a small amount of air through pursed lips ("hissing") during the hardest part of the lift (the sticking point) to modulate intrathoracic pressure without losing core rigidity.
Final Thoughts
The Smith machine deadlift offers a unique blend of safety and stability, allowing for targeted posterior chain growth while minimizing dangerous shear force on the lower back. By removing the need for complex balancing, it provides a scientifically backed alternative for both rehabilitation and pure hypertrophy training.
Don't let purist stigma hold you back from safer gains. Add the Smith machine deadlift to your next leg day rotation to experience isolated glute and hamstring development with total confidence.
Important disclaimer: This article is for general educational purposes only and is not medical advice. If you have shoulder, neck, back, elbow, or wrist pain, a recent injury or surgery, numbness or tingling, unexplained weakness, or dizziness, consult a qualified clinician before starting. Stop any exercise that causes sharp pain.
FAQs: Smith Machine Deadlift
How much does the bar weigh on a Smith machine?
Residential Smith machine bars typically provide fifteen to twenty pounds of starting resistance due to rail friction and the lack of counterweights. Commercial gym models usually feature counterbalanced systems that reduce the effective starting weight to approximately six pounds to accommodate rehabilitation patients.
How do I perform Romanian deadlifts on a Smith machine?
Start from the standing position and push your hips back while keeping a slight knee bend to target the hamstrings. Lower the bar until you feel a maximal stretch in the posterior chain but stop before your lower back begins to round or lose neutrality.
Is the Smith machine deadlift easier or harder than a standard deadlift?
The exercise feels easier regarding balance because the fixed rails remove the need for stabilizer muscles to coordinate the bar path. This stability advantage allows most lifters to handle loads five to ten percent heavier than they can lift using a conventional free weight barbell.
Is doing deadlifts on a Smith machine bad for my lower back?
The machine significantly reduces shear force on the spine by fixing the bar path and preventing the weight from drifting away from your center of mass. This mechanical constraint makes it a safer option for individuals rehabilitating lower back injuries compared to free weight variations.
References
- Schwanbeck S, Chilibeck PD, Binsted G. A comparison of free weight squat to Smith machine squat using electromyography. J Strength Cond Res. 2009;23(9):2588-2591. doi:10.1519/JSC.0b013e3181b1b181
- Neto WK, Vieira TL, Gama EF. Barbell Hip Thrust, Muscular Activation and Performance: A Systematic Review. J Sports Sci Med. 2019;18(2):198-206. Published 2019 Jun 1.
- Escamilla RF, Fleisig GS, Lowry TM, Barrentine SW, Andrews JR. A three-dimensional biomechanical analysis of the squat during varying stance widths. Med Sci Sports Exerc. 2001;33(6):984-998. doi:10.1097/00005768-200106000-00019
-
Schoenfeld BJ. The mechanisms of muscle hypertrophy and their application to resistance training. J Strength Cond Res. 2010;24(10):2857-2872. doi:10.1519/JSC.0b013e3181e840f3


