


Table of Contents
- What is a Push Press?
- Who Should and Should Not Do the Push Press
- Push Press Form and Techniques
- Push Press Common Mistakes to Avoid
- Push Press Muscles Worked
- Benefits of the Push Press
- Push Press Variations
- Push Press Alternatives
- Safety and Precautions
- Push Press Vs. Overhead Press
- Beginner-Friendly Push Press Workout Example
- Push Press FAQs
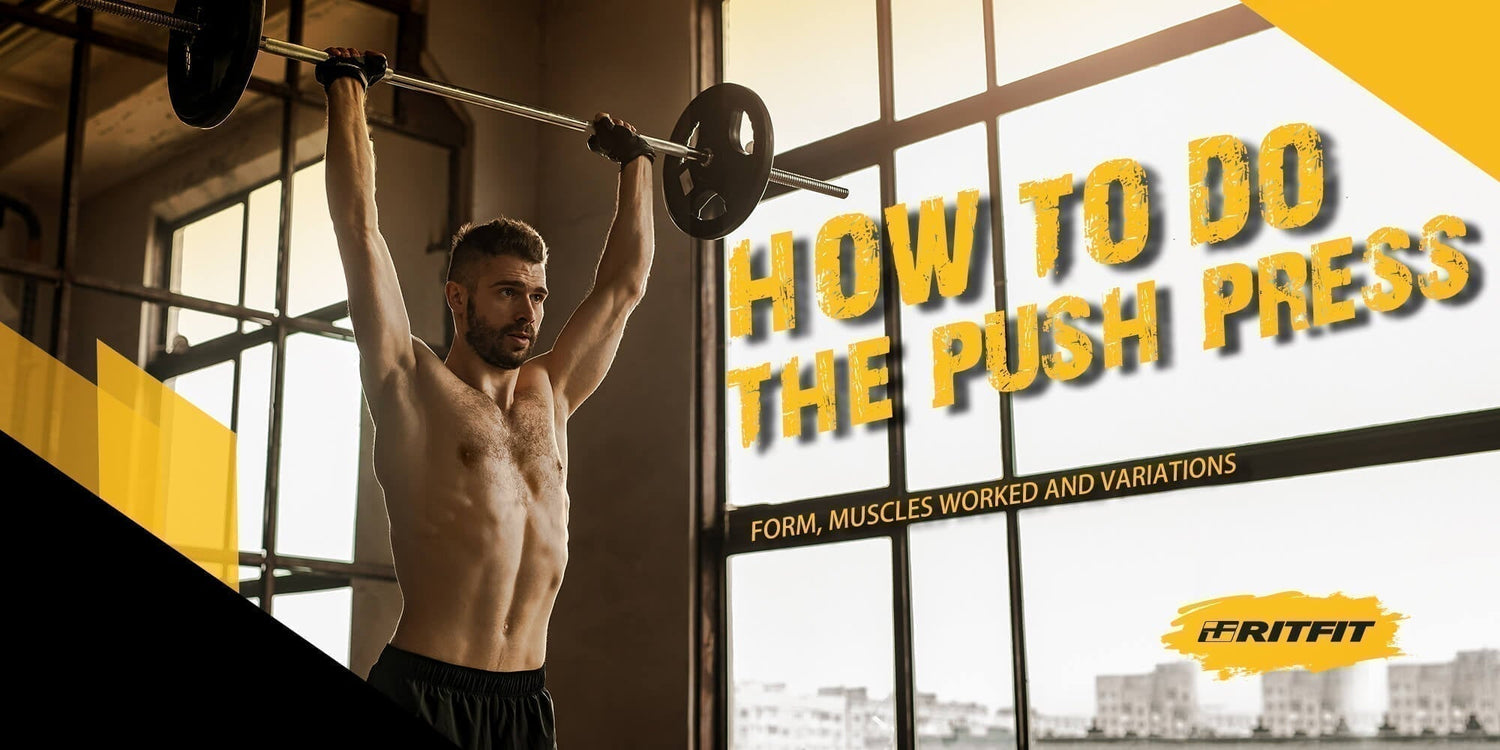
The push press is a popular exercise for building muscles and improving stability. It is one of the most common workouts in strength training routines as it not just builds shoulders, but uses most of the major muscle groups as well. It relies on the power of the legs, buttocks, back, and core muscles for maximum effectiveness.
Performing this ballistic workout requires proper posture, suitable weights, and guidance. That’s why it may be challenging for an amateur to get started with it. This article will tell you everything you need to know about the push press including a step-by-step guide, the muscles used in this workout, the advantages, and some frequent mistakes to avoid. So let’s dive right into it!
What is a Push Press?
The push press is a strength training move in which you start with a weight at shoulder height and then use a small push from your legs to help lift the weight over your head.
You can use a barbell, dumbbells, kettlebells, a Smith machine, or a power rack to do the push press.
Unlike a strict overhead press, where only the upper body works, the push press uses your legs, hips, shoulders, and core together. This is why it is a favorite for athletes and for people who want more full-body strength and power.
In everyday life, the push press helps with all tasks where you must lift something from chest level to a higher shelf, such as moving boxes or putting luggage into an overhead compartment.
Who Should and Should Not Do the Push Press
The push press is best for people who already know basic strength moves, such as bodyweight squats and simple overhead presses with light weights.
You should be extra careful or talk to a doctor or physical therapist before doing the push-up. If you:
- Have current or past shoulder pain or injury
- Have serious neck, lower back, hip, or knee problems
- Feel sharp pain, numbness, or tingling in any joint while pressing overhead
If you are a complete beginner and have never pressed a weight overhead, start first with very light dumbbell shoulder presses or a machine press. Once you feel stable and pain-free there, you can slowly add the push press later.
Push Press Form and Techniques
Warm Up Before You Start
Before you do any push press sets, always warm up for at least 5 to 10 minutes. You can walk on a treadmill, ride a bike or do light dynamic moves such as arm circles, leg swings and bodyweight squats.
Then perform one or two very light sets of overhead presses with an empty barbell or light dumbbells. The goal is to feel your shoulders, hips and core wake up, not to get tired.
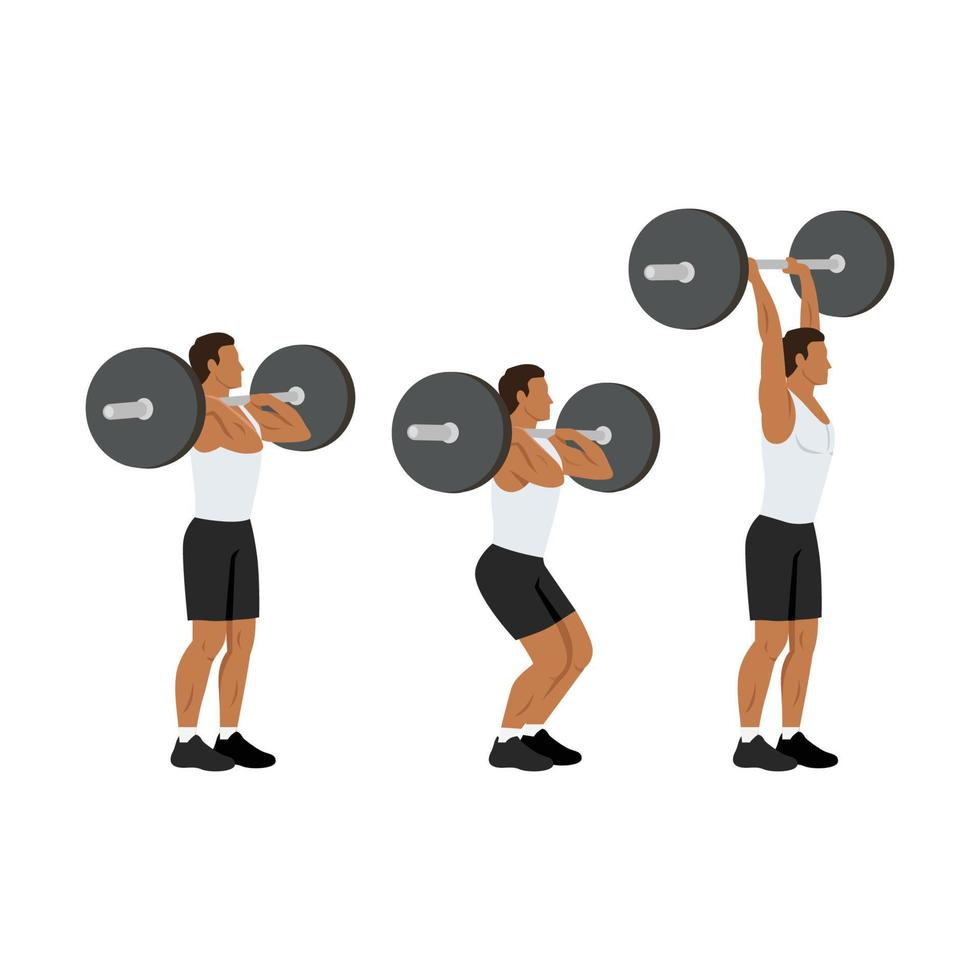
How to Do the Push Press (Step by Step)
You can follow these simple steps with a barbell or with two dumbbells. Start with very light weight so you can focus on form.
Step 1: Set your stance and grip
- Stand with your feet about shoulder-width apart. Your toes can point straight ahead or slightly out, whichever feels natural and stable.
- If you use a barbell, hold it in front of your shoulders with your palms facing forward. Your hands should be just a bit wider than shoulder width. Your elbows should point slightly forward, not straight out to the sides.
- If you use dumbbells or kettlebells, hold them at shoulder height with your palms facing in toward your face and your wrists stacked over your elbows.
Step 2: Brace your core and stand tall.
- Gently squeeze your glutes, tighten your abdominal muscles as if someone is about to poke your stomach, and keep your chest proud that proper core bracing creates intra-abdominal pressure that protects the lumbar spine from shear forces[1].
- Look straight ahead. Your head, ribs, and hips should be stacked in one line, not leaning back. This protects your lower back.
Step 3: Dip with a small, controlled bend
- Take a small breath in and bend your knees and hips a little, like a short and quick quarter squat. Your torso stays almost upright, not leaning forward.
- Keep your heels on the floor and feel your weight spread across the whole foot. This small dip loads your legs and hips to create power.
Step 4: Drive the legs and press overhead
- From the bottom of the dip, push the floor away with your legs. As your legs extend, let that power travel into your arms and press the weight straight up overhead. Think about pushing the bar or dumbbells in a straight line above the middle of your foot.
- As the weight passes your face, gently move your head slightly back and then bring it back under the bar so that, at the top, your arms are straight and the weight is roughly over your ears and midfoot.
- Do not arch your lower back to reach the top. If you must lean back, the weight is probably too heavy.
Step 5: Lock out and breathe
- At the top, straighten your elbows and feel your shoulders, upper back, and core working to hold the weight. Do not shrug your shoulders toward your ears. Keep your neck long.
- Pause for a brief moment and breathe out slowly.
Step 5: Lower the weight and reset
- Lower the weight back to your shoulders with control. As it comes down, soften your knees slightly to absorb the load and keep your core tight.
- Once the weight is back at your shoulders and you feel stable, take a small breath, reset your stance if needed, and repeat for the next repetition.
- Move slowly at first. It is better to do fewer clean and smooth repetitions than many rushed ones with poor form.
Push Press Common Mistakes to Avoid
1. Poor Foot Position
- If your stance is too wide, you may feel wobbly and place extra stress on your knees and lower back. If your feet are too close together, you will feel unstable and have trouble balancing overhead.
- Aim for a stance that is just about shoulder width. Both feet should feel firmly planted on the floor.
2. Choosing a Weight That Is Too Heavy
- If you need to use your lower back or you cannot control the weight on the way down, it is too heavy.
- Start with a weight that you can press overhead for 6 to 8 strict reps without help from your legs. Then reduce that weight slightly for your push press practice. This keeps you safe and helps you learn the movement pattern first.
3. Rushing the Dip
- The dip should be quick and controlled, not a rapid collapse. Dropping too fast can pull your knees forward and strain your joints.
- Think of a small bounce. You bend a little, keep your chest up, then immediately drive back up. If someone watched you from the side, your torso would stay almost vertical.
4. Only Using the Arms
- The push press is not just a shoulder exercise. The power should start from the legs and hips, then move through the core, and finally into the arms.
- Using only your arms and shoulders makes the exercise harder and less effective. Focus on pushing the floor away first, then pressing.
5. Letting the Lower Back Arch
- Leaning back and over-arching the lower back to get the weight overhead is a common mistake. This can cause discomfort or pain in the spine.
- Keep your ribs down, your abs tight, and your glutes gently squeezed. If you cannot keep this position, choose a lighter weight.
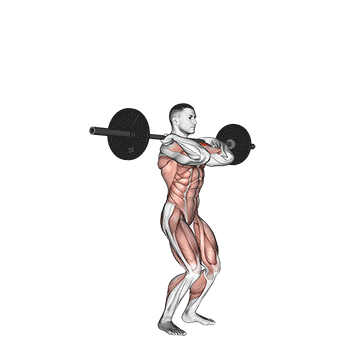
Push Press Muscles Worked
Glutes
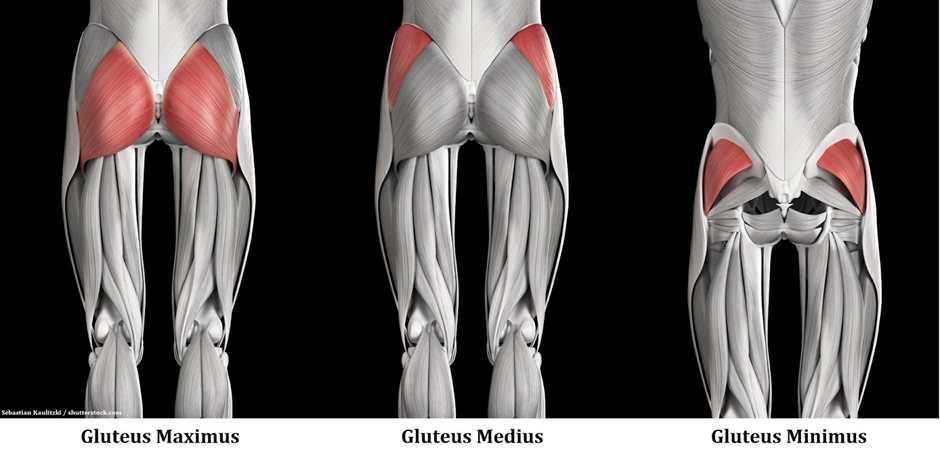
The glutes are the largest and strongest muscle in the human body. The gluteus maximus, gluteus medius, and gluteus minimus make up the gluteal region, popularly known as the buttocks. It is one of the main muscles during different presses.
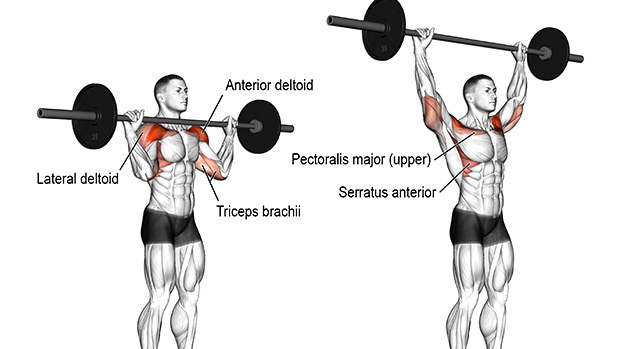
Shoulders
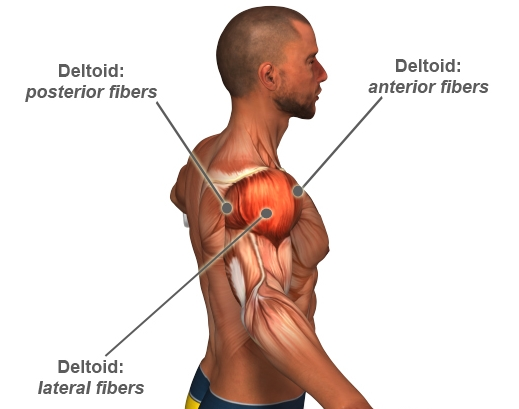
The Deltoid is the primary shoulder muscle used in this exercise. As these are the main muscles involved, this exercise is beneficial for developing strong, bulky shoulders.EMG data reveals that the push press elicits high activation of the anterior deltoid and triceps brachii[2].
Quadriceps
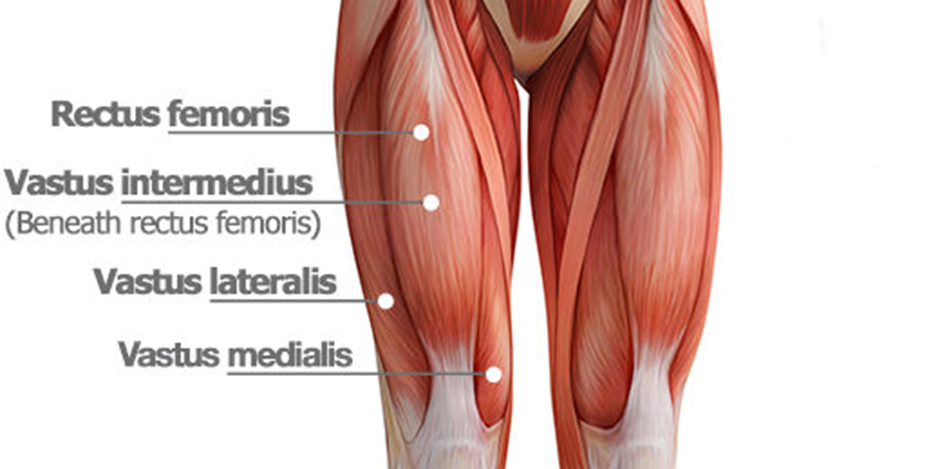
Your thigh has four quadriceps muscles, which are situated in front of it. They comprise the vastus lateralis, medialis, intermedius, and rectus femoris. The rectus femoris, which helps in rip flexion, is the muscle that is mainly used when performing a press.
Benefits of the Push Press
Full Body Strength and Power
Because the push press uses your legs, hips, shoulders, and core at the same time, it helps you build strength across your whole body. The quick dip and drive also train power, which is the ability to produce force quickly.
Better Athletic Performance
Many sports, such as basketball, volleyball, and field events, need you to jump, push, or throw with your whole body. The push press trains similar patterns, so it can help you move faster and more explosively.
Stronger Shoulders and Upper Body
The push press lets you use a bit more weight than a strict overhead press because your legs help the start of the movement. Over time, this can lead to stronger shoulders and triceps, as long as your form stays solid.
Better Coordination and Body Awareness
The push press teaches you how to connect your lower body and upper body. You learn timing, rhythm, and how to keep your body tight and stable while moving a weight overhead. This improves your overall coordination.
Useful Carryover to Daily Life
Any time you need to lift something from chest height to a shelf above your head, the strength and control you build with the push press will help you do it more safely and with less effort.
Push Press Variations
Barbell Push Press
This variant is one of the most popular ones. Take a barbell and place your palms forward at shoulder height. To begin, place your feet shoulder-width apart and budge your knees just a little. To powerfully press the barbell straight above your head, push it up with your legs, rather than just your arms. reset the position for the second rep.
Dumbbell Push Press
Stand straight with dumbells at shoulder height with wrists vertically over your elbow. Bend down and use your legs to push the weights up.
Kettlebell Push Press
This variant can be performed with either one or two kettlebells. You have to hold them in a front rack position. Like all other variations, this also requires keeping your back straight and avoiding unnecessary knee bending.
Single Arm Push Press
The correct foot position is to stand with your legs shoulder wide. Hold a kettlebell in front of your chest, elbow close to your ribs. Then, drive the legs into the ground and extend the arm with weights straight up in the air. Then bring it down to shoulder height for another rep.
Landmine Push Press
This variant is slightly complex as it requires a landmine. Stand with your back straight and your feet shoulder-width apart. Put one hand on the barbell and the other in a relaxed position. After setting up the barbell, exhale deeply before pressing to lockout by flexing the shoulder and extending the elbow. To complete the necessary number of repetitions, slowly descend the barbell from your shoulder to the starting position.
Push Press Alternatives
Seated Dumbbell Shoulder Press
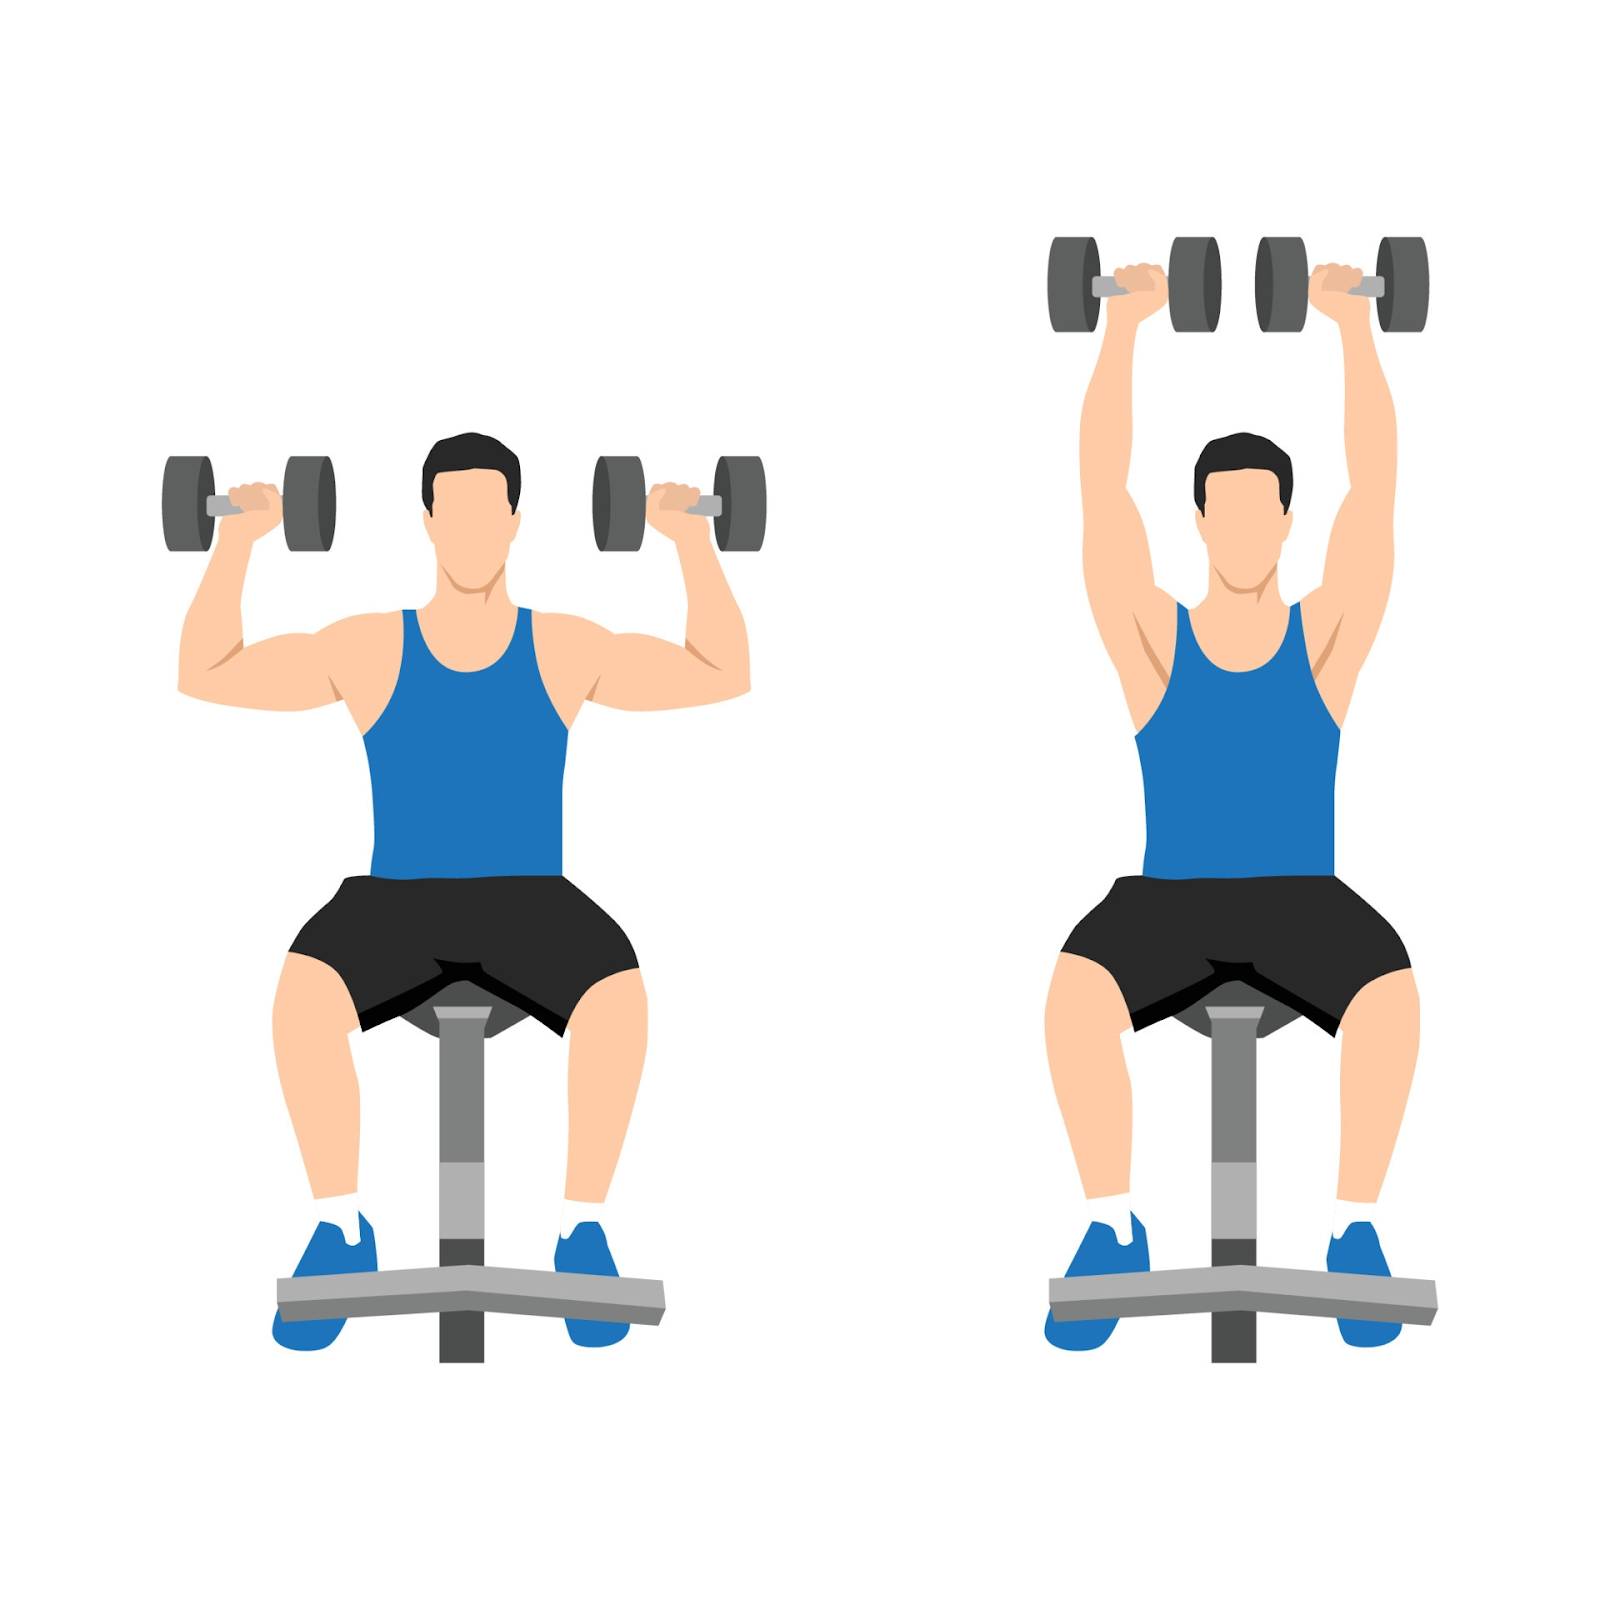
This workout is one of the most popular alternatives. It targets the shoulder muscles to build shoulder strength and mass. sitting down reduces the requirement for core stabilization, so you can concentrate more on pushing the primary muscles only.
Muscle Clean
This alternative also focuses on shoulder muscles as this is incredible power-building training. As the name suggests, it cleans all the muscles that are under the bar and you are only making your upper body muscles work. It allows you to improve your movement and posture before advancing to complex exercises.
Standing Overhead Press
This is also called a strict press. You press the weight overhead without using your legs to create momentum. This is an excellent way to learn control and build a solid base before adding the leg drive of a push press.
Landmine Press
For people with tight or sensitive shoulders, the landmine press can feel more comfortable. You stand facing the landmine, hold the bar at your chest and press it up and away from your body. The angled path often feels easier on the joints and still builds strong shoulders and core.
Safety and Precautions
This weight-training overhead exercise is quite tempting, especially for beginners. You may see people with an ideal physique doing it around you and that entices you to start doing it right away. Keep in mind that this is a high-level exercise with serious risks of injury if not done with full concentration and knowledge.
It is best to start by learning the fundamentals of this exercise as well as the proper stance and posture. Even then, begin by doing it under the guidance of an experienced trainer while using smaller weights. Performing the movements, without weights, in front of the mirror can significantly improve posture and movements.
Never ignore pain
Start light and progress slowly
Use a spotter or safe equipment when possible
Take care of your shoulders and back.
Push Press Vs. Overhead Press
The push press and the overhead press look similar, but they are not exactly the same.
In the push press, you bend your knees and hips slightly, then drive with your legs to help start the weight moving. It trains power and full body coordination. You can usually lift more weight in a push press than in a strict overhead press.
In the overhead press, your legs stay straight and still. Only your upper body and core move the weight. The overhead press is usually better for strict strength building in the shoulders and triceps and is often easier for beginners to learn first.
A simple way to think about it is: the overhead press builds strict strength and control, and the push press builds strength plus power and timing. Both are useful and can be used in the same training plan.
Beginner-Friendly Push Press Workout Example
Here is a simple sample that you can use one or two times per week, once you feel comfortable with overhead pressing. Adjust the weights so that you always feel in control.
Warm-Up
- 5 to 10 minutes of light cardio, such as walking or easy cycling
- Dynamic moves such as arm circles, shoulder rolls, and bodyweight squats for 1 to 2 sets of 10 to 15 reps
Main Workout
- Push Press
3 sets of 3 to 5 repetitions with a light to moderate weight. Rest 60 to 90 seconds between sets. Focus on clean technique, not on lifting the heaviest load. - Seated Dumbbell Shoulder Press or Standing Overhead Press
2 to 3 sets of 6 to 8 repetitions. This reinforces shoulder strength and control. - Row variations such as dumbbell row or lat pulldown
3 sets of 8 to 10 repetitions. This type of exercise balances the pressing work with pulling work for healthy shoulders. - Core exercises such as plank or farmer carry
2 to 3 sets of 20 to 30 second plank holds, or short farmer carries with light to moderate weights.
Finish with gentle stretching for the shoulders, chest, and hips for a few minutes.
Push Press FAQs
Who Should Do the Push Press?
How Many Reps and Sets Should I Do for the Push Press
For general strength and muscle
For basic learning and technique
How Often Can I Do the Push Press
How Can I Safely Increase My Push Press Weight?
- Add one or two more sets with the same weight.
- After you can do 3 or 4 sets of 5 to 6 clean repetitions, add a small amount of weight and drop the reps back down to 3 to 4.
- Avoid making big jumps in weight. Small and steady increases are safer and give better long term results.
Summary
The push press is a fantastic way to work out your legs, hips, shoulders, and core all at once. You can lift more weight over your head and get stronger, more powerful, and more coordinated by doing a small, controlled dip and driving your legs hard.
If you're just starting out, the most important things to remember are to start light, move slowly, practice the technique regularly, and listen to your body. You can build a strong and capable upper body that will help you in sports and everyday life by doing the push press along with some basic pulling and core exercises.
References
- Nakai Y, Kijimuta T, Takeshita Y, et al. Effects of External Abdominal Pressure Support on Dynamic Balance: A Randomized Crossover Study. Sports (Basel). 2023;11(11):217. Published 2023 Nov 7. doi:10.3390/sports11110217
- Snarr RL, Esco MR. Electromyographic comparison of traditional and suspension push-ups. J Hum Kinet. 2013;39:75-83. Published 2013 Dec 31. doi:10.2478/hukin-2013-0070
