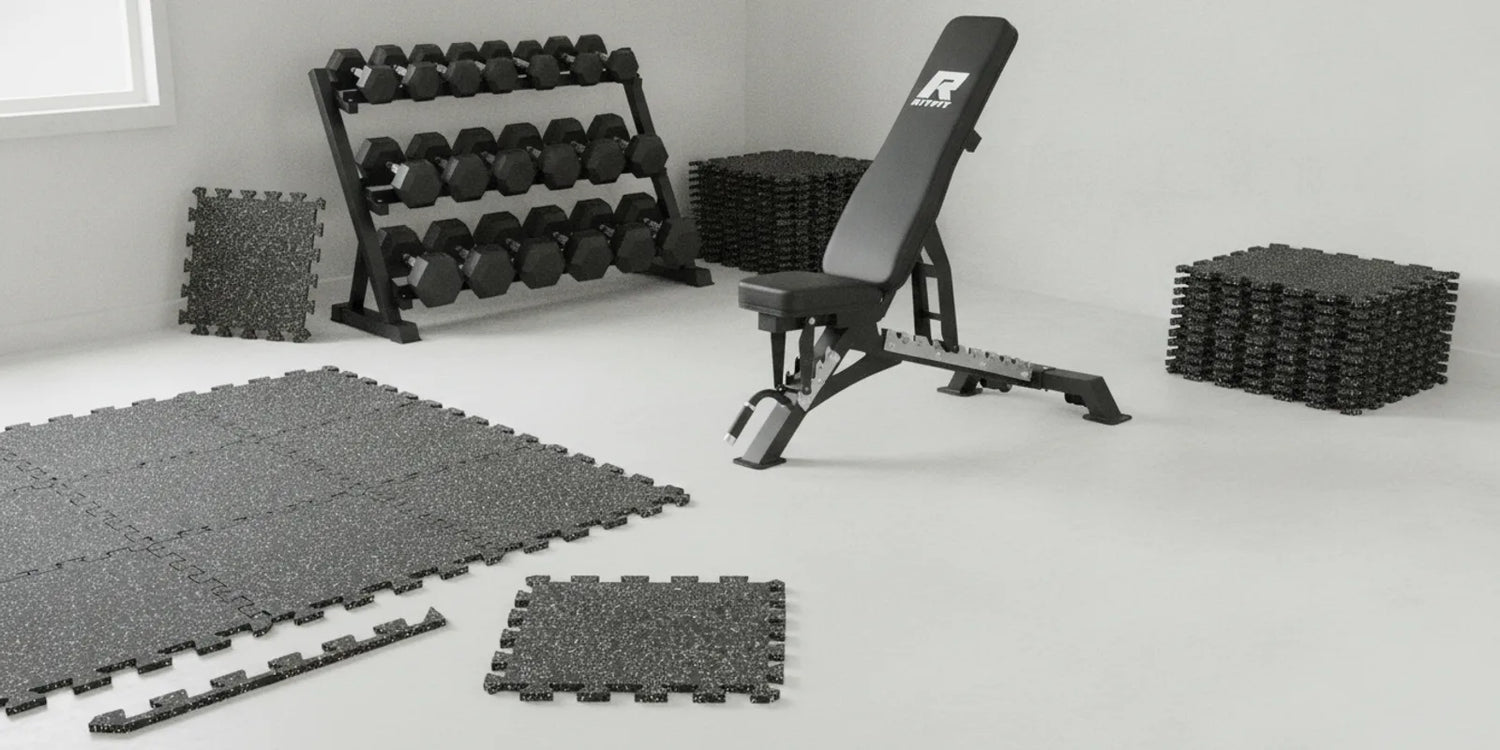
Installing gym flooring tiles is a manageable DIY project once you understand the subfloor, the layout, and the connection method. This guide walks you through every step of installing interlocking or glue-down rubber gym tiles, from measuring the room to cutting edge tiles and finishing the perimeter.
You will learn which thickness and installation method suit your training style, how to prepare concrete or wooden subfloors, and how to avoid the mistakes that cause tiles to rock, buckle, or shift. The result is a durable, professional-looking floor you can build in an afternoon.
Quick Answer: To install gym flooring tiles, prepare a clean, dry, level subfloor, acclimate the tiles for 24 to 48 hours, find the room center with chalk lines, and lay interlocking tiles outward from that point while leaving an expansion gap around the walls. Interlocking tiles need no adhesive; glue-down suits permanent, high-traffic floors.
Key Takeaways
- Prepare first: The subfloor must be clean, dry, and level within about 1/8 inch over 10 feet, or rubber tiles will telegraph every bump.
- Pick thickness by use: General fitness rooms work with 10 to 20 mm tiles, while heavy free-weight zones call for 20 to 30 mm or more.
- Work from the center: Snap chalk lines to find the room center and dry-lay before committing, so border cuts stay even.
- Respect the gap: Leave roughly 1/4 inch around walls for expansion and finish exposed edges with ramped edge strips.
- Interlock or glue: Interlocking tiles are removable and adhesive-free; glue-down suits permanent, high-traffic floors and needs 24 hours to cure.
Why Does Gym Flooring Installation Matter?
Getting gym flooring installation right matters because the floor protects both your subfloor and your equipment from damage during training. A properly prepared and installed surface also makes your training space more comfortable to use every day.
Research shows that building and sustaining a home training habit depends on repeatable routines more than motivation alone, and a dedicated, safe space lowers everyday barriers to that routine.[1] One study found that self-efficacy, or confidence in your ability to train, is a key factor in whether people form and maintain an exercise habit, while adherence research suggests confidence can take a year or longer to build, so reducing friction such as a safe floor helps you stay consistent.[2][3]
- Equipment protection: A thick rubber surface absorbs impact from dropped dumbbells and barbells.
- Subfloor protection: Rubber tiles stop heavy equipment feet and dropped loads from denting concrete or wood.
- Comfort and noise: Rubber dampens noise and cushions standing work, stretching, and floor movements.
- Routine support: A safe, finished space removes the everyday excuses that stop people from training consistently.
What Tools Do You Need to Install Rubber Gym Tiles?
To install rubber gym tiles you need a tape measure, chalk line, straight edge, sharp utility knife, rubber mallet, and a broom or vacuum for prep. Add self-levelling compound if the subfloor has dips and a two-component polyurethane adhesive if you plan to glue tiles down.
- Measuring and marking: Tape measure, chalk line, and chalk or pencil for marking cut lines.
- Cutting: Sharp utility knife with spare blades and a long metal straight edge or drywall T-square.
- Seating: Rubber mallet for tapping interlocking tabs firmly into place.
- Subfloor prep: Broom, vacuum, and self-levelling compound for filling dips and high spots.
- Glue-down only: Notched trowel, rubber contact adhesive, and a seam roller.
You can start with the tiles themselves, such as the Rubber High Density Interlocking Gym Flooring Mats Tiles, and build the rest of your tool list around their tile size and thickness.
How Do You Choose the Right Rubber Tile and Installation Method?
Choose tile thickness by how you train: 10 to 20 mm tiles suit general fitness and light use, while heavy free-weight zones with dropped loads call for 20 to 30 mm or more. Choose interlocking tiles for removable, adhesive-free floors and glue-down tiles for permanent, high-traffic areas.
- Free-weight or dropped-load zone: Thicker tiles absorb more impact and resist indentation, so pair them with heavy gear like the RitFit Hex Rubber Dumbbells.
- Cardio, yoga, or light-use room: Thinner 10 to 20 mm tiles keep the budget down and still cushion standing work.
- Rented or temporary space: Interlocking tiles can be lifted and relaid, which protects your deposit.
- Garage or concrete subfloor: Confirm the slab is dry, and use a two-component polyurethane adhesive if you want a permanent floor.
- Upper floor on wood: Check floor joist support and use lighter interlocking tiles to avoid excessive weight.
Compare exact thickness and tile dimensions in the Rubber Flooring Gym Mats Technical Specification, and browse the full Mats Flooring range to match your room size.
How Do You Prepare a Concrete or Wooden Subfloor for Rubber Tiles?
Prepare the subfloor by cleaning away all dust and debris, confirming it is level within about 1/8 inch over 10 feet, and making sure it is dry before you lay anything. Fill dips with self-levelling compound, sand high spots, and re-secure loose wooden boards.
- Clean: Sweep and vacuum to remove grit and small stones that can show through tiles.
- Level: Check with a straight edge; gaps of more than about 2 mm mean the surface needs attention.
- Dry: Rubber tiles over damp concrete can trap moisture and develop mold underneath.
- Wood specifics: Re-nail any boards that squeak or move before tiling.
- Repair: Fill cracks with floor repair mortar and let it cure completely.
Why Do Rubber Tiles Need to Acclimate Before Installation?
Rubber tiles need to acclimate in the installation room for 24 to 48 hours at room temperature so they reach dimensional stability before you lay them. Installing cold tiles in a warm room can cause them to shrink and open gaps later.
- Unbox in the room: Remove tiles from cartons and stack them loosely for air circulation.
- Give it time: 24 to 48 hours at room temperature is a common manufacturer recommendation.
- Mix batches: Blend tiles from multiple boxes so color and shade stay consistent across the floor.
How Do You Plan the Layout of Rubber Gym Tiles?
Plan the layout by measuring the room, snapping chalk lines between opposite wall midpoints to find the center, and dry-laying tiles outward to check the fit before you commit. Adjust the starting point if border tiles would be narrower than half a tile.
- Measure: Record length and width and order about 5 to 10 percent extra for cuts and waste.
- Find the center: Snap two chalk lines that cross at the middle of the room.
- Dry-lay: Lay tiles in one quadrant without adhesive to confirm coverage.
- Balance borders: Shift the start by half a tile if a wall would end with a thin strip.
How Do You Install Interlocking Rubber Gym Tiles?
Install interlocking rubber gym tiles by starting at the center chalk-line intersection, working outward in quadrants, and tapping each connection fully with a rubber mallet. Leave an expansion gap of about 1/4 inch around the walls and stagger joints between rows.
- Start at the center: Place the first tile at the chalk-line cross and work outward in quadrants.
- Seat connections: Connect at a slight angle, press down, then tap with a mallet so tabs seat fully.
- Stagger joints: Offset seams in a brick pattern to improve stability and appearance.
- Leave the gap: Keep about 5 to 10 mm between tiles and walls for expansion.
- Add edge strips: Ramp strips create a clean, trip-free transition at exposed edges.
When and How Do You Glue Down Rubber Gym Tiles?
Glue down rubber gym tiles when you need a permanent, immobile floor under heavy traffic, large areas, or rolling equipment, using a two-component polyurethane adhesive and a notched trowel. Work in small sections, press tiles into place, roll the surface, and let it cure for about 24 hours.
- When to glue: Large rooms, commercial use, heavy loads, or equipment that shifts loose-laid tiles.
- Adhesive: Use a two-component polyurethane (PU) product made for rubber to concrete.
- Work small: Spread adhesive for only a few tiles at a time so it stays workable.
- Place, do not slide: Lower each tile into position and roll the surface for full contact.
- Cure: Avoid heavy traffic for about 24 hours, or follow the adhesive instructions.
How Do You Cut Rubber Tiles to Fit Walls and Obstacles?
Cut rubber tiles by marking the cut line, clamping a metal straight edge along it, and scoring with a sharp utility knife in several passes before snapping along the line. For thick tiles use a jigsaw, and for pipes or columns make a cardboard template first.
- Straight cuts: Score three or more passes on the surface and bend to snap cleanly.
- Thick tiles: Use a jigsaw with a coarse blade for 20 mm and thicker rubber.
- Obstacles: Transfer a cardboard template to the tile for columns, drains, and pipes.
- Cut slightly short: Leave 3 to 5 mm at walls so expansion does not buckle the floor.
What Common Mistakes Should You Avoid When Installing Rubber Tiles?
The most common rubber tile installation mistakes are skipping subfloor prep, starting from a wall instead of the center, leaving no expansion gap, and not seating interlocking connections fully with a mallet. Any of these can make tiles rock, lift, or buckle later.
- Dirty or uneven subfloor: Dips and bumps show through thin tiles and make them rock.
- Unbalanced layout: Starting from a wall leaves an awkward thin strip at the far end.
- No expansion gap: A floor with no gap can buckle in warm weather.
- Under-seated connections: Half-seated tabs cause tiles to separate during use.
- Wrong adhesive: General floor adhesive does not work well on rubber; use a PU product.
- Wet subfloor: Tiles over damp concrete can lift, so check moisture before laying.
How Do You Clean and Maintain Rubber Gym Flooring Tiles?
Clean rubber gym flooring tiles by sweeping or vacuuming regularly and damp-mopping with a neutral pH detergent diluted per the instructions. Avoid excess water, bleach, and abrasive pads because interlocking tiles are permeable.
- Daily: Sweep or vacuum to remove dust that can scratch the surface.
- Deep clean: Damp-mop with neutral pH cleaner and rinse with clean water.
- Stains: Scrub with a nylon brush and rinse thoroughly.
- Replace singles: Damaged interlocking tiles can be lifted and replaced individually.
- Move equipment: Use protective mats under heavy machines to spread concentrated loads.
A well-laid floor pays for itself in the equipment it protects, which is why planning the subfloor and layout matters so much. For more guidance on choosing a floor before you install, read How To Choose The Best Home Gym Flooring, and see how real training spaces use these setups in the Cathy Dings Gym collection.
"The floor is the foundation of your gym. Getting it right with proper mats under your equipment protects your investment in both the floor and the equipment itself."
Jeff Cavaliere, MSPT, CSCS, Athlean-X
FAQs About Gym Flooring Tiles
How long does it take to install rubber gym flooring tiles?
Most DIYers finish an interlocking rubber tile floor in a single afternoon, and a typical 15 to 25 square meter room takes around 3 to 5 hours including subfloor cleaning, layout planning, and cutting edge tiles. Glue-down installations run slower because adhesive must be spread in sections and left to cure before heavy use.
Do I need adhesive for interlocking rubber gym tiles?
No. Interlocking tiles connect through puzzle-edge or tab-and-hole systems and can be dry-laid without adhesive, which also lets you lift and relaid them in a rental space. Choose glue-down only for permanent floors under heavy traffic, large areas, or rolling equipment where you need maximum stability.
Can I install rubber gym tiles over concrete?
Yes, concrete is one of the most common subfloors for rubber gym tiles, so first confirm the slab is clean, dry, level, and free of dust and oil, and check moisture levels before laying. For loose-lay, heavy tiles sit fine, while a two-component polyurethane adhesive suits permanent floors on concrete.
How thick should my rubber gym flooring tiles be?
It depends on how you train: for general fitness and light use, 10 to 20 mm tiles are usually enough, while dropped heavy dumbbells or Olympic lifts call for 20 to 30 mm or more. Thicker rubber absorbs more impact, protects the subfloor, and better resists indentation from equipment feet.
Do I need to leave an expansion gap around the walls?
Yes, leave a small expansion gap around the perimeter so the floor can expand and contract with temperature changes. Most manufacturers recommend roughly 1/4 inch or 5 to 10 mm at each wall, then cover exposed edges with ramped edge strips for a clean, trip-free finish.
Conclusion
A correct installation turns a bare floor into a training surface you can rely on for years. Measure the room, prepare the subfloor, match tile thickness to how you train, and lay tiles from the center with an expansion gap around the walls.
Interlocking tiles keep the job adhesive-free and removable, while glue-down suits permanent, high-traffic spaces. For finishing inspiration, see real setups in the Jake Millers Gym collection, and check current pricing at RitFit sales.
Disclaimer
Safety and installation advice in this guide is provided for general information and does not replace the manufacturer's instructions for your specific tiles or the advice of a qualified professional. Always follow the product manual, use personal protective equipment when cutting rubber or handling adhesive, and consult a structural engineer before installing heavy flooring on an upper floor.
References
1. Ma H, Wang A, Pei R, Piao M. Effects of habit formation interventions on physical activity habit strength: meta-analysis and meta-regression. Int J Behav Nutr Phys Act. 2023;20(1):109. PMCID: PMC10498635
2. Stojanovic M, Fries S, Grund A. Self-Efficacy in Habit Building: How General and Habit-Specific Self-Efficacy Influence Behavioral Automatization and Motivational Interference. Front Psychol. 2021;12:643753. PMCID: PMC8137900
3. Alonso WW, Kupzyk K, Norman J, et al. Negative Attitudes, Self-efficacy, and Relapse Management Mediate Long-Term Adherence to Exercise in Patients With Heart Failure. Ann Behav Med. 2021;55(10):1031-1041. PMCID: PMC8489305