


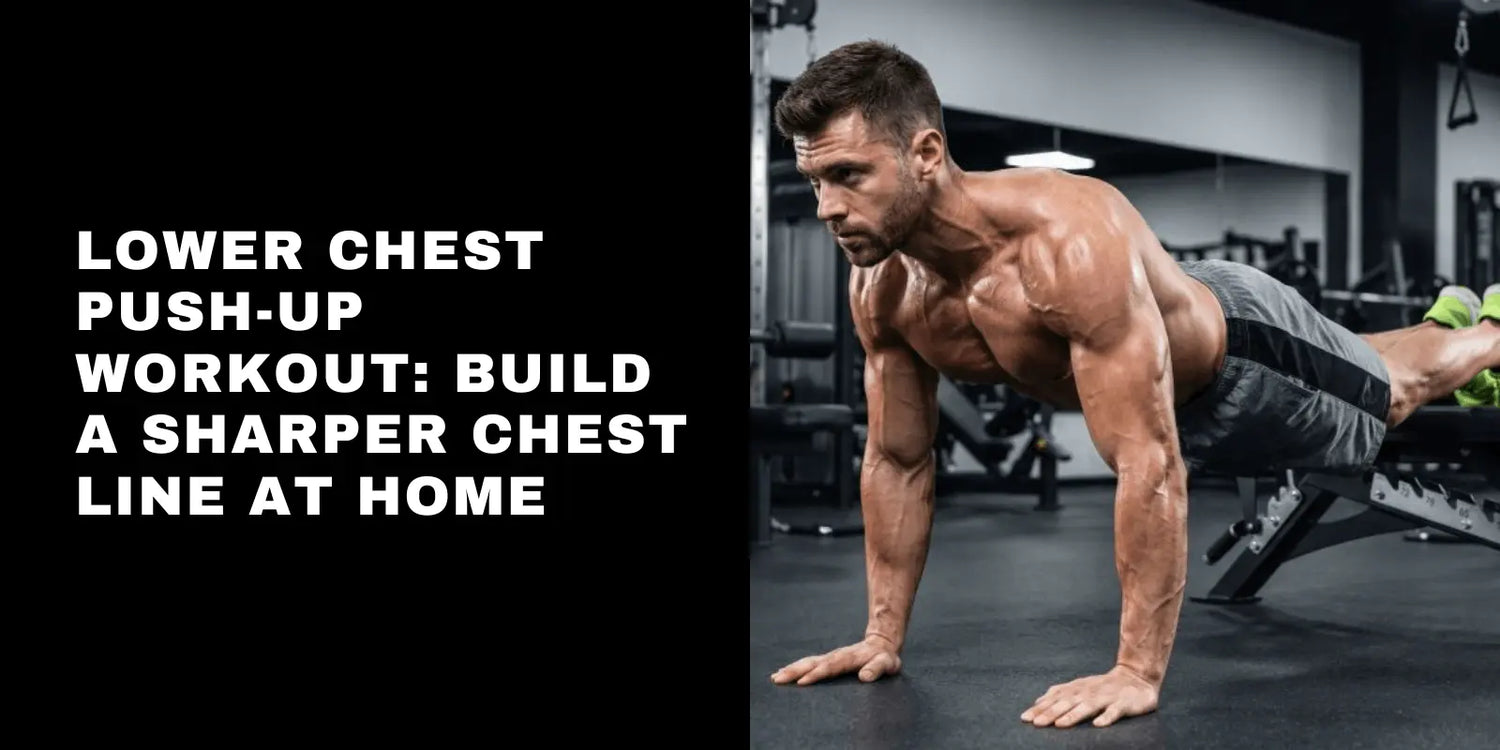
Lower chest push ups can help build a stronger and more defined chest when you use the right angle, full range of motion, and progressive overload. You cannot fully isolate the lower chest, but you can bias the lower and outer pec area with smart push up variations, controlled reps, and consistent weekly volume.
Table of Contents
- Why the Lower Chest Looks Different
- Decline Push Ups and the Lower Chest Question
- Two Rules That Make Lower Chest Push Ups More Effective
- Quick Warm Up in Three to Five Minutes
- Best Push Up Variations for Lower Chest Bias
- The 6 Week Lower Chest Push Up Plan
- Lower Chest Push Up Form Checklist
- Common Problems and Fast Fixes
- Nutrition and Recovery Tips
Key Takeaways
- Lower chest training is about bias, not isolation: Push ups train the whole chest, but angle and form can shift emphasis for many lifters.
- Hands elevated push ups are often the best starting point: They help beginners feel the chest while reducing wrist and shoulder stress.
- Decline push ups are not a guaranteed lower chest fix: Feet elevated variations often increase shoulder and upper chest demand.
- Full range of motion matters: Controlled bottom range reps usually create better tension than fast half reps.
- Progression drives results: Lower the hand height, slow the tempo, add pauses, or add load as your strength improves.
Why the Lower Chest Looks Different
The lower chest usually refers to the lower edge of the pectoralis major, where the chest meets the upper abs. This area looks more defined when you combine enough chest muscle, good posture, and a body fat level that allows the lower pec line to show.
The pectoralis major is one large fan shaped muscle, so push ups cannot isolate one small section completely. You can still bias different fibers by adjusting body angle, arm path, grip width, range of motion, and loading.
A common reason the lower chest looks underdeveloped is that most people repeat the same flat push up pattern for months. Push up research shows that changing stability, loading, and setup can alter upper body muscle activation, which supports using multiple push up variations instead of relying on only one version.[1]
Definition also depends on nutrition and recovery. You can build the chest with push ups, but the lower chest line will be less visible if body fat remains higher.
Decline Push Ups and the Lower Chest Question
Decline push ups are useful, but they are not automatically the best lower chest exercise. Feet elevated push ups often shift more challenge toward the shoulders and upper chest because the body angle changes the pressing path.
- Feet elevated decline push ups: Use these for harder bodyweight pressing once your standard push up is strong and pain free.
- Hands elevated incline push ups: Use these to build volume, control the bottom range, and feel the chest with less joint stress.
- Deficit push ups: Use these when you can control a deeper stretch without shoulder discomfort.
Push ups can still be a serious strength tool when they are loaded and progressed. Research comparing loaded push ups and bench press found similar upper body muscle activation patterns at comparable loads in trained men, which supports progressive push ups as a valid chest strength option.[2]
For more machine based chest training ideas, see the RitFit Smith machine chest workout guide. It can help you compare bodyweight pressing with more stable loaded chest exercises.
Two Rules That Make Lower Chest Push Ups More Effective
Rule 1: Press down and forward instead of shrugging upward
The best lower chest push up cue is to press the floor away while keeping the ribs down and shoulders stable. This helps keep tension on the chest instead of turning every rep into a front shoulder dominant movement.
- Body line: Keep your ribs down, glutes tight, and hips aligned from shoulders to ankles.
- Elbow path: Keep elbows about 30 to 60 degrees from the torso instead of flaring straight out.
- Pressing cue: Think about bringing your upper arms toward your ribs as you press.
Rule 2: Use a full range of motion and control the bottom
The bottom of the push up is important because the chest is under high tension when the rep is controlled. A narrative review on stretch mediated hypertrophy explains how mechanical tension in lengthened positions may contribute to muscle growth adaptations.[3]
- Depth: Lower until your chest comes close to your hands or the elevated surface.
- Pause: Hold the bottom for half a second if you tend to bounce.
- Control: Use a 2 to 3 second lowering phase when you want more tension without adding equipment.
Quick Warm Up in Three to Five Minutes
A short warm up prepares your wrists, shoulders, shoulder blades, and chest for better push up mechanics. Use this before every lower chest push up session.
- Wrist prep: Do gentle wrist rocks on all fours for 30 to 45 seconds. Use fists or handles if your wrists are sensitive.
- Scapular push ups: Perform 8 to 12 reps with straight arms. Let the shoulder blades move without bending the elbows.
- Easy incline push ups: Do 8 to 10 light reps on a bench, box, or step. Focus on smooth reps and chest tension.
- Shoulder circles: Move slowly for 30 to 45 seconds. Stop if the shoulder feels sharp or unstable.
For a stable hands elevated setup, a strong adjustable bench can make progression easier. The RitFit GATOR Adjustable Weight Bench can support incline push up setups, dumbbell work, and future pressing progressions.
Best Push Up Variations for Lower Chest Bias
Hands Elevated Chest Bias Push Up
The hands elevated chest bias push up is the best starting point for most beginners because it lowers difficulty while improving control. Use a sturdy bench, box, step, or stable elevated surface.
- Setup: Place hands slightly wider than shoulder width on the elevated surface.
- Execution: Lower your chest toward your hands while keeping ribs down and glutes tight.
- Progression: Lower the hand height over time until you can perform strict floor push ups.
For more bench based training options, visit the RitFit weight benches collection. A stable bench can help bridge the gap between beginner incline push ups and harder floor variations.
Lean Forward Incline Push Up
The lean forward incline push up increases chest demand without requiring extra load. Move your shoulders slightly forward over your hands while keeping the body straight.
- Setup: Place hands on a bench or step and lean from the ankles, not the lower back.
- Execution: Lower under control and press through the base of your palms.
- Best use: Add this after standard incline push ups feel too easy.
Wide Grip Incline Push Up
The wide grip incline push up can help some lifters feel more outer chest tension. Keep the grip moderate because going too wide may irritate the shoulders.
- Setup: Place hands wider than shoulder width while keeping forearms close to vertical at the bottom.
- Execution: Lower slowly and avoid letting the shoulders roll forward.
- Safety cue: Narrow your hand position if you feel pinching in the front of the shoulder.
Deficit Push Up
The deficit push up increases range of motion and can create a stronger chest stretch. Only use this variation if your shoulders feel stable and pain free.
- Setup: Place hands on two stable blocks, push up handles, or dumbbells.
- Execution: Lower slightly below hand level while keeping shoulder blades controlled.
- Progression: Add a brief bottom pause before increasing reps or load.
If you prefer using handles, a pair of dumbbells can reduce wrist extension during deficit push ups. See the RitFit Hex Rubber Dumbbells for a simple home gym option that also supports rows, presses, and accessory work.
Dip Pattern Option
Dips are not push ups, but they can train a lower chest pressing pattern when done with control. Skip them if they cause shoulder pain or force you into an uncomfortable bottom stretch.
- Setup: Use stable parallel bars or a secure dip station.
- Execution: Lean slightly forward while keeping the chest lifted and ribs controlled.
- Stop point: Stop before your shoulders feel pinched or unstable.
Feet Elevated Decline Push Up
The feet elevated decline push up is best used as a harder strength variation, not as the only lower chest exercise. Many lifters feel this version more in the upper chest and shoulders.

- Setup: Place feet on a bench or step and hands on the floor.
- Execution: Keep the body straight and lower with control.
- Best use: Rotate it into the plan when standard floor push ups are already strong.
The 6 Week Lower Chest Push Up Plan
This plan uses 3 nonconsecutive training days per week to build strength, volume, and chest control. Most sets should stop with 1 to 3 reps in reserve so form stays clean.
Training volume matters for muscle growth, and a systematic review suggests that 12 to 20 weekly sets per muscle group may be a useful hypertrophy range for trained young men.[4] Beginners should start lower and increase only when recovery stays strong.
Progression Rules
Progress when you hit the top of the rep range on all sets for two sessions with good form. Make only one progression at a time so you can track what works.
- Lower hand height: Move from a high bench to a lower step.
- Slow the eccentric: Lower for 3 seconds on each rep.
- Add a pause: Hold the bottom position for 1 second.
- Add load: Use a weighted vest or secure backpack only when bodyweight reps are stable.
Day 1: Lower Chest Bias and Weekly Volume
Day 1 builds your main lower chest push up base with controlled reps and enough total work. Keep every rep smooth and stop before your shoulders take over.
- Hands elevated chest bias push up: 4 sets of 8 to 15 reps.
- Wide grip incline push up: 3 sets of 8 to 12 reps.
- Deficit push up or standard push up: 3 sets of 6 to 10 reps.
- Mechanical drop set finisher: Do low incline push ups near failure, then higher incline push ups near failure, then wall push ups for 15 to 25 reps.
Day 2: Strength Focus and Pressing Control
Day 2 makes the push up pattern harder while keeping shoulder comfort as the priority. Use longer rest periods and cleaner reps.
- Feet elevated decline push up: 5 sets of 5 to 8 reps if pain free.
- Lean forward incline push up: 4 sets of 6 to 10 reps with a bottom pause.
- Close grip push up: 3 sets of 8 to 12 reps for triceps support.
- Plank: 2 to 3 sets of 30 to 60 seconds to improve body line control.
Day 3: Pump Work and Chest Feel
Day 3 adds controlled volume and helps you practice chest tension from different angles. Keep the pace steady and avoid rushing the bottom position.
- Archer push up: 4 sets of 5 to 8 reps per side, using an incline if needed.
- Hands elevated chest bias push up: 3 sets of 10 to 20 reps.
- Light deficit push up: 2 sets of 8 to 12 reps.
- 10 minute density block: Alternate 8 incline push ups and 8 standard or knee push ups, resting as needed.
When bodyweight push ups stop feeling challenging, add accessory work through the RitFit dumbbells collection. Dumbbell presses, fly style movements, and rows can help balance your upper body training.
Lower Chest Push Up Form Checklist
Good form makes lower chest push ups safer and more effective. Use this checklist before adding harder variations or extra load.
- Hands: Press evenly through the palm and avoid collapsing into the wrists.
- Elbows: Keep elbows about 30 to 60 degrees from the torso.
- Shoulders: Keep shoulders stable and avoid shrugging at the top.
- Body line: Keep ribs down, glutes tight, and hips from sagging.
- Range: Bring the chest close to the hands without bouncing.
- Breathing: Inhale as you lower and exhale as you press.
Common Problems and Fast Fixes
I feel it in my shoulders, not my chest
Raise your hand height and slow down each rep. This usually reduces shoulder strain and makes it easier to feel the chest.
- Fix 1: Use a higher incline for 2 to 3 weeks.
- Fix 2: Bring elbows slightly closer to your sides.
- Fix 3: Reduce decline push ups until shoulder comfort improves.
My wrists hurt during push ups
Use a wrist friendly setup before increasing volume. Handles, fists, or dumbbells can reduce wrist extension for many lifters.
- Fix 1: Warm up wrists longer before working sets.
- Fix 2: Try dumbbells as neutral grip handles.
- Fix 3: Use incline push ups to reduce load on the hands.
For handle style training tools and cable attachments, browse the RitFit gym accessories collection. The right setup can make high volume home training more comfortable.
I can do many reps, but my chest is not growing
Stop chasing endless reps and make the exercise harder. Muscle growth needs progressive overload, enough hard sets, and recovery.
- Fix 1: Add a slower lowering phase.
- Fix 2: Add a bottom pause.
- Fix 3: Add load only after strict reps are easy.
Nutrition and Recovery Tips for Better Lower Chest Definition
Training builds the chest, but nutrition and recovery help make the results visible. Keep your plan simple enough to repeat for months.
- Protein: Aim for a consistent daily protein habit to support repair and growth. A large meta analysis found that protein supplementation can support resistance training induced gains in strength and muscle mass in healthy adults.[5]
- Sleep: Prioritize 7 to 9 hours when possible because poor sleep can reduce training performance and recovery.
- Rest days: Keep at least 48 hours between hard chest sessions if soreness or performance drop is high.
- Body composition: Use a moderate calorie deficit if definition is the main goal. Avoid crash dieting because performance should remain stable or gradually improve.
If you want to progress beyond push ups, the RitFit GORILLA Chest and Shoulder Press Machine adds a more stable loaded pressing option for home gyms. You can also compare full body cable training ideas in the Smith machine with cable system workout guide.
FAQs
Can lower chest push ups really build the lower chest?
Yes. Lower chest push ups can help build the chest when they use full range of motion, progressive overload, and enough weekly volume. They cannot fully isolate one chest section, but smart incline, deficit, and controlled push up variations can bias the lower chest for many lifters.
Which lower chest push up is best for beginners?
The best lower chest push up for most beginners is a hands elevated chest bias push up. It lets you use a comfortable angle, better shoulder control, and enough reps to build volume before progressing to lower surfaces, deficit push ups, or added load.
Do decline push ups work the lower chest?
Yes. Decline push ups work the chest, but they are not always the best lower chest choice. Because your feet are elevated, many lifters feel more upper chest and shoulder demand, so decline push ups should be used as a strength variation, not the only solution.
How often should I train lower chest push ups?
Most people should train lower chest push ups two to three times per week. This frequency gives enough practice and volume while leaving time for recovery. Keep at least one rest day between hard sessions if soreness, shoulder fatigue, or performance drop becomes noticeable.
Should I do lower chest push ups to failure?
No. Most working sets should stop with one to three reps in reserve. Going to failure too often can reduce form quality and irritate shoulders or wrists. Save near failure work for the final finisher set, and only when your reps stay controlled.
Why do I feel lower chest push ups in my shoulders?
You usually feel lower chest push ups in your shoulders because the angle, elbow path, or depth is not controlled. Raise your hands, bring elbows slightly closer, slow the lowering phase, and avoid shrugging. If pain feels sharp, stop and choose an easier variation.
Can I build lower chest definition without gym machines?
Yes. You can build lower chest definition without machines by combining progressive push ups, enough weekly sets, protein, sleep, and body fat management. Machines can help add load later, but they are not required for beginners who train consistently with good form.
How long does it take to see lower chest push up results?
Most lifters notice better control and strength within two to four weeks. Visible lower chest changes usually take six to twelve weeks or longer, depending on training consistency, nutrition, recovery, and starting body fat level. Track reps, form, and photos instead of judging daily.
Conclusion
Lower chest push ups work best when you treat them as a progression system, not a single magic exercise. Start with hands elevated push ups, build clean volume, add harder variations gradually, and support the process with protein, sleep, and consistent recovery.
Disclaimer: This article is for general educational purposes only and is not medical advice. If you have shoulder, wrist, elbow, neck, back, chest pain, recent injury, surgery, numbness, tingling, dizziness, or unexplained weakness, consult a qualified clinician before training. Stop any exercise that causes sharp pain or unstable joint discomfort.
How This Guide Was Created
This guide was built from exercise programming principles, peer reviewed research, and practical home training progressions. The goal is to help readers train safely with clear form cues, realistic expectations, and no exaggerated promise of spot reduction or perfect muscle isolation.
References
- Calatayud J, Borreani S, Colado JC, Martin F, Rogers ME, Behm DG, et al. Muscle activation during push ups with different suspension training systems. J Sports Sci Med. 2014;13(3):502-510.
- van den Tillaar R, Ball N. Push ups are able to predict the bench press 1 RM and constitute an alternative for measuring maximum upper body strength based on load velocity relationships. J Hum Kinet. 2020;73(1):7-18. doi:10.2478/hukin-2019-0133
- Warneke K, Lohmann LH, Lima CD, Hollander K, Konrad A, Zech A, et al. Physiology of stretch mediated hypertrophy and strength increases: a narrative review. Sports Med. 2023;53(11):2055-2075. doi:10.1007/s40279-023-01898-x
- Baz-Valle E, Balsalobre-Fernandez C, Alix-Fages C, Santos-Concejero J. A systematic review of the effects of different resistance training volumes on muscle hypertrophy. J Hum Kinet. 2022;81(1):199-210. doi:10.2478/hukin-2022-0017
- Morton RW, Murphy KT, McKellar SR, Schoenfeld BJ, Henselmans M, Helms ER, et al. A systematic review, meta analysis and meta regression of the effect of protein supplementation on resistance training induced gains in muscle mass and strength in healthy adults. Br J Sports Med. 2018;52(6):376-384. doi:10.1136/bjsports-2017-097608


