


Table of Contents
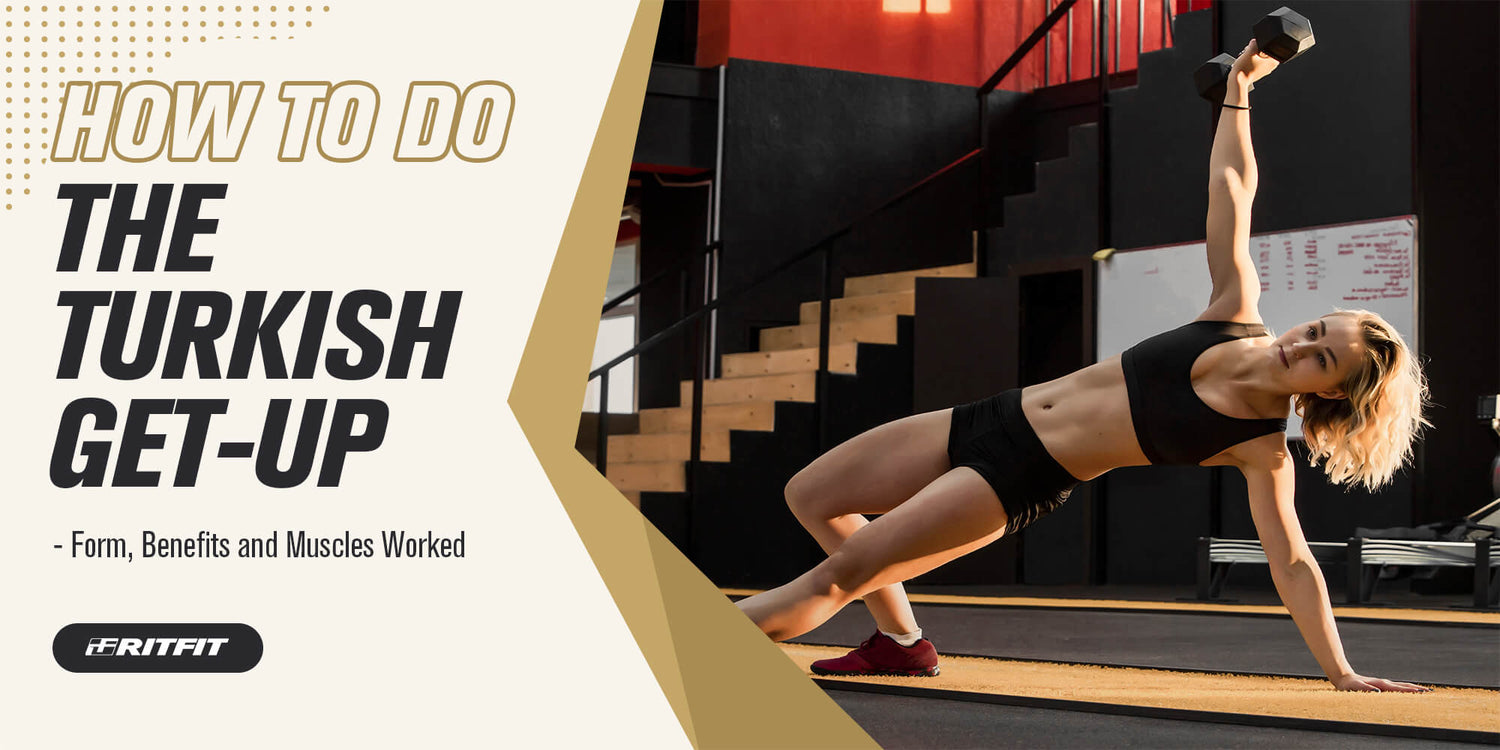
Stability and mobility are what let you squat, press, run, and get off the floor without feeling stiff or fragile. When one of them falls behind, something else in your body usually has to “pay the price” in the form of aches, compensations, or injuries.
The Turkish get-up is a slow, technical, full-body exercise that trains this stability–mobility balance in a single movement. You start lying on the floor, stand up while supporting a weight overhead, then return to the ground under full control. Along the way, your shoulders, core, hips, and legs all have to work together.
As a sports-medicine and strength-coaching tool, I like the Turkish get-up because it doubles as both an exercise and an assessment. It shows you where you lack control, exposes hidden weaknesses, and teaches you how to safely “own” positions that protect your joints in daily life and heavier barbell lifts.
In this guide, we’ll break down the movement step by step, walk through common mistakes, explain the major muscles and benefits, and show you how to progress it safely—whether you’re a beginner, a home-gym lifter, or an advanced athlete.
What is a Turkish Get-up?
The Turkish get-up is a compound, multi-step exercise where you move from lying on your back to standing up and then back down again while balancing a weight straight above your shoulder.
Every phase of the movement demands coordinated work from your shoulder, core, hips, and legs. You roll to your side, post up on an elbow and hand, lift into a bridge, sweep into a half-kneeling lunge, stand tall, and then reverse the path with the same control.
Because the weight stays stacked over your shoulder the entire time, the exercise acts like a moving stability test. Any lack of shoulder control, core stiffness, or hip mobility shows up immediately. For many people, the Turkish get-up is the first time they discover how hard it actually is to get off the floor under load—and how much better they can move after practicing it.
How to Do a Turkish Get-up (5 Simple Steps)
Step 1: Set up on your back and press the weight
Lie on your back with the kettlebell or dumbbell beside your right shoulder. Roll onto your side, grab it with both hands, then roll back so you’re on your back and press it straight up over your chest. Bend your right knee with your foot flat, extend your left leg out at about 30–45 degrees, and place your left arm on the floor at a similar angle. Keep your wrist neutral, elbow locked, and knuckles pointed to the ceiling.
Step 2: Roll to your elbow, then to your hand
Brace your core, drive your right foot into the floor, and roll onto your left side, coming up onto your left elbow (don’t yank with your neck). From there, press the floor away and straighten your left arm so your hand is on the ground behind you and your chest is tall. Keep your eyes on the weight and your right arm vertical.
Step 3: Bridge and sweep into half kneeling
Press firmly into your right foot and left hand, squeeze your right glute, and lift your hips into a strong bridge. With your hips high, slide your left leg under your body and place your left knee on the floor under your hip. You should now be in a supported half-kneeling position with your left hand on the floor, left knee down, right foot flat, and the weight still stacked overhead.
Step 4: Come to tall half kneeling and stand up
Shift your weight toward your legs, lift your left hand off the floor, and rotate your torso to face forward into a classic lunge stance (right foot in front, left knee on the ground). From this tall half-kneeling position, push through your right heel and gently assist with your back leg to stand up, finishing with your feet hip-width apart and the weight locked out overhead.
Step 5: Reverse the movement back to the floor
Step back into a lunge with your left leg and lower your left knee to the floor. Hinge slightly at the hips and place your left hand back on the ground outside your left knee. Sweep your left leg out long into the bridge position, then lower your hips to the ground. Roll from your hand to your elbow and then down to your back, keeping the weight controlled overhead. Finally, bring the weight back to your chest with both hands, roll to your side, and park it safely on the floor.
Beginner Progressions & Programming for the Turkish Get-up
If the full Turkish get-up feels overwhelming, break it into smaller steps and build confidence before adding load.
Suggested learning progression:
1. Bodyweight get-up with no weight
Practice the entire sequence using an empty fist. Your goal is smooth movement and consistent breathing, not speed.
2. “Shoe” or block get-up
Balance a light shoe or yoga block on your fist. If it falls off, your arm is drifting or your positions are unstable.
3. Half Turkish get-up
Work only from lying on your back up to the tall seated or supported half-kneeling position, then return. This lets you groove the hardest control segments without fatigue from standing up.
4. Light dumbbell or kettlebell get-up
Start with a weight you could comfortably press overhead for 8–10 reps. Master 1–3 smooth reps per side before thinking about going heavier.
Basic programming ideas:
- Warm-up / skill work (beginners): 2–3 sets of 2–3 reps per side with a light load, 2–3 times per week.
- Strength / stability focus (intermediate): 3–4 sets of 1–3 reps per side with a moderate-to-heavy load, resting 60–120 seconds between sets.
- Conditioning / flow (advanced): Short timed blocks (for example, 5 minutes alternating sides) with light-to-moderate weights, only if you can maintain clean technique under fatigue.
Safety Tips & Who Should Be Careful
The Turkish get-up is joint-friendly when performed correctly, but it is not the best starting point for everyone.
You should be especially cautious and consider speaking with a healthcare or rehab professional before loading the get-up if you:
- Have a current or recent shoulder, elbow, or wrist injury.
- Struggle with severe back pain, nerve symptoms, or recent spinal surgery.
- Have major balance issues, frequent dizziness, or a high risk of falling.
General safety guidelines:
- Always start with bodyweight or a very light object and progress slowly.
- Stop immediately if you feel sharp pain, numbness, or dizziness.
- Keep your training area clear so you have space to safely drop the weight away from your body if needed.
- When in doubt, err on the side of lighter loads and fewer reps. Turkish get-ups reward control, not ego.
Turkish Get-up Common Mistakes to Avoid
If you want your Turkish get-up to actually build usable strength and resilience (not just “survive the rep”), avoid these common errors.
Mistake #1: A lazy, uncontrolled start
Many lifters try to “muscle” themselves up with a neck crunch or a sloppy roll instead of using their leg drive and core. That lazy start puts stress on the neck and ruins your alignment for the rest of the rep.
Coach fix:
- Create full-body tension before you move—brace your core, grip the handle hard, press your foot into the floor.
- Think about rolling from your ribs and hips, not pulling with your head and neck.
- If you can’t smoothly reach the elbow position, your load is too heavy or you need more practice with regressions.
Mistake #2: Poor alignment and crowded positions
When your limbs drift too close to your head or your base gets narrow, you run out of space to move. That’s when people feel “stuck” or wobbly and start compensating with weird twists.
Coach fix:
- Keep your supporting arm and extended leg at about a 30–45-degree angle from your body.
- Maintain a wide, stable base—imagine building a tripod between your hand, foot, and knee.
- Frequently check that the weight is stacked over your shoulder, not drifting forward or behind you.
Mistake #3: Rushing the movement
The Turkish get-up is not meant to be a fast, explosive exercise. Racing through the steps turns a technical stability drill into a messy scramble and dramatically increases your risk of losing the weight or over-twisting your spine.
Coach fix:
- Pause briefly at each major checkpoint: elbow, hand, bridge, half kneeling, standing.
- Use a slow, even breathing rhythm instead of holding your breath the entire time.
- If you can’t remember exactly what you did during the rep, you’re moving too fast.
Mistake #4: Ignoring breathing
Even with perfect positions, poor breathing can make you feel weak, unstable, or light-headed. Holding your breath for the entire get-up spikes blood pressure and makes balance harder.
Coach fix:
- Take a small breath in and brace before each effortful phase (roll, bridge, stand).
- Gently exhale as you move through the hardest part of each step.
- Between steps, take one or two calm belly breaths while you hold the weight steady overhead.
Turkish Get-up Muscles Worked
The Turkish get-up is a true full-body movement. Almost every major muscle group has a role, with many working isometrically (holding tension without changing length) while a few drive the motion.
Shoulders
Your working shoulder (the one holding the weight) must stay packed and stable from start to finish. The rotator cuff muscles, deltoids, and smaller scapular stabilizers work together to keep the weight stacked over the joint while your torso and hips move underneath. That dynamic stability is what makes the get-up so valuable for long-term shoulder health.
Obliques & Abdominals
Your core does far more than “crunch” in a Turkish get-up. The deep abdominal muscles and obliques brace to keep your spine neutral while you roll, bridge, and rotate. If you let your ribs flare up or your low back over-arch, you lose that stability and shift stress onto the spine instead of the muscles.
Gluteal Muscles
From the bridge phase to the lunge and stand, your glutes are heavily involved. The gluteus maximus drives hip extension, while the gluteus medius and minimus help steady your pelvis so your knee doesn’t cave in. Strong, well-timed glute activation is a big part of why the Turkish get-up carries over so well to squats and deadlifts.
Quadriceps & Hamstrings
Your quadriceps (front of the thighs) extend the knee when you stand up from the lunge and help support you during the transitions. The hamstrings (back of the thighs) work with the glutes to control hip extension and keep the back of the leg and hip joint stable. Together, they help you push the floor away without the knees collapsing or the hips shifting.
Turkish Get-up Benefits
Better Barbell Lifts
The same qualities that make the Turkish get-up difficult—shoulder stability, core control, and hip strength—are exactly what you need for big barbell lifts. Keeping a packed shoulder and rigid trunk while your hips move is the foundation for safe overhead pressing, squatting, and deadlifting.
By practicing the get-up, you learn how to “own” end-range positions overhead and under load. That often translates into smoother bar paths, more confident lockouts, and fewer compensations when the weights get heavy.
Fights Injuries
Many shoulder and low-back issues are less about pure strength and more about not being able to control certain positions. The Turkish get-up gently forces you to explore those positions—deep hip flexion, bridging, rotation, and overhead support—while staying in control.
Over time, this combination of mobility and stability can help reduce your risk of cranky shoulders, irritated hips, and over-stressed lower backs, especially if you also respect good load management and recovery.
Improves Joint Stability by Addressing Weak Links
Because the Turkish get-up moves slowly through so many different positions, it quickly exposes “weak links” that might not show up in simple up-and-down exercises. Maybe your wrist collapses under the kettlebell, your shoulder wobbles at the top, or your hip can’t hold a bridge.
Once you know where the chain is weakest, you can use lighter get-ups and accessory drills to specifically target those areas. Over time, that targeted stability work leads to more confident, efficient movement patterns.
Stabilizes the Spine
A stable spine under load is a major pillar of both performance and injury prevention. In the get-up, your spine has to stay quiet while your arms and legs move through large ranges of motion. That teaches you how to brace your core, control rib position, and avoid hyperextending your low back when you reach overhead or push through your hips.
These skills carry directly into heavy compound lifts and everyday tasks like carrying groceries, lifting kids, or getting up from the floor without straining your back.
Turkish Get-up Variations
Half Turkish Get-up
The half get-up is a great teaching and rehab tool because it focuses on the lower-risk, high-skill portion of the movement. You work from lying on your back up to a tall seated or supported half-kneeling position, then return to the ground.
Basic sequence:
- Lie flat on your back with the weight in your right hand, right knee bent, left leg extended, left arm at about 45 degrees.
- Roll to your left elbow, then post up onto your left hand while keeping the weight vertical and your eyes on it.
- Lift into a small bridge and slide your left leg slightly under you, or simply come to a tall seated position with your chest up and spine neutral.
- Pause, breathe, then reverse the steps back down under control.
Use the half get-up when you’re learning the pattern, coming back from injury, or want extra shoulder and core stability work without the fatigue of repeated full stands.
Kettlebell Turkish Get-up
The kettlebell is the classic tool for Turkish get-ups because its offset center of mass naturally encourages a packed, stable shoulder. The movement pattern is the same as the standard get-up described earlier.
Key tips:
- Let the kettlebell sit deep in your palm with your knuckles aimed at the ceiling and your wrist straight.
- “Crush” the handle the entire time to recruit more shoulder stabilizers.
- If the bell wants to tilt or wobble, lower the weight and focus on tighter positions instead of fighting it with brute force.
Dumbbell Turkish Get-up
Dumbbells are often more available in home gyms and are perfectly fine for Turkish get-ups. The main difference is that a dumbbell feels more balanced in the hand, so it may not “teach” shoulder packing as aggressively as a kettlebell.
Key tips:
- Start with a light dumbbell that you can strict-press easily.
- Keep the plate ends lined up vertically, not tipping forward or back.
- Treat the dumbbell as if it were a kettlebell—eyes on it, shoulder packed, arm locked out.
Turkish Get-up CrossFit
You will sometimes see Turkish get-ups programmed in high-intensity or CrossFit-style sessions. This can be effective for building work capacity, but only if your technique is already rock-solid.
If you add the get-up to conditioning pieces:
- Choose a weight you can perform with perfect form even when tired.
- Keep rep counts low (for example, 1–3 per side) and prioritize clean movement over speed.
- If your positions start to fall apart, immediately slow down or switch to a lighter variation.
Turkish Get-up Alternatives
Overhead Lunge
The overhead lunge mimics the top portion of the get-up and challenges your shoulder, core, and hips in a standing position.
How to do it:
- Press a kettlebell, dumbbell, or barbell overhead and lock your elbow. Keep your ribs down and your biceps near your ear.
- Step forward or backward into a lunge, lowering until both knees are close to 90 degrees.
- Push through your front heel to return to standing, keeping the weight directly over your shoulder the entire time, then switch legs.
This is a great option if getting up and down from the floor is uncomfortable but you still want overhead stability and single-leg strength.
Kettlebell Windmill
The kettlebell windmill trains overhead stability, hip hinge mechanics, and lateral core strength with less complexity than a full get-up.
How to do it:
- Stand with your feet slightly wider than shoulder width and turn your toes about 45 degrees away from the working arm. Press a kettlebell overhead with your right arm.
- Shift your hips back and toward your left side while keeping your right leg straighter and softening your left knee.
- Slide your left hand down the inside of your left leg toward your foot, keeping your spine long and eyes on the kettlebell.
- Stop before you lose tension or round your back, then drive through your hips to return to standing.
The windmill is especially helpful for learning how to hinge and rotate at the hips without dumping pressure into the low back.
Overhead Squat
The overhead squat challenges shoulder, thoracic spine, and hip mobility while demanding a rock-solid core—similar qualities to the Turkish get-up but in a more symmetrical, barbell-friendly pattern.
How to do it:
- Take a wide grip on a barbell and press or snatch it overhead. Actively “pull the bar apart” to create tension.
- Stand with your feet roughly shoulder width, brace your core, and keep the bar stacked over the middle of your foot.
- Sit your hips back and down into a squat while pushing your knees slightly out and keeping your heels flat.
- Descend as low as you can while maintaining a neutral spine and stable shoulders, then drive through your legs to stand back up.
For many lifters, building comfort in the overhead squat makes the top position of the Turkish get-up feel much more natural and secure.
Turkish Get-Up FAQs
Q: Who should do the Turkish get-up?
The Turkish get-up is a smart choice for:
- Lifters who want better shoulder stability, hip strength, and core control.
- Home-gym athletes looking for a single exercise that “checks a lot of boxes” in a small space.
- People who want to stay confident getting up and down from the floor as they age.
If you have a current injury or medical condition, especially involving your shoulders, spine, or balance, talk with a qualified professional before loading the get-up heavily.
Q: How should I program the Turkish get-up into my training?
There are three simple ways to plug get-ups into your routine:
As a warm-up:
Do 1–2 light sets of 2–3 reps per side at the start of upper- or full-body days to wake up your shoulders, core, and hips.
As a main strength movement:
Perform 3–4 sets of 1–3 controlled reps per side with a moderate-to-heavy load after your general warm-up, resting 60–120 seconds between sets.
As a “quality finisher”:
Use a lighter weight for 2–3 sets of 1–2 reps per side, focusing on smooth, precise movement when you’re already a little fatigued—but only if your technique stays clean.
Q: What are the best sets and reps for the Turkish get-up?
Because the Turkish get-up is long and technical, lower rep ranges usually work best. As a general guideline:
- Beginners: 2–3 sets of 1–3 reps per side with a very light weight.
- Intermediate lifters: 3–4 sets of 1–3 reps per side with a moderate load.
- Advanced lifters: 4–5 sets of 1–2 heavy reps per side, or short timed blocks with clean, crisp technique.
Higher rep ranges (5–6+ reps per side) can work for conditioning but often lead to sloppy form. When in doubt, keep the reps low, the movement slow, and the quality high.
Summary
The Turkish get-up is not the flashiest exercise in the gym, but few movements offer as much return on your time and effort. It blends shoulder stability, core control, hip strength, and full-body coordination into one slow, thoughtful pattern that directly supports heavier lifting and everyday life.
Start with regressed versions, use a light load, and focus on clean positions instead of chasing big weights. Avoid the common mistakes of rushing, losing alignment, or ignoring your breathing. With consistent practice and smart progression, the Turkish get-up can become a cornerstone movement in your home-gym program for long-term strength, mobility, and joint health.
