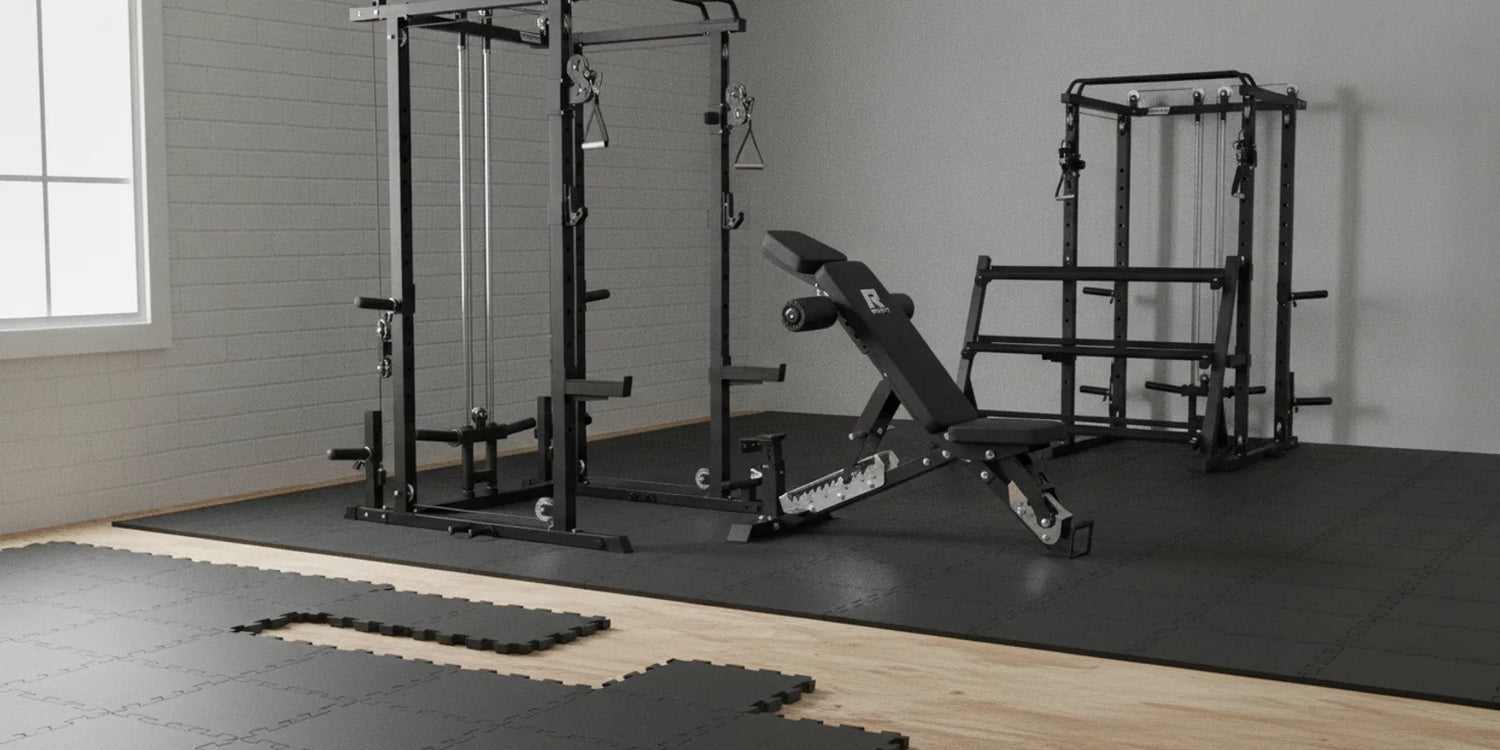
Knowing what to put under rubber gym flooring is the difference between a floor that lasts a decade and one that curls, stains or grows mold. The right under layer depends entirely on the surface you are covering.
This guide matches an under layer to every common subfloor, then walks through the lay down sequence step by step. You will also get the moisture tests that decide whether you need a barrier at all.
Quick Answer: On dry, level concrete, rubber gym flooring needs nothing underneath except a clean slab. Add 6-mil polyethylene if the slab tests damp, craft paper or felt underlayment over hardwood to prevent staining, and floating three-quarter-inch plywood over medium or high pile carpet.
Key Takeaways
- Subfloor decides everything: Dry concrete usually needs no under layer, while wood needs stain protection and carpet needs rigidity.
- Rubber is its own vapor barrier: Because it does not breathe, any moisture rising from below gets trapped and turns into odor, adhesive failure and mold.
- Test before you buy anything: A taped plastic sheet left on the slab for 48 hours tells you whether a 6-mil poly film is mandatory.
- Plywood is the carpet fix: Three-quarter-inch plywood floated over medium or high pile carpet gives the rigidity that keeps interlocking tiles seated.
- Acclimate then lay: Letting rubber sit in the room for 24 to 48 hours before installation prevents the gaps and buckling that appear weeks later.
What Does an Under Layer Actually Do?
An under layer beneath rubber gym flooring performs four separate jobs, and most rooms only need one or two of them. Identifying which job your room requires stops you from buying materials you do not need.
- Moisture control: A film or liquid barrier keeps vapor rising through a slab from becoming trapped under non porous rubber.
- Stain and finish protection: Craft paper or felt stops recycled rubber from leaching oils into hardwood, engineered planks or carpet fibers.
- Flatness correction: Plywood, patching compound or self leveler removes the dips and ridges that rubber will otherwise telegraph straight through.
- Impact and sound damping: Extra mass or a cushioning layer softens dropped plates and reduces the noise that travels into rooms below.
The surface you train on also changes how force travels back into your legs. A study of layered landing mats found that the number of layers and the stiffness of the middle layer significantly changed peak vertical ground reaction force during drop landings.[1]
That is a useful reminder that the stack matters, not just the top tile. If you are still choosing a top surface, start with our guide on how to choose the best home gym flooring.
What Goes Under Rubber Flooring on Each Subfloor?
The correct under layer for rubber gym flooring is determined by the subfloor, not by the rubber itself. Match your surface to the row below and you have your answer in one step.
| Subfloor | What to put underneath | Why |
|---|---|---|
| Dry, level concrete | Nothing, just a clean slab | Concrete is the ideal base when it is flat and dry, so extra layers only add movement |
| Concrete that tests damp | 6-mil polyethylene film, or a liquid epoxy mitigant for glue down | Rubber traps rising vapor, which destroys adhesive and feeds mold |
| Basement slab, high risk | Dimpled drainage mat | The air gap lets vapor migrate to the perimeter and evaporate instead of pooling |
| Plywood or OSB above grade | Usually nothing, thin poly film optional | Above grade wood is normally dry, but film protects it from sweat and mopping water |
| Hardwood or floating engineered floor | Craft paper or a moisture resistant felt underlayment | Recycled rubber can leach oils that stain wood and react with some finishes |
| Ceramic tile | Cushioning underlayment, or use rolls instead of tiles | The layer bridges grout lines and stops heavy loads from cracking tile |
| Low pile carpet under a quarter inch | Plastic moisture barrier, then heavy mats or 9mm tiles | The film protects carpet from rubber marks and cleaning water |
| Medium or high pile carpet | Floating three-quarter-inch plywood plus 6-mil poly | Plush pile compresses under load, popping seams and shifting tiles |
Compiled from flooring installer guidance for concrete, wood, tile and carpet substrates.
Notice that two of the eight rows call for no under layer at all. Before you spend money, confirm your slab is genuinely dry using the tests in the next section, and check the rubber flooring technical specifications for the thickness you plan to use.
Do You Need a Vapor Barrier Under Rubber Gym Flooring?
You almost always need a vapor barrier over concrete and in any basement, and rarely need one on dry wood above grade. Rubber is non porous, so it becomes the vapor barrier itself and traps whatever rises from below.
Trapped moisture is not a cosmetic issue. It breaks adhesive bonds, rots organic subfloors and creates the damp conditions that support microbial growth.
How do you test a slab for moisture?
Two tests answer the question cheaply, and either one is enough to make the call before you buy materials.
- Plastic sheet test: Tape a 2 foot by 2 foot piece of clear plastic flat to the slab for 24 to 72 hours, then look for condensation or darkened concrete.
- Calcium chloride test, ASTM F1869: Results above 3 pounds of vapor per 1,000 square feet in 24 hours point to a liquid applied mitigant rather than a film.
Skipping the test is a gamble with real consequences. A review of the epidemiologic evidence concluded that preventing and remediating indoor dampness and mold is likely to reduce health risks,[2] and a separate meta analysis reported an association between residential dampness and increases in respiratory infections and bronchitis.[3]
Which barrier goes with which install?
Match the barrier to how the rubber will be fixed down, because a film that works under floating tiles will ruin a glue down job.
- Floating tiles or loose laid rolls: 6-mil polyethylene film, overlapped 6 to 8 inches, sealed with waterproof seam tape and run about 2 inches up the wall.
- Full spread glue down: A two component epoxy moisture mitigant, because adhesive needs to bond to the barrier itself.
- Damp basement: A dimpled drainage mat that creates an air gap for vapor to escape at the perimeter.
- Never acceptable: A woven tarp, which lets vapor pass straight through the weave.
Which Underlayment Materials Are Worth Using?
Every underlayment material solves one specific problem, and using the wrong one creates a new problem. Pick by the job you identified earlier rather than by price alone.
| Material | Job it does | Where it fails |
|---|---|---|
| 6-mil polyethylene film | Blocks slab vapor and protects carpet or wood from rubber marks | Adds nothing structural, and traps moisture if laid over damp wood |
| Craft or rosin paper | Stops rubber oils from staining hardwood and reacting with finishes | Offers no moisture protection and tears during heavy repositioning |
| Moisture resistant felt underlayment | Protects floating engineered floors while adding light sound damping | Not a substitute for a true vapor barrier over a wet slab |
| Closed cell foam | Adds comfort and reduces footfall noise in low load areas | Compresses permanently under racks and machines, unlocking tile seams |
| Cork | Damps sound and vibration under light training zones | Absorbs water, so it is a poor choice for basements and garages |
| Three-quarter-inch plywood | Creates a rigid platform over carpet or a springy floor | Raises floor height and needs its own moisture film above it |
| Dimpled drainage mat | Gives rising vapor an air path in high risk basements | Can create a slightly hollow sound underfoot |
| Self leveling compound | Corrects dips and high spots before anything is laid | Needs a primer on OSB and full cure time before installation |
Materials listed are general categories rather than specific brands.
Foam is the single most common mistake in this list. If your goal is to protect the structure under a loaded rack, mass and rigidity beat softness every time, which is why some lifters compare interlocking tiles against horse stall mats for a home gym before deciding.
How Do You Prep the Subfloor Before Anything Goes Down?
Subfloor prep comes down to three words: flat, dry and solid. Rubber is flexible and telegraphs every ridge, crack and soft spot beneath it, so problems must be fixed before installation rather than after.
- Check flatness: Run a long straightedge across the room and mark every high spot and dip you find.
- Repair concrete: Fill cracks and spalls with hydraulic cement, and grind down high spots rather than trying to bridge them.
- Level wood: Sand minor high spots, or prime the OSB and use a fiber reinforced self leveler for larger dips.
- Fix movement: Screw down squeaky boards and replace any soft or water damaged sheathing before you cover it.
- Let new concrete cure: A fresh slab should cure at least 28 days before rubber goes over it.
- Clean thoroughly: Remove old glue, paint, oil and dust, then vacuum so nothing stays trapped in the surface texture.
Prep is also the moment to confirm your layout will actually fit the equipment you own. Our home gym size guide and home gym layout ideas help you decide which zones need full coverage and which only need mats.
How Do You Put Down Rubber Gym Flooring Step by Step?
Putting down rubber gym flooring follows the same seven step sequence whether you are laying tiles or rolls. Work in order, because acclimation and barrier placement cannot be corrected once the rubber is down.
- Acclimate the material: Leave the tiles or rolls in the room for 24 to 48 hours with the HVAC running so they stop expanding and contracting.
- Dry fit and plan: Lay pieces out loosely to position seams away from doorways, then snap chalk lines from the center of the room toward the walls.
- Lay the barrier: Roll out your film or underlayment, overlap seams by 6 inches, and seal every joint with waterproof tape.
- Set the first row: Start on your straightest wall or chalk line, since every later row inherits the alignment of the first one.
- Seat the joints: Tap interlocking tabs fully home with a rubber mallet, and butt roll seams tight without forcing them into a bow.
- Trim the perimeter: Cut to the walls with a fresh utility knife blade against a straightedge, leaving roughly a one eighth inch expansion gap.
- Secure and cure: Apply double sided tape at seams and the perimeter, or trowel polyurethane adhesive, roll it with a 100 to 150 pound roller and wait 24 to 48 hours before loading.
Interlocking tiles are the most forgiving format for a first install because they need no adhesive and can be lifted and reseated. Our high-density interlocking rubber gym flooring tiles and the wider gym mats and flooring collection cover both tile and mat formats.
The walkthrough below shows a professional installer laying rubber gym rolls over concrete, including seam taping and cutting into an adjoining tile floor.
Should You Loose Lay, Tape, or Glue the Rubber Down?
Most home gyms are best served by double sided tape at the seams and perimeter, which stops creeping without permanent damage. Loose lay suits renters, and full spread adhesive belongs in heavy or commercial rooms.
- Loose lay: Best for rentals, temporary rooms and light training, where you expect to lift the floor again within a year or two.
- Double sided seam tape: The default for home gyms with dropped dumbbells, since it holds edges flat and still releases cleanly.
- Full spread polyurethane adhesive: Required for lifting platforms, sled work, commercial traffic and anything laid over steps or a ramp.
One caution applies to glue down installs specifically. If the slab tests positive for moisture, the epoxy mitigant has to go down first, because adhesive applied straight onto a damp slab will release under hydrostatic pressure.
Budget also nudges this decision, since adhesive and rollers add cost that could go toward equipment instead. If you are building the room out in stages, our guide to build a home gym under $1,000 shows where flooring fits in the sequence.
How Do You Handle Carpet, Wood, and Basements?
Carpet, hardwood and basements each break one of the assumptions that make concrete easy, so each needs a specific fix. Handle the exception correctly and the rest of the install is unchanged.
What works over carpet, and how thick should the plywood sub base be?
Carpet pile height decides the whole approach, because compression under load is what pops seams and shifts tiles.
- Under a quarter inch pile: Heavy mats or interlocking tiles 9mm and thicker can go directly over the carpet, ideally with a plastic film between them.
- A quarter to half inch pile: Use the heaviest tiles you can, and add a plywood sub base if the floor still feels soft underfoot.
- Over half inch pile: Float three-quarter-inch plywood first, stagger the joints like brickwork, tape the seams and do not screw it into the subfloor.
- Thin tiles: Avoid them entirely over carpet, since low mass tiles move and unlock under lateral load.
What protects hardwood and engineered floors?
Wood needs a slip sheet rather than a vapor barrier in most above grade rooms.
- Craft or rosin paper: The simplest barrier against rubber oils leaching into the boards and reacting with the finish.
- Felt moisture resistant underlayment: A better choice over floating engineered floors, where you also want a little sound control.
- Squeaks and dips first: Fix them before covering, because rubber makes them worse rather than hiding them.
What changes in a basement?
Basements combine the highest moisture risk with the least airflow, so ventilation matters as much as the barrier you choose.
- Air gap over film: A dimpled drainage mat outperforms flat plastic where hydrostatic pressure is a real possibility.
- Perimeter gaps: Leave the expansion gap open rather than sealing it, so edge evaporation can still happen.
- Humidity control: Run a dehumidifier before and after installation, and confirm the room holds a stable humidity level.
A well prepped basement is the most common home gym location, and it can carry serious equipment once the floor is right. Heavy pieces such as the P3 power cage home gym package or the M1 multi-functional Smith machine need a rigid, level base under the rubber, and our home gym setup guide covers placement around them.
What Mistakes Ruin a Rubber Gym Floor?
Most failed rubber gym floors trace back to a handful of avoidable errors, and nearly all of them happen before the rubber is laid. Checking this list takes minutes and saves a full reinstall.
- Skipping acclimation: Rubber laid cold shrinks as it warms, opening gaps at seams and walls weeks later.
- Sealing a wet slab: Covering untested concrete traps vapor and produces odor, adhesive failure and mold.
- Plastic over damp wood: Film on top of wood that cannot dry from below creates a rot sandwich instead of protection.
- Foam under heavy equipment: Soft underlayment compresses under a rack or bench, tilting the frame and unlocking nearby tiles.
- Plush carpet with no plywood: The floor feels bouncy, seams separate and the surface becomes a trip hazard.
- Using a tarp as a barrier: Woven material passes vapor, so only solid film or a certified liquid mitigant counts.
- No expansion gap: A floor cut wall to wall has nowhere to go when it expands, so it buckles at the seams.
- Installing over an unrepaired floor: Every high spot and crack shows through as a ridge and becomes a wear point.
Guidance summarized in the allergy literature recommends that persistent dampness and microbial growth inside building structures be avoided or minimized, which is exactly what these checks accomplish.[4] Getting the base right also protects the equipment sitting on it, a point worth remembering when you compare options in our roundup of the best home gym equipment under $500.
"The floor is the foundation of your gym. Getting it right with proper mats under your equipment protects your investment in both the floor and the equipment itself."
Jeff Cavaliere, MSPT, CSCS, Physical Therapist and Strength Coach, Athlean-X
FAQs About What to Put Under Rubber Gym Flooring
What do you put under rubber gym flooring?
It depends on the subfloor. Dry, level concrete needs nothing but a clean surface. A slab that tests damp needs 6-mil polyethylene or a liquid epoxy mitigant. Hardwood and floating floors need craft paper or felt underlayment to stop staining. Medium or high pile carpet needs floating plywood.
Do I need a vapor barrier under rubber gym flooring?
Almost always over concrete or in a basement. Rubber does not breathe, so vapor rising through the slab gets trapped underneath, ruining adhesive and feeding mold. Tape clear plastic to the slab for 48 hours first, if condensation appears or the concrete darkens, a barrier is mandatory.
Can you put rubber gym flooring directly over carpet?
Only over low pile carpet under roughly a quarter inch, using heavy mats or 9mm or thicker interlocking tiles. Anything plushier compresses under load, pops seams and creates trip hazards. For medium and high pile, float three-quarter-inch plywood over the carpet first, then lay the rubber.
How do you put down rubber gym flooring step by step?
Acclimate the rubber in the room for 24 to 48 hours, prep and clean the subfloor, lay any barrier with taped six inch overlaps, snap a center line, set the first row, seat interlocks with a rubber mallet, trim to the walls, then tape or glue the seams.
Should rubber gym flooring be glued down or loose laid?
Loose lay works for renters and light training. Most home gyms do best with double sided tape at the perimeter and seams, which stops creeping without permanent damage. Choose full spread polyurethane adhesive for heavy platforms, commercial rooms, ramps or steps, and roll it with a heavy roller afterward.
Can you put foam underlayment under rubber gym flooring?
Only for comfort and sound in low load areas. Soft foam compresses permanently under a power rack, bench or treadmill, which tilts equipment and unlocks tile seams. If you want impact and noise control under heavy gear, use thicker rubber or a rigid plywood sub base instead.
Conclusion
Deciding what to put under rubber gym flooring starts with the subfloor, not the product. Test concrete for moisture, protect wood from staining, add rigidity over carpet, and leave dry slabs alone.
Prep the surface, acclimate the rubber for a full day, then lay from a center line and leave an expansion gap. Browse current RitFit deals and offers when you are ready to order your flooring and equipment together.
Disclaimer
This article provides general guidance on flooring installation and is not a substitute for manufacturer instructions, building codes or professional moisture testing. Consult a qualified flooring contractor or building professional before addressing structural, moisture or mold concerns in your home.
References
1. Brtva P, Bizovská L, Canty B, Skypala J, Irwin G, Farana R. Modifying landing mat properties elicits different lower limb biomechanical responses in gymnasts and non-gymnasts. Sci Rep. 2025;15(1):42490. doi:10.1038/s41598-025-26522-y. PMCID: PMC12660871
2. Mendell MJ, Mirer AG, Cheung K, Tong M, Douwes J. Respiratory and allergic health effects of dampness, mold, and dampness-related agents: a review of the epidemiologic evidence. Environ Health Perspect. 2011;119(6):748-56. doi:10.1289/ehp.1002410. PMCID: PMC3114807
3. Fisk WJ, Eliseeva EA, Mendell MJ. Association of residential dampness and mold with respiratory tract infections and bronchitis: a meta-analysis. Environ Health. 2010;9:72. doi:10.1186/1476-069X-9-72. PMCID: PMC3000394
4. Cox-Ganser JM. Indoor dampness and mould health effects - ongoing questions on microbial exposures and allergic versus nonallergic mechanisms. Clin Exp Allergy. 2015;45(10):1478-82. doi:10.1111/cea.12601. PMCID: PMC4667360