


Table of Contents
- The Bottom Line: Which Package Is Right for You?
- Deep Dive: The Magic of the 3D Guided Bar
- Deep Dive: Built-In Weight Stacks Versus Free Plates
- Core Features Included In Every Package
- Growing Your Setup With Attachments
- Room Size and Floor Space Planning
- Assembly Tips and Common Mistakes
- A Simple and Effective Weekly Routine
- Long-Term Care and Cleaning
The most important question when building a home workout room is which equipment package fits your space and goals. The RitFit M2 series gives you three amazing choices to build a complete fitness sanctuary. This guide gives you the direct answer first. We will break down exactly how the M2 3D, the M2 Pro, and the M2 Pro 3D compare. You will learn exactly what you need without confusing words. Let us find your perfect setup right now.
The Bottom Line: Which Package Is Right for You?
When you are ready to buy a home gym, you do not want to read 20 pages just to figure out what you are getting. Here is the direct breakdown of the three main packages to help you choose immediately. Every package includes a heavy-duty steel frame that covers about 23 square feet of floor space. The differences come down to how the guided bar moves and how you load the weight.
The M2 3D Package This is the entry point into the world of multi-directional lifting
- The Bar Movement: It features the advanced 3D bar that moves both up and down and forward and backward.
- The Weight System: It does not come with built-in weight stacks. You must load your own round iron or rubber plates onto the back pegs to use the cables.
- Best For: This is the perfect choice for buyers on a budget who already own a massive collection of weight plates and want the most natural-feeling squat possible.
The M2 Pro Package: This middle-tier package changes the formula significantly for ultimate convenience.
- The Bar Movement: It features a basic guided bar that only moves straight up and straight down.
- The Weight System: It includes two built-in weight stacks. Each stack weighs 143 pounds, giving you a total of 286 pounds of instant cable resistance.
- Best For: This is ideal for folks who want incredibly fast workouts. You can change cable weights instantly with a metal pin, making it perfect for quick morning routines.
The M2 Pro 3D Package: For those who refuse to compromise, this is the ultimate choice.
- The Bar Movement: It gives you the advanced 3D bar for completely natural movement.
- The Weight System: It also includes the massive 286-pound double weight stacks for instant cable weight changes.
- Best For: This package is for serious lifters who want the true luxury of a commercial fitness center right in their garage. It combines every premium feature into one massive playground.
Deep Dive: The Magic of the 3D Guided Bar
Now that you know the packages, you might wonder why the bar movement matters so much. To appreciate this amazing feature, you must understand the limits of older equipment. A traditional guided bar operates exactly like an elevator. It moves perfectly straight up and perfectly straight down.
While a straight vertical path is incredibly safe, human joints do not operate in perfect straight lines. When you lower your body into a squat, your hips naturally travel backward. Your chest leans forward to help you keep your balance. From a biomechanical perspective, if you are holding a bar that refuses to move backward with you, your body feels forced into an awkward and highly unnatural position. Fighting the natural curve of your body can lead to unnecessary shear stress on the joints, knee pain, and a feeling of stiffness.
The multi-directional bar solves this problem brilliantly. The barbell still slides up and down on vertical rods to keep you safe. However, those vertical rods are attached to a horizontal track located at the top and bottom of the steel cage. This allows the entire vertical elevator to roll forward and backward by several inches.
The Benefits Of Natural Movement
- Joint Comfort When you step under this bar and squat, you can naturally push your hips backward. The bar simply rolls backward with you.
- Free Weight Feeling It feels almost exactly like holding a completely free barbell. It demands natural balance and proper muscle engagement.
- Ultimate Safety Despite this freedom, it remains incredibly safe. If you get tired at the bottom of a heavy lift and cannot stand back up, you simply twist your wrists backward. This action engages steel hooks that instantly grab onto the frame and save you from dropping the weight.
Deep Dive: Built-In Weight Stacks Versus Free Plates
The next big decision is choosing how you want to power your cable exercises. This choice completely changes how your daily workout feels.
The Plate-Loaded Experience
Using free weight plates on a cable system requires patience and effort.
- Slower Workouts Imagine a routine that calls for chest flys followed immediately by arm curls. You must walk to the left side of the machine, pick up a heavy plate, slide it on, and secure a clip. Then you must walk to the right side and do the same thing.
- More Effort When you switch exercises, you must stop your workout, walk around, remove the heavy plates, and load lighter ones. This process takes valuable time and lets your heart rate drop.
- Higher Limit: The main positive is that a plate-loaded system is only limited by how many plates you can safely slide onto the peg.
The Pin-Loaded Experience
Built-in weight stacks eliminate delays completely.
- Incredible Speed Moving the magnetic pin from a heavy weight to a lighter weight takes exactly two seconds.
- Better Focus This speed is incredibly helpful for people who need to finish their routines quickly before work. You never have to carry heavy iron plates across the room just to do a simple cable exercise.
- Smooth Operation The rectangular blocks glide along greased guide rods with a very soft clicking sound, making them quieter and smoother than sliding free plates.
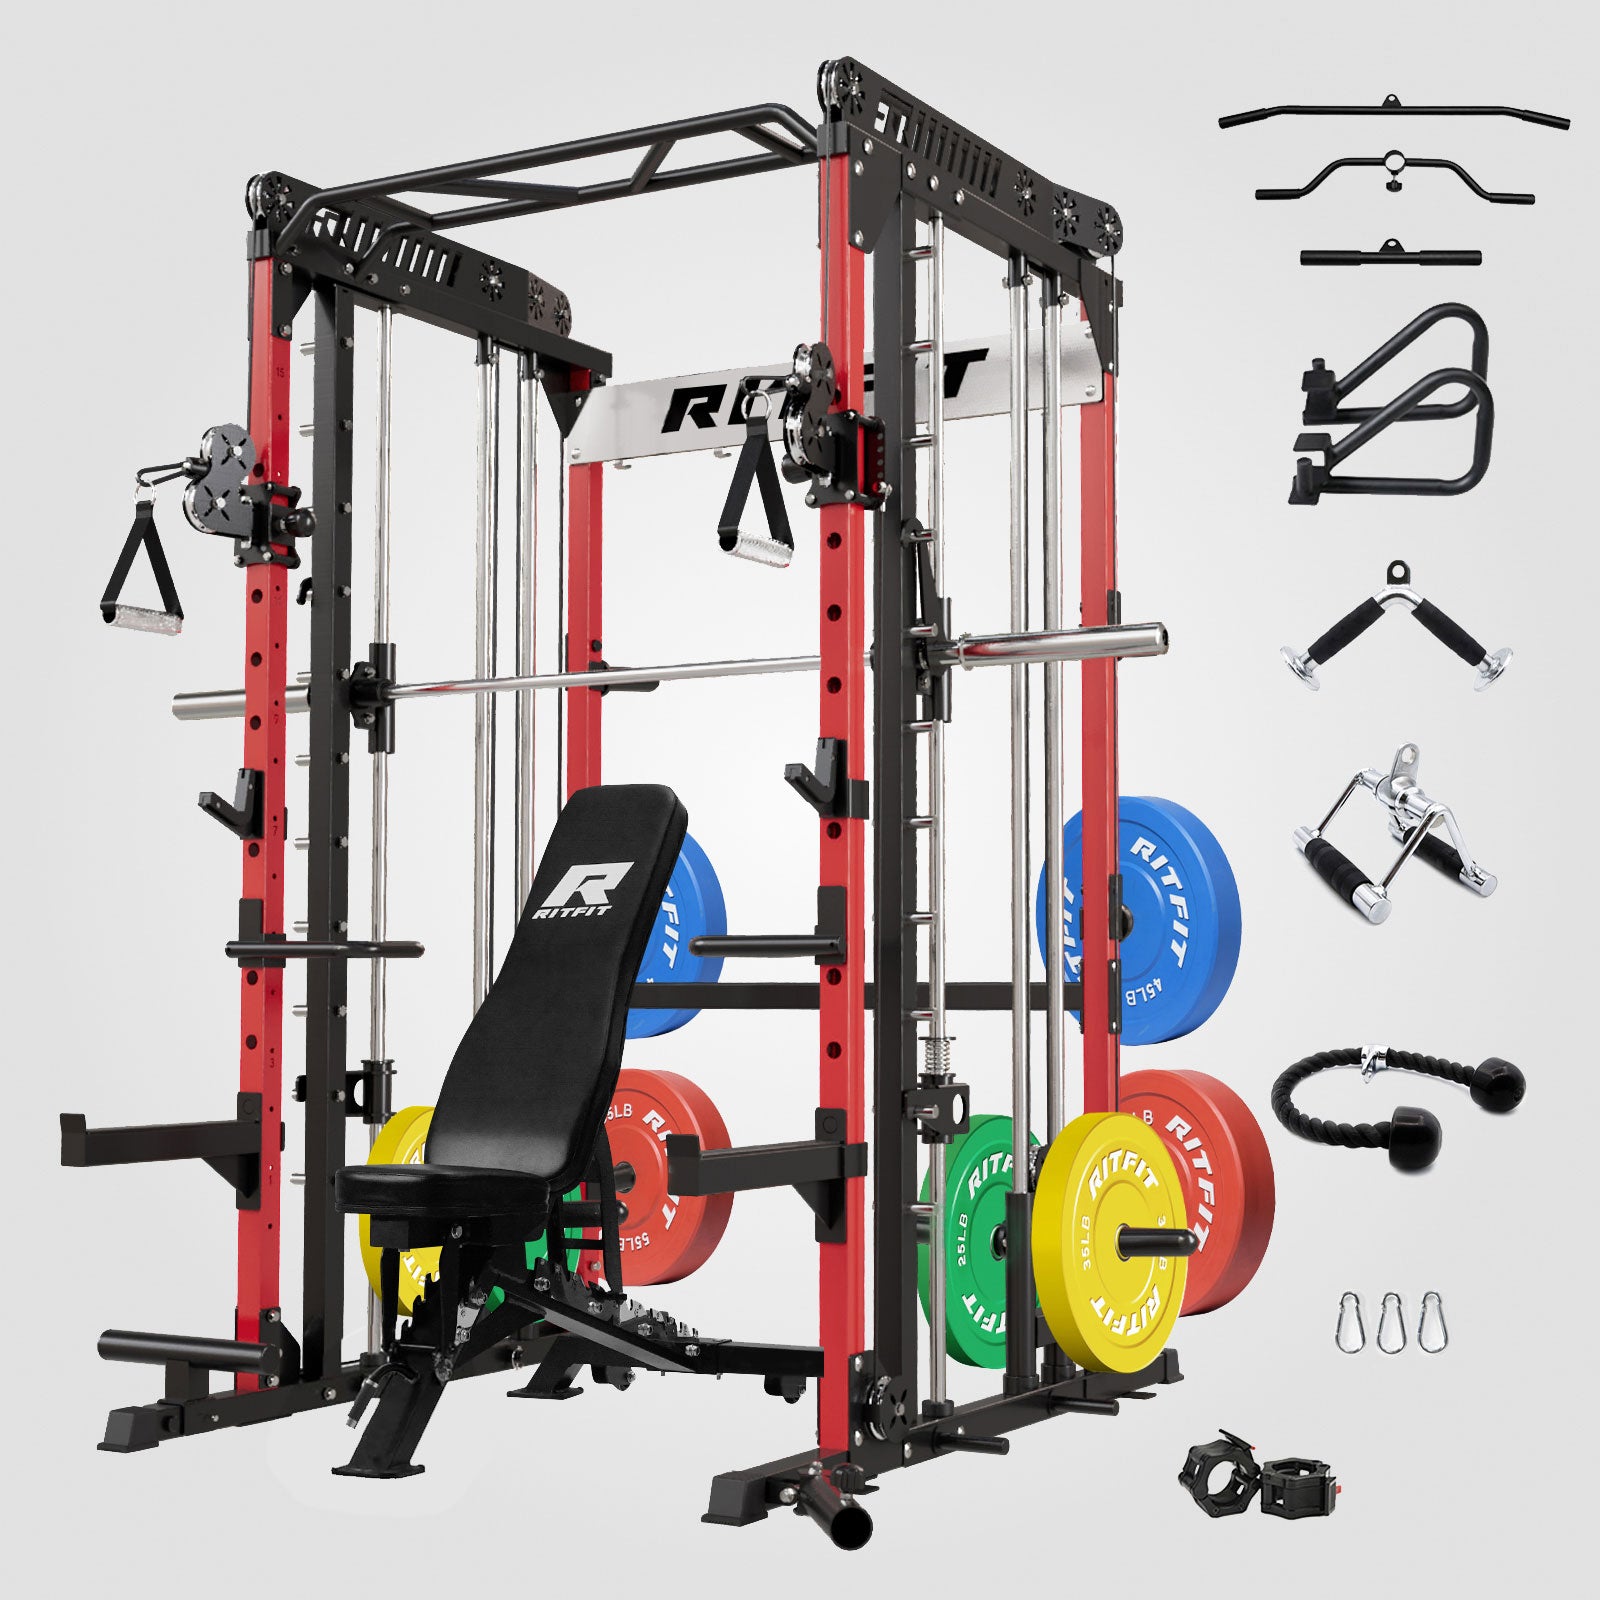
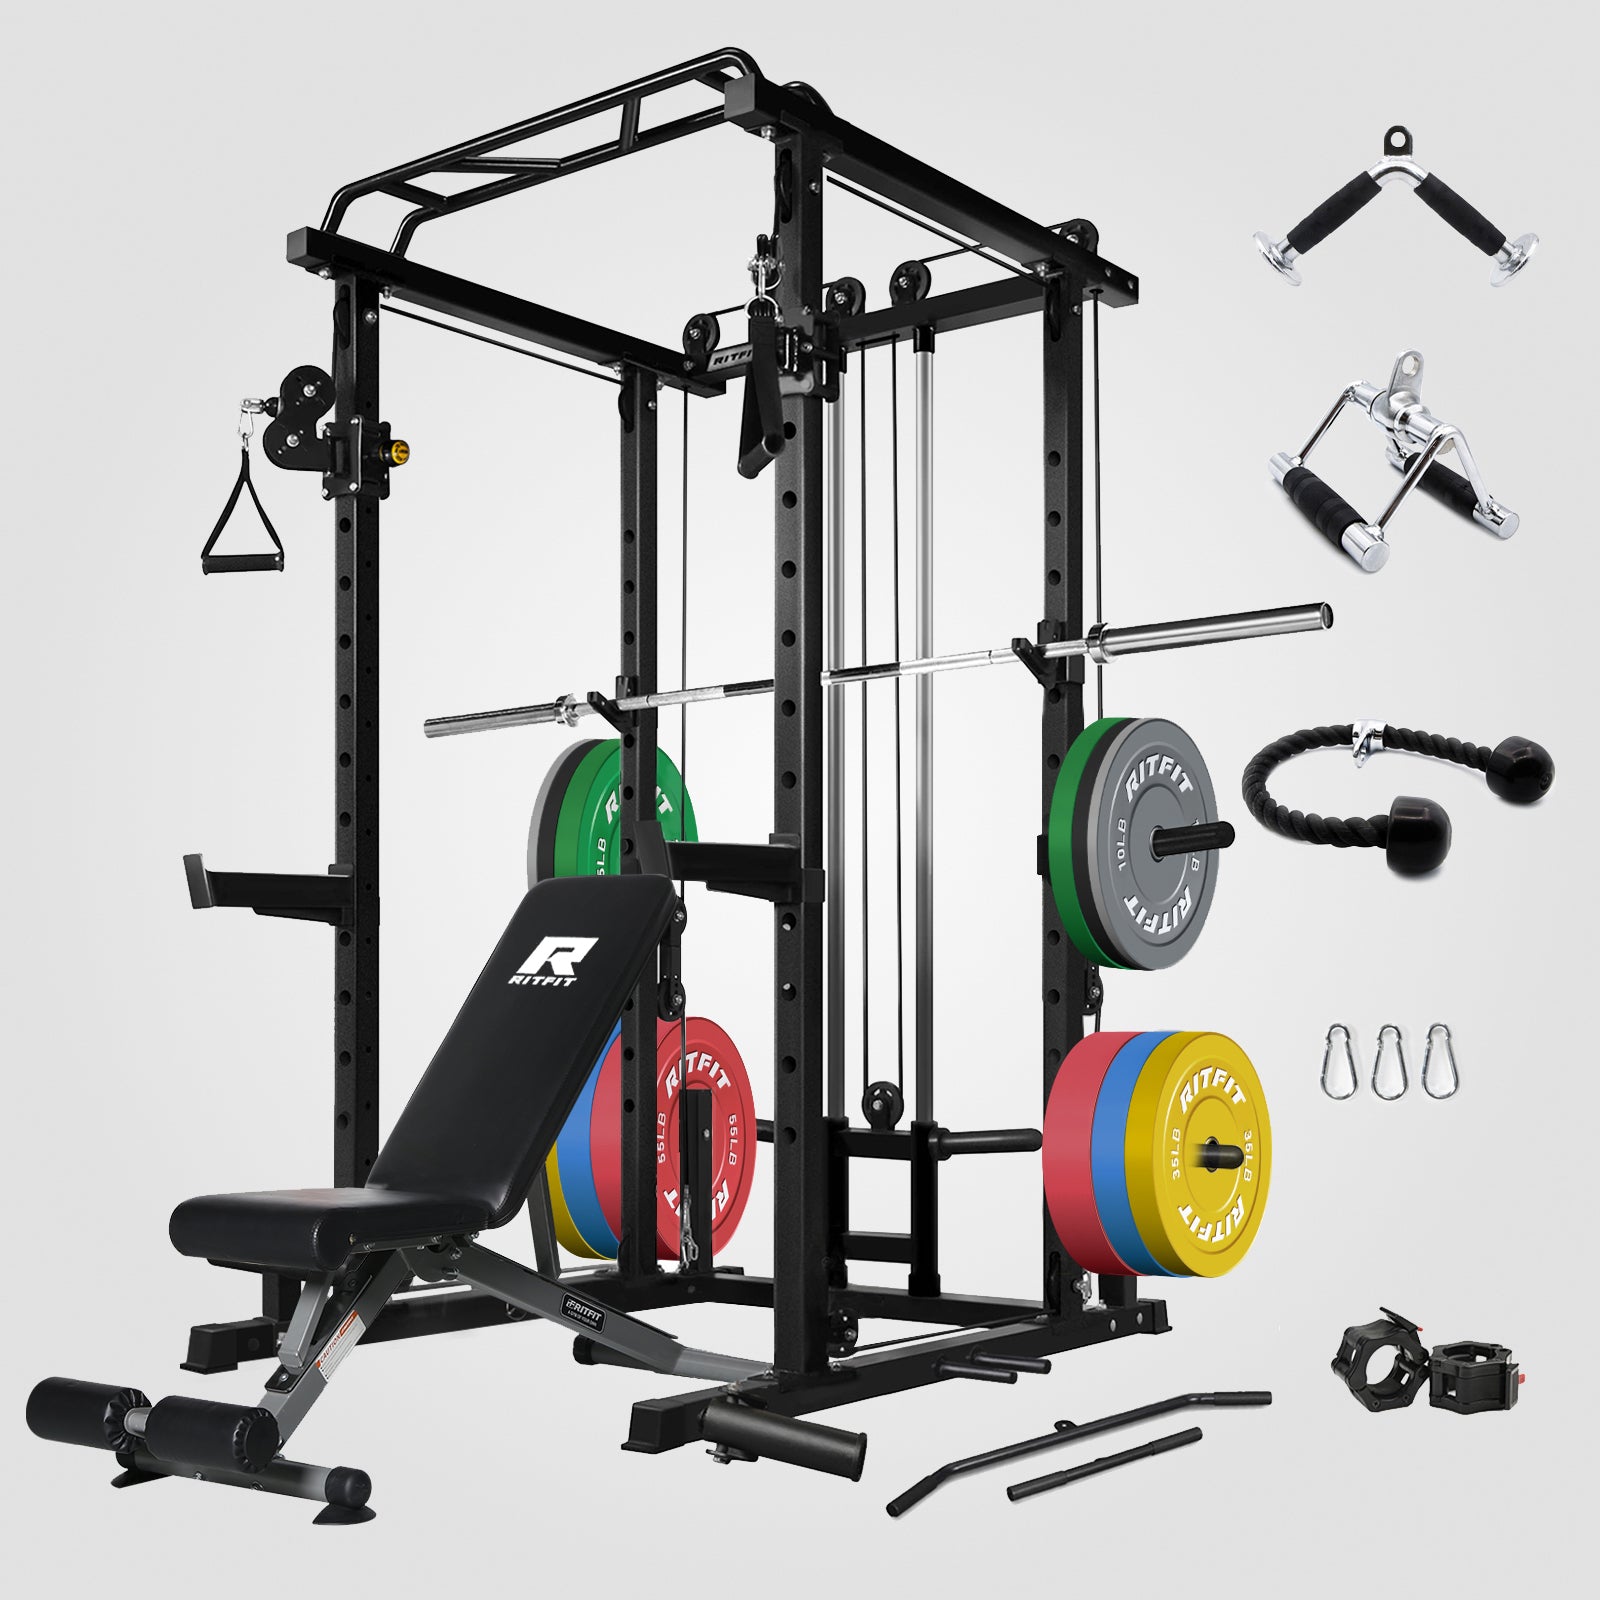
Core Features Included In Every Package
No matter which package you select, the core frame serves as an incredible all-in-one fitness station. By combining several different workout stations into a single steel cage, you can compress a full commercial layout into a space no larger than a small bed.
The Six Built-In Stations
- Heavy Duty Power Rack The front steel columns feature holes drilled all the way up and down. You can attach heavy brackets to hold a loose barbell for traditional free weight squats and chest presses.
- Guided Bar System Whether it is the basic or the multi-directional version, every frame includes a permanent sliding barbell for safe lifting without a spotter.
- Double Cable Crossover Sliding pulley blocks are mounted to the front columns. You can adjust these pulleys to sixteen different heights. You can lower them to the floor for arm curls or raise them to the top for chest exercises.
- Pull-Up Station A multi-grip bar sits at the very top of the steel cage. It allows you to target different areas of your upper back simply by changing where you place your hands.
- Low Row Station By attaching a specific footplate and a low cable handle, you can sit on the floor and perform heavy back rows.
- Landmine Attachment A small metal tube on a swivel joint sits at the base of the frame. You slide one end of a loose barbell into the tube, allowing the other end to move freely in any direction for athletic shoulder and core exercises.
The frame itself is constructed from high-quality 13-gauge steel. In the world of metal tubing, a lower gauge number means thicker and heavier material. This thick profile ensures the frame can support massive amounts of weight. The total maximum weight capacity for the frame is rated at 2,000 pounds.
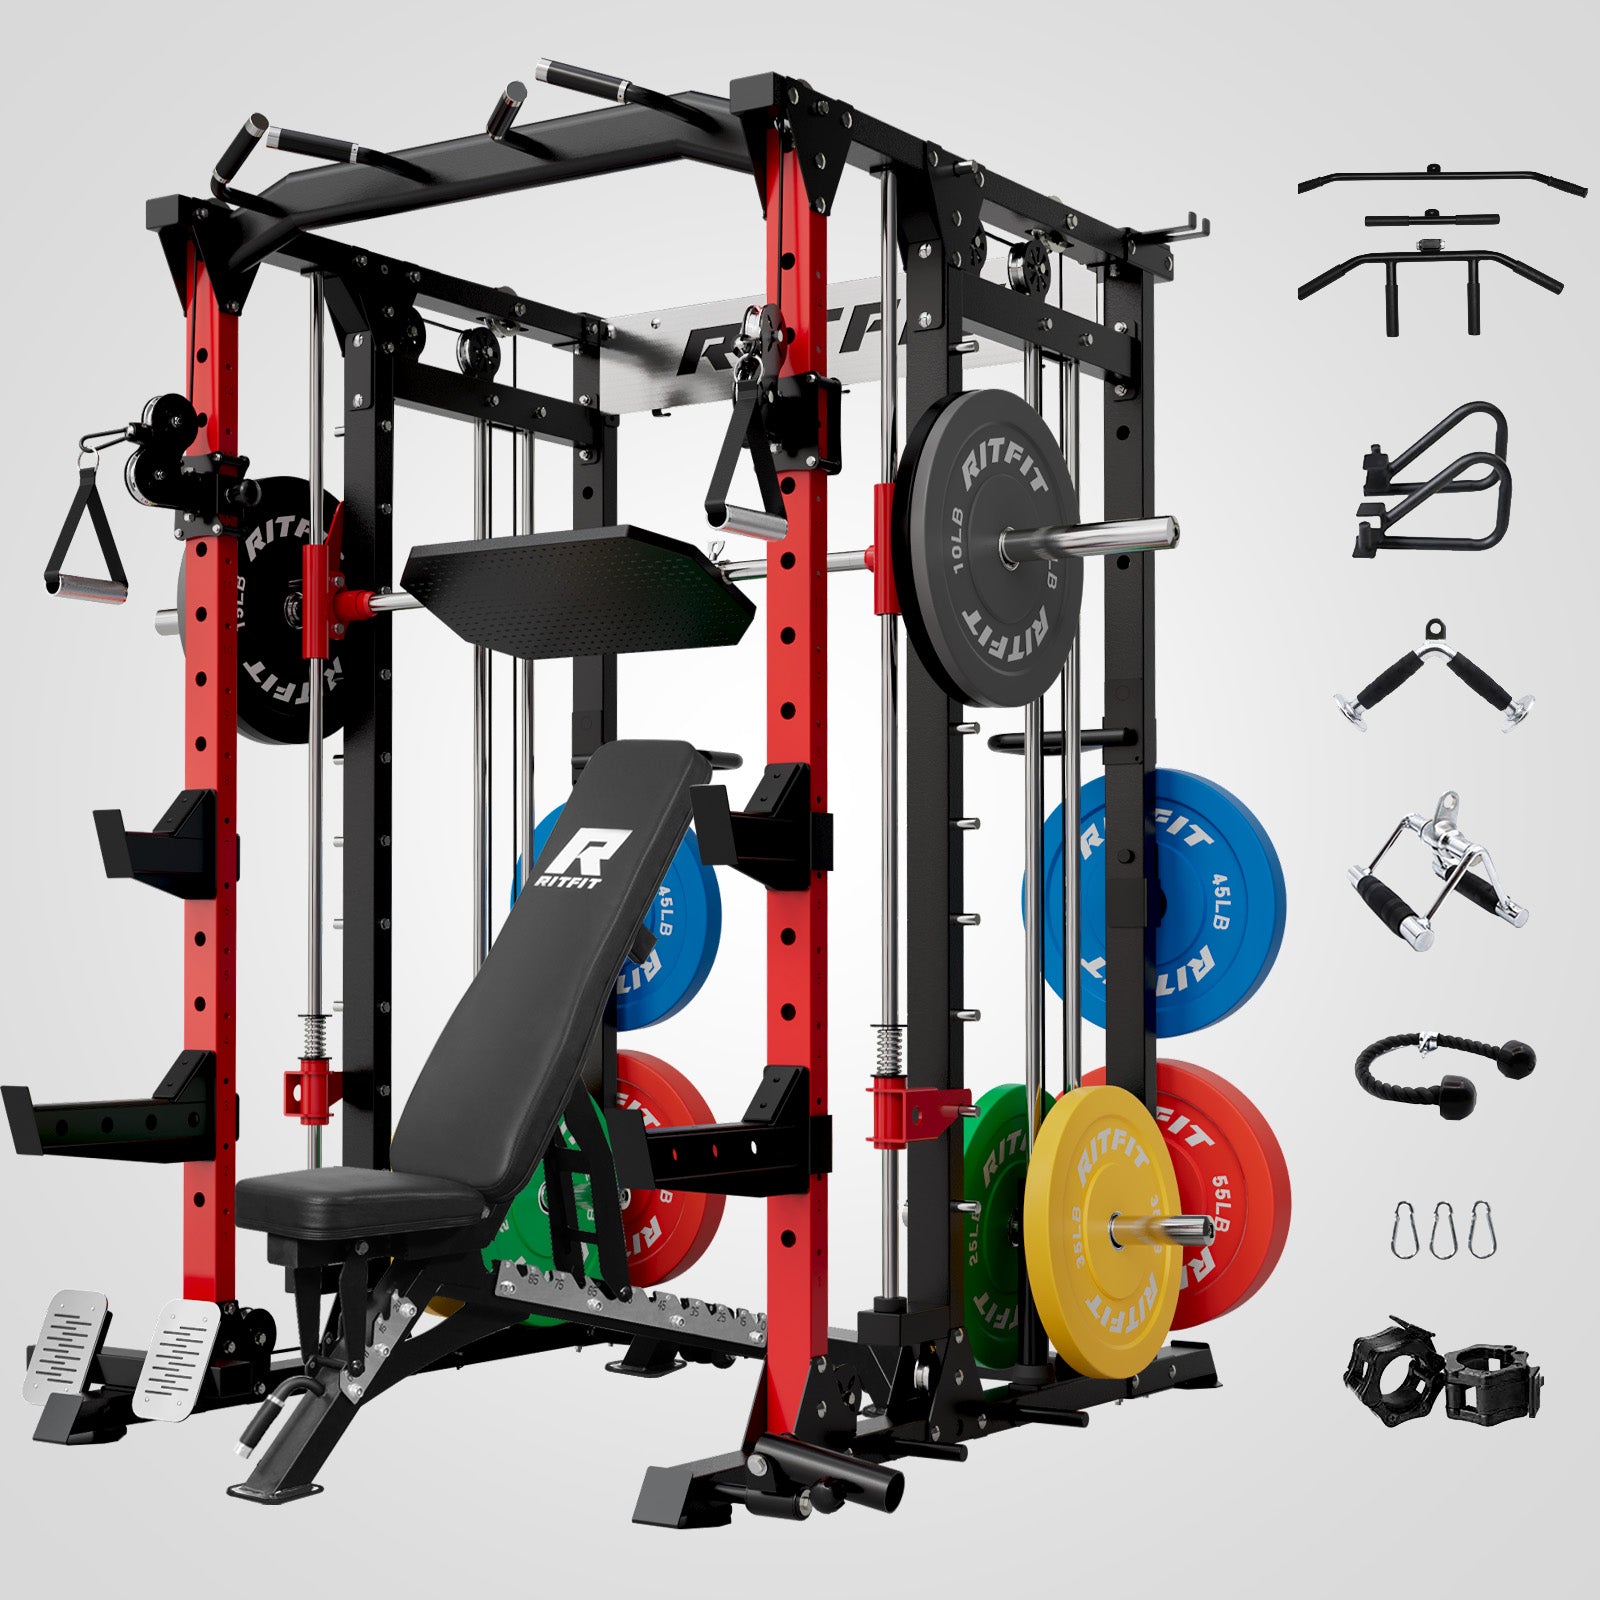
Growing Your Setup With Attachments
One of the greatest benefits of investing in a premium frame is the ability to expand it over time. The manufacturer offers specialized attachments that bolt directly onto the main columns. You do not need to buy everything on day one.
Top Recommended Additions
- The Lever Arms These heavy-duty steel arms pin onto the front of the cage. Unlike a free barbell that can tip sideways, these arms move in a perfectly fixed circular path. You can load weight plates onto the ends and push them forward or upward. Because the arms are bolted to the cage, you do not have to waste any energy balancing the weight. They are built from reinforced steel and can hold up to 150 pounds each.
- High Row Pulldown: This metal bracket bolts to the top of the machine and extends the height of the cable pulleys. This is particularly useful for taller individuals who need more room to stretch their arms completely straight during a back exercise.
- Leg Hold Down Seat: When pulling heavy weights on the top cables, the weight will literally lift you out of your chair. This attachment features thick padded cushions that lock you safely to the bench, anchoring you to the floor so you can pull massive weights downward.
It is incredibly important to understand the specific dimensions of your frame. The upright columns measure roughly 2.36 inches square with 1-inch holes. Generic attachments bought from random internet stores will likely not fit properly. You should exclusively purchase attachments specifically designed for this exact model to ensure absolute safety.
Room Size and Floor Space Planning
A premium workout machine is entirely useless if it does not properly fit in your room. Failing to measure your designated space is a very common and frustrating mistake. Proper space planning involves much more than just looking at the physical size of the metal frame.
Essential Space Measurements
- The Base Footprint: The frame itself measures almost 79 inches in length from front to back, almost 69 inches in width from side to side, and slightly over 86 inches in height.
- The Front Clearance: You must leave at least 3 to 4 feet of completely open floor space at the front of the machine. You need room to step forward during cable exercises and enough space to slide an adjustable bench in and out of the metal cage.
- The Side Clearance: You must leave at least 2 to 3 feet of empty space on both the left and right sides of the machine. A standard barbell is over 7 feet long. If the machine is shoved tightly against a side wall, you will be physically unable to slide weight plates onto the bar or reach the storage pegs.
- The Ceiling Clearance: The top metal piece sits at 86 inches high. When you perform pull-ups, your head will extend significantly higher than the frame. To avoid smashing your head into the ceiling, your room should ideally have a ceiling height that is 18 to 24 inches taller than the machine.
The floor itself must be protected. Dropping a heavy barbell can instantly crack a concrete garage floor or shatter interior house tiles. The universally accepted solution is to purchase thick rubber stall mats from an agricultural supply store. These mats absorb loud impacts and provide a slip-resistant surface for heavy lifting.
Assembly Tips and Common Mistakes
Taking delivery of a massive steel gym is an intimidating prospect. Moving the heavy boxes into your house is definitely a two-person job. Beyond assembly errors, many enthusiasts sabotage their fitness journey through poor planning.
How to Avoid Frustration
- Sort Your Hardware: The single biggest mistake happens within the first hour. People tear open all the boxes and mix hundreds of bolts into a giant pile. You must open the hardware carefully and sort every bolt by length before touching a single piece of steel.
- Keep Bolts Loose: When constructing the frame, you must thread the nuts onto the bolts using only your bare fingers. The entire frame should feel slightly loose and wobbly. This allows you to wiggle the heavy columns, ensuring every single bolt slides smoothly into its designated hole. Once the entire cage is standing tall, you take your wrench and tighten every bolt, starting from the floor and working your way up.
- Level the Floor: Garage floors are almost never perfectly flat. If the steel frame sits on a sloped floor, it will twist slightly. This twisting causes the multidirectional tracks to misalign, creating weird gaps and a bar that feels sticky. You must place a bubble level on the frame and insert thin rubber shims under the feet until the cage sits perfectly flat.
- Take Your Time With Attachments: Trying to buy every single attachment on the very first day often leads to a cluttered room. The smartest approach is to purchase the core machine and use it consistently. As you discover which exercises you enjoy, you can slowly purchase specific attachments to improve your routine.
A Simple and Effective Weekly Routine
Having a world-class piece of equipment in the spare room is only valuable if you know exactly how to utilize it. The incredible variety of stations allows you to train every single muscle group effectively without ever stepping foot outside your house. Here is a biomechanically sound split to get you started:
Leg Day Focus
A great leg day requires heavy weight and absolute safety.
- Heavy Squats: Set the safety hooks just below your waist level. Step under the guided bar and sit backward into a deep squat. The multi-directional track rolls back with you, keeping your knees perfectly aligned.
- Cable Pull Throughs: Slide the pulleys to the very bottom, attach a rope handle, and perform hip thrusts to target the back of your legs and glutes.
- Calf Raises: Place the heavy guided bar across your shoulders and press up onto your toes.
Push Day Focus
This session targets your chest, shoulders, and the back of your arms.
- Bench Press: Roll a flat bench into the center of the metal cage and perform heavy chest presses using the guided bar.
- Standing Cable Flys: Stand in the middle of the frame, grab a handle in each hand, and squeeze them together. The cables provide incredible tension at the peak of the movement.
- Shoulder Raises Lower the pulleys to the floor and raise your arms directly out to your sides to build wide shoulders.
Pull Day Focus
This session builds a thick back and strong biceps.
- Bent-Over Rows: Using the guided bar, bend at the waist and pull the bar forcefully into your stomach.
- Top Cable Pulldowns: Sit on a bench and pull a long metal bar down to your chest, engaging the wide muscles of your upper back.
- Bicep Curls: Finish the session by standing tall and curling the low cable handles up toward your shoulders.
Long-Term Care and Cleaning
A high-quality metal frame requires very little maintenance. A few small habits will keep the machine operating flawlessly for a lifetime.
The guided bar carriage rolls on polished stainless steel rods. Over time, dust and chalk can stick to these rods. Once a month, you should wipe the steel rods down with a clean and dry cloth. Applying a very light coat of silicone-based spray will keep the carriage gliding silently.
You must walk around the machine regularly and inspect the wire cables for any signs of fraying or peeling plastic coating. The cable tension will also stretch slightly over the first few months of use. You will need to adjust the tension bolts near the weight stacks to remove any slack from the line. Wiping down the padded benches and the pull-up grips after a tough workout prevents rust and keeps your fitness sanctuary smelling clean and inviting.
FAQs
Is the 3D guided bar stable enough for heavy powerlifting?
Absolutely. While the bar allows for horizontal travel, it is built on reinforced steel tracks. From a clinical safety perspective, this "controlled freedom" is actually superior for heavy lifting because it prevents the bar from "pinching" your joints into a fixed path, which is where most Smith machine injuries occur under heavy loads.
I have a previous lower back injury. Which model is safest for me?
As someone who evaluates movement patterns daily, I recommend the M2 Pro 3D. The multi-directional movement allows you to maintain a more vertical torso and a neutral spine during squats and presses. This significantly reduces the "shear force" on your lumbar discs compared to a standard straight-up-and-down machine.
Do the weight stacks provide enough resistance for advanced lifters?
The dual 143-pound stacks (286 pounds total) are more than enough for most isolation and accessory movements like chest flys, lat pulldowns, and rows. If you are a high-level strength athlete looking to exceed these limits on primary lifts, the M2's ability to act as a traditional power rack for free weights gives you an unlimited ceiling for growth.
Can I assemble this alone, or do I need a professional?
While the instructions are clear, the 13-gauge steel components are heavy. For safety and precision, especially when aligning the 3D horizontal tracks, I strongly recommend a two-person assembly. Proper alignment is key to ensuring the bearings glide smoothly without premature wear.
Conclusion
Choosing a home gym is about more than just buying metal and cables; it is about creating a space that removes the friction between you and your health goals. Whether you choose the M2 3D for its natural movement, the M2 Pro for its time-saving efficiency, or the M2 Pro 3D for the ultimate uncompromising experience, you are investing in a foundation that supports proper biomechanics and long-term joint integrity.
A commercial-grade setup in your own home eliminates excuses and provides a safe, controlled environment to push your physical limits. Remember, the best piece of equipment is the one that you feel safe and comfortable using every single day.


