A weight bench with squat rack is the single most versatile setup you can build for a home gym, letting you safely perform every major barbell compound lift without a spotter. This guide covers what to look for in a power rack and bench combo, how to configure it correctly, and which RitFit options fit your budget and space.
Whether you are setting up a garage gym from scratch or upgrading a squat stand to a full power cage, you will find the setup steps, safety configurations, and product comparisons you need to train with confidence at home.
Quick Answer: A weight bench with squat rack pairs a four-post power cage with an adjustable bench, giving you a safe solo-training station for squats, bench press, and overhead press. Look for a rack rated at 1,000 lb or higher, a bench rated at 1,300 lb minimum, and roughly 8 ft by 10 ft of clear floor space.
Key Takeaways
- Safety is the core value: A full four-post power cage with adjustable safety bars lets you train to near-failure alone on both squat and bench press, eliminating the risk of being trapped under a missed rep.
- Capacity matters more than you think: Choose a bench rated at least 1,300 lb so the combined weight of your body and the barbell stays well within the structural limit during heavy pressing.
- Configuration is everything: Setting J-hooks and safety bars at the wrong height is the most common cause of shoulder strain during unracking and failed reps that land on the frame rather than the safeties.
- Space planning prevents regret: A full-size power rack setup needs roughly 8 ft wide by 10 ft deep of clear floor space plus at least 8 ft of ceiling height if the rack includes a pull-up bar.
- One setup, years of progress: A power rack, adjustable bench, Olympic barbell, and weight plates cover every fundamental compound barbell movement and support continuous strength gains for one to three years before you need to add accessories.
What Is a Weight Bench With Squat Rack and Why Does the Combo Matter?
A weight bench with squat rack is a home gym setup that places an adjustable flat or incline bench inside a power cage or half rack, combining two pieces of equipment into one space-efficient compound-lift station that covers every foundational barbell movement. One equipment guide notes that a power rack, 300 lb Olympic weight set, adjustable bench, and protective flooring covers every compound lift and supports progressive overload for one to three years.
The Core Components: Power Rack vs Squat Stand vs Half Rack
A power rack, also called a power cage, uses four vertical uprights connected by horizontal crossmembers to form a fully enclosed cage, while a squat stand uses just two uprights and a half rack adds rear uprights without a fully enclosed frame.
- Full power cage: Four uprights with adjustable J-hooks and safety bars on both front and rear posts, allowing safe solo training on squat and bench press because a failed rep settles onto the safeties rather than trapping you.
- Half rack: Front uprights with safeties but no rear uprights, limiting bench press safety during solo training without a spotter.
- Squat stand: Two uprights with no safety bar system, suited only for light work or experienced lifters with spotters present.
- Best choice for home gym: A full four-post power cage is the only configuration that provides complete solo-training safety for both squat and bench press in a single footprint.
The squat and bench press are the two lifts most people care about most, and they both require a rack. If you want to get strong, you need a rack.
Greg Nuckols, MA, Strength Researcher and Coach, Stronger By Science
Understanding what power rack vs squat rack means for your training goals is the first step to choosing the right setup.
Why a Flat or Adjustable Bench Completes the Setup
An adjustable weight bench inside the power cage transforms the rack from a squat station into a full pressing platform that covers flat bench press, incline press, and decline press without moving to a separate piece of equipment.
- Flat bench press: Requires J-hooks set at mid-chest height and safety bars set roughly one inch below chest level at the bottom position.
- Incline press: Adjusting the bench back pad to 30-45 degrees adds incline pressing variations that target the upper chest and anterior deltoids.
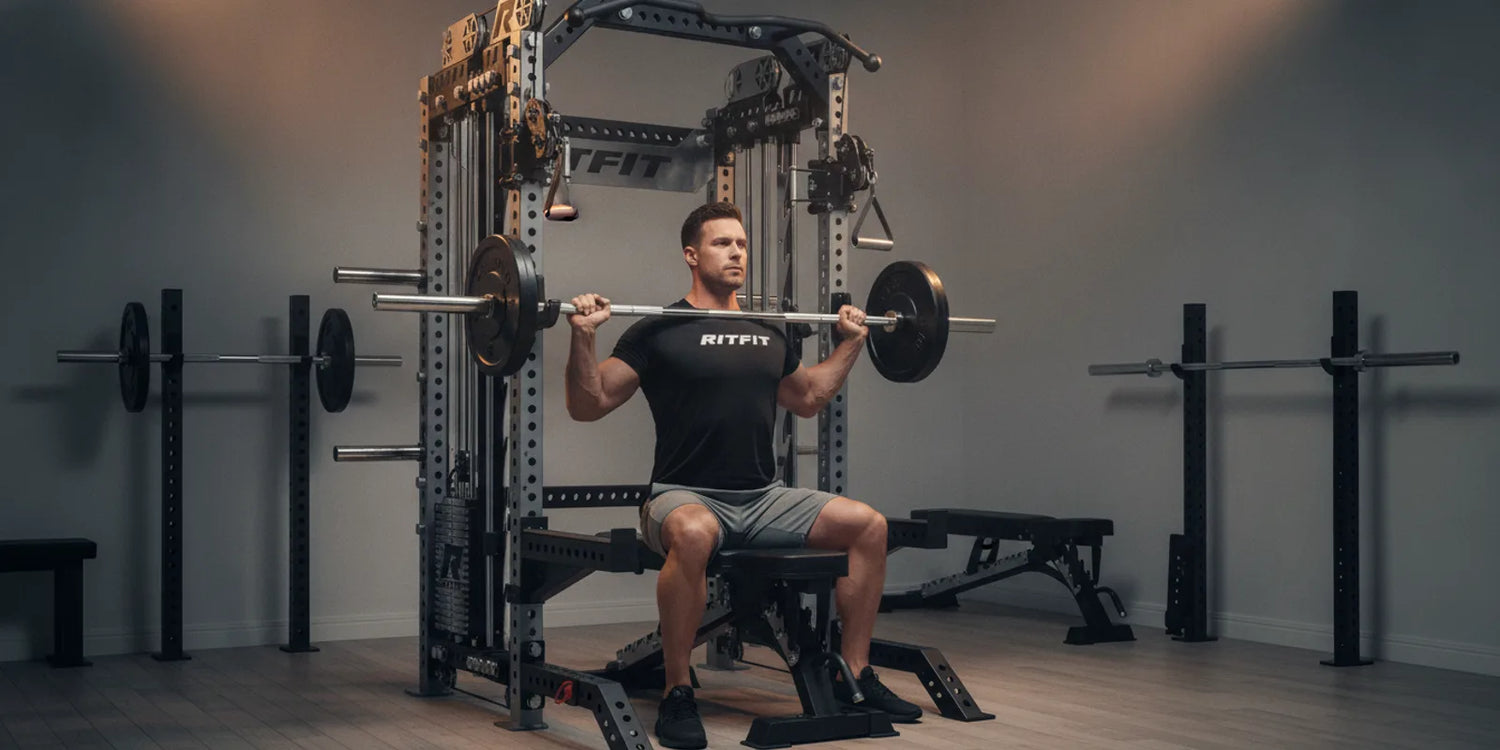
- Seated overhead press: With the bench in a near-vertical position inside the rack, you can perform seated overhead press under the pull-up bar with the J-hooks as a guide.
- Stability and rigidity: A bench rated to 1,300 lb or higher stays firm under heavy loads, preventing wobble that can shift bar path and cause shoulder injuries.
Pairing the right weight bench guide selection with a full power cage is the decision that determines how safely and effectively you can train alone for years.
What Key Specs Should You Check Before You Buy?
The key specs to check before buying a weight bench with squat rack combo are weight capacity for both the rack and bench, steel gauge and frame construction, J-hook and safety bar adjustability, and the footprint and ceiling height your space requires.
Weight Capacity: Rack and Bench
Rack capacity should be at least 1,000 lb for general strength training, while the bench capacity must account for both your body weight and the barbell load simultaneously at the highest point of loading.
- Rack weight capacity: Look for 1,000 lb or higher; commercial-grade racks often rate to 1,500-2,000 lb, providing extra margin for heavy deadlifts and loaded barbell storage on the J-hooks.
- Bench capacity: A bench rated to 1,300 lb like the RitFit 1300lb Adjustable Weight Bench handles a 200 lb lifter pressing a 300 lb bar with an enormous safety margin.
- Frame rigidity vs rated capacity: Higher-rated benches use thicker tube steel that noticeably reduces flex and movement under load, improving pressing stability and bar path consistency.
Steel Gauge and Frame Construction
Steel gauge directly determines how much the rack flexes and wobbles under load, with lower gauge numbers indicating thicker, stronger steel.
- 11-gauge steel (3x3 uprights): The benchmark for serious home gym power racks, providing the stiffness needed for heavy squats and pressing without rack sway.
- 12-gauge steel: Suitable for intermediate lifters training under 400 lb, but may show flex at heavier loads.
- Hole spacing: 1-inch Westside hole spacing in the bench area gives fine-grained adjustment for dialing in exact bar heights for different lifters.
J-Hook Spacing and Safety Bar Adjustability
J-hook and safety bar adjustability determines whether the rack can be precisely configured for your height and proportions, directly affecting lifting safety on both squat and bench press.
- J-hook liner: UHMW plastic-lined J-hooks protect the bar knurling during unracking and reduce metal-on-metal noise.
- Safety bar length: Long safety bars spanning the full rack width catch the bar no matter where along the bar it contacts, while short pins only catch at a single point.
- Adjustable in 1-inch increments: The finer the hole spacing in the uprights, the more precisely you can set safeties one inch below your chest or just below your squat depth.
Footprint and Ceiling Height Requirements
Most full-size power cage setups require a footprint of roughly 2-3 meters in length and about 1.5 meters in width, plus vertical clearance above the pull-up bar for overhead work and bar loading.
- Floor dimensions: Add at least 18 inches on each side of the rack for the loaded Olympic barbell to extend; a 7 ft Olympic bar loaded with plates needs about 8 ft of total width.
- Ceiling clearance: Measure floor to ceiling before purchasing; a rack with a pull-up bar typically stands 84-90 inches tall and you need 6-8 inches of clearance above that for pull-up range of motion.
- Depth for bench: A bench placed inside the rack adds 12-18 inches to the required front-to-back depth, so plan for at least 9-10 ft of clear depth from the front of the rack to the wall behind it.
Before ordering, read the detailed breakdown on squat rack dimensions to confirm your room measurements work for a full power cage setup.
How Do You Set Up Your Rack and Bench Correctly?
Setting up a rack and bench correctly requires configuring J-hook height for safe unracking, positioning safety bars at the appropriate fail-catch height for each lift, and placing the bench so its centerline aligns with the bar path between the uprights.
Step-by-Step J-Hook Height Setup for Bench Press
J-hook height for bench press should be set so the bar sits at roughly mid-chest height when you lie flat, allowing you to unrack with a slight elbow bend rather than a full press-out or an overhead reach.
- Step 1: Lie on the bench without the bar in place and note the height of your mid-chest from the floor.
- Step 2: Set both J-hooks to the hole that places the bar at or just above that mid-chest height, confirming both hooks are at exactly the same hole on opposite uprights.
- Step 3: Unrack an unloaded bar and check that your elbows are not locked out straight or bent more than 30 degrees at the top; adjust by one hole if needed.
- Step 4: Set safety bars approximately one inch below your chest at the lowest point of the bench press, so a failed rep rests on the safeties rather than your ribcage or throat.
- Step 5: Confirm that the left and right J-hooks sit at the identical hole; uneven hooks are the leading cause of shoulder strain during the unrack motion.
Training with properly set safety bars makes solo lifting to near-failure safe because a missed rep settles onto the safeties rather than trapping you, as outlined in the how to use a squat rack guide.
Step-by-Step Safety Bar Height Setup for Squats
Safety bar height for squats should be set just below your deepest stable squat position with a neutral spine, allowing the bar to contact the safeties only on a true failed rep and not at the bottom of a good rep.
- Step 1: Unload the bar and perform an air squat to your full depth while maintaining a neutral spine; note the height of the bar at the lowest point.
- Step 2: Set the safety bars to one hole below that position, so a good rep clears the safeties and only a complete miss catches on them.
- Step 3: Set J-hooks for squats at upper-chest or near-chin height so you can unrack with a short step back, not a full walk-out from a low pin.
- Step 4: Perform a test rep with a light load and confirm the bar does not contact the safeties at any point during a controlled descent to full depth.
- Step 5: Adjust safeties down by one hole if the bar is brushing them at the bottom, or up by one hole if they feel too low to catch a genuine missed rep.
Bench Positioning Inside the Rack
The bench inside the rack should be centered so the lifter's eyes line up directly below the bar when lying in the pressing position, with the bench feet clear of the rack uprights to prevent the bench from shifting during a set.
- Centering: Slide the bench in so the bar, when racked, sits directly over the middle of the bench pad, not over the lifter's face or hips.
- Clear uprights: Ensure the bench legs do not contact the rack uprights or base, as any contact will cause bench movement under load and alter bar path.
- Remove bench for squats: Slide the bench completely out of the rack before squatting; the bench should never be inside the rack during any standing barbell movement.
What Common Mistakes Should You Avoid?
The most common setup and safety mistakes with a weight bench and squat rack include mismatched J-hook heights, incorrectly positioned safety bars, leaving the bench inside the rack during squats, and ignoring ceiling clearance until after the rack is assembled.
- Mismatched J-hook heights: Setting the left and right J-hooks at different holes forces an asymmetric unrack that loads one shoulder more than the other, a direct path to rotator cuff strain.
- Safeties too high (bench press): Setting safety bars above your chest at the bottom cuts your range of motion and forces you to stop the rep early, reducing training effectiveness and reinforcing poor movement patterns.
- Safeties too low (squat): Setting safety bars more than two inches below your deepest position means the bar travels a long distance after a missed rep before catching, increasing the chance of spinal compression or a fall.
- Bench inside rack during squats: Leaving the bench inside the rack during a squat creates a tripping hazard on the walk-out and blocks your escape path if you need to bail the bar.
- Skipping ceiling measurement: Assembling a tall power cage only to discover it cannot stand upright in your room is one of the most common and costly home gym mistakes; always measure floor to ceiling before purchase.
- Ignoring base anchoring: An unanchored power cage can tip forward on heavy overhead press or pull-up sets; bolt the rack to the floor or use plate storage posts to add stability weight to the base.
- Using a low-capacity bench under heavy loads: A bench rated under 600 lb can flex or collapse under a 200 lb lifter pressing 250 lb, creating a genuine structural failure risk during a heavy set.
What Exercises Can You Do With a Weight Bench and Squat Rack?
A power rack and adjustable bench combination covers every major compound barbell lift and a wide range of accessory movements, making it the most complete single-station home gym setup available for strength training.
Compound Barbell Lifts
The power cage and bench together provide the safety infrastructure for the four principal barbell compound movements without requiring a spotter.
- Back squat: The rack's J-hooks and safety bars allow you to load heavy and push to near-failure safely.
- Bench press: Flat, incline, and decline variations with the bench inside the cage and safety bars set for fail protection.
- Overhead press: Standing or seated overhead press performed inside the rack with the bench removed, using the J-hooks as a starting position.
- Barbell row: Performed with the bar on the J-hooks set low, pulling to the lower chest or abdomen from a hinged position.
- Deadlift: Performed from the floor in front of or inside the rack with safety bars removed, optionally with pin pulls from safeties set at mid-shin height for partial range work.
- Front squat: Using the rack's J-hooks at front-rack height, cleaning or stepping into position for front squat variations.
Accessory and Upper-Body Work on the Adjustable Bench
The adjustable bench extends the power rack station well beyond barbell compound lifts into a full upper-body accessory platform when slid out of the rack or used independently.
- Pull-ups and chin-ups: The pull-up bar built into most full power cages adds vertical pulling without any additional equipment.
- Dumbbell pressing: Flat, incline, and decline dumbbell press on the adjustable bench targets the chest from multiple angles.
- Seated dumbbell shoulder press: The bench in a near-vertical position supports strict seated pressing form.
- Step-ups and box work: A flat bench used as a step-up box or box squat target when removed from the rack adds lower-body variety.
- Core work: Decline sit-ups, dumbbell hip hinges, and band-resisted movements on the flat bench round out the accessory program.
Pair your setup with RitFit weight plates and barbells to complete the loading system and maximize the full exercise range your rack and bench combo supports.
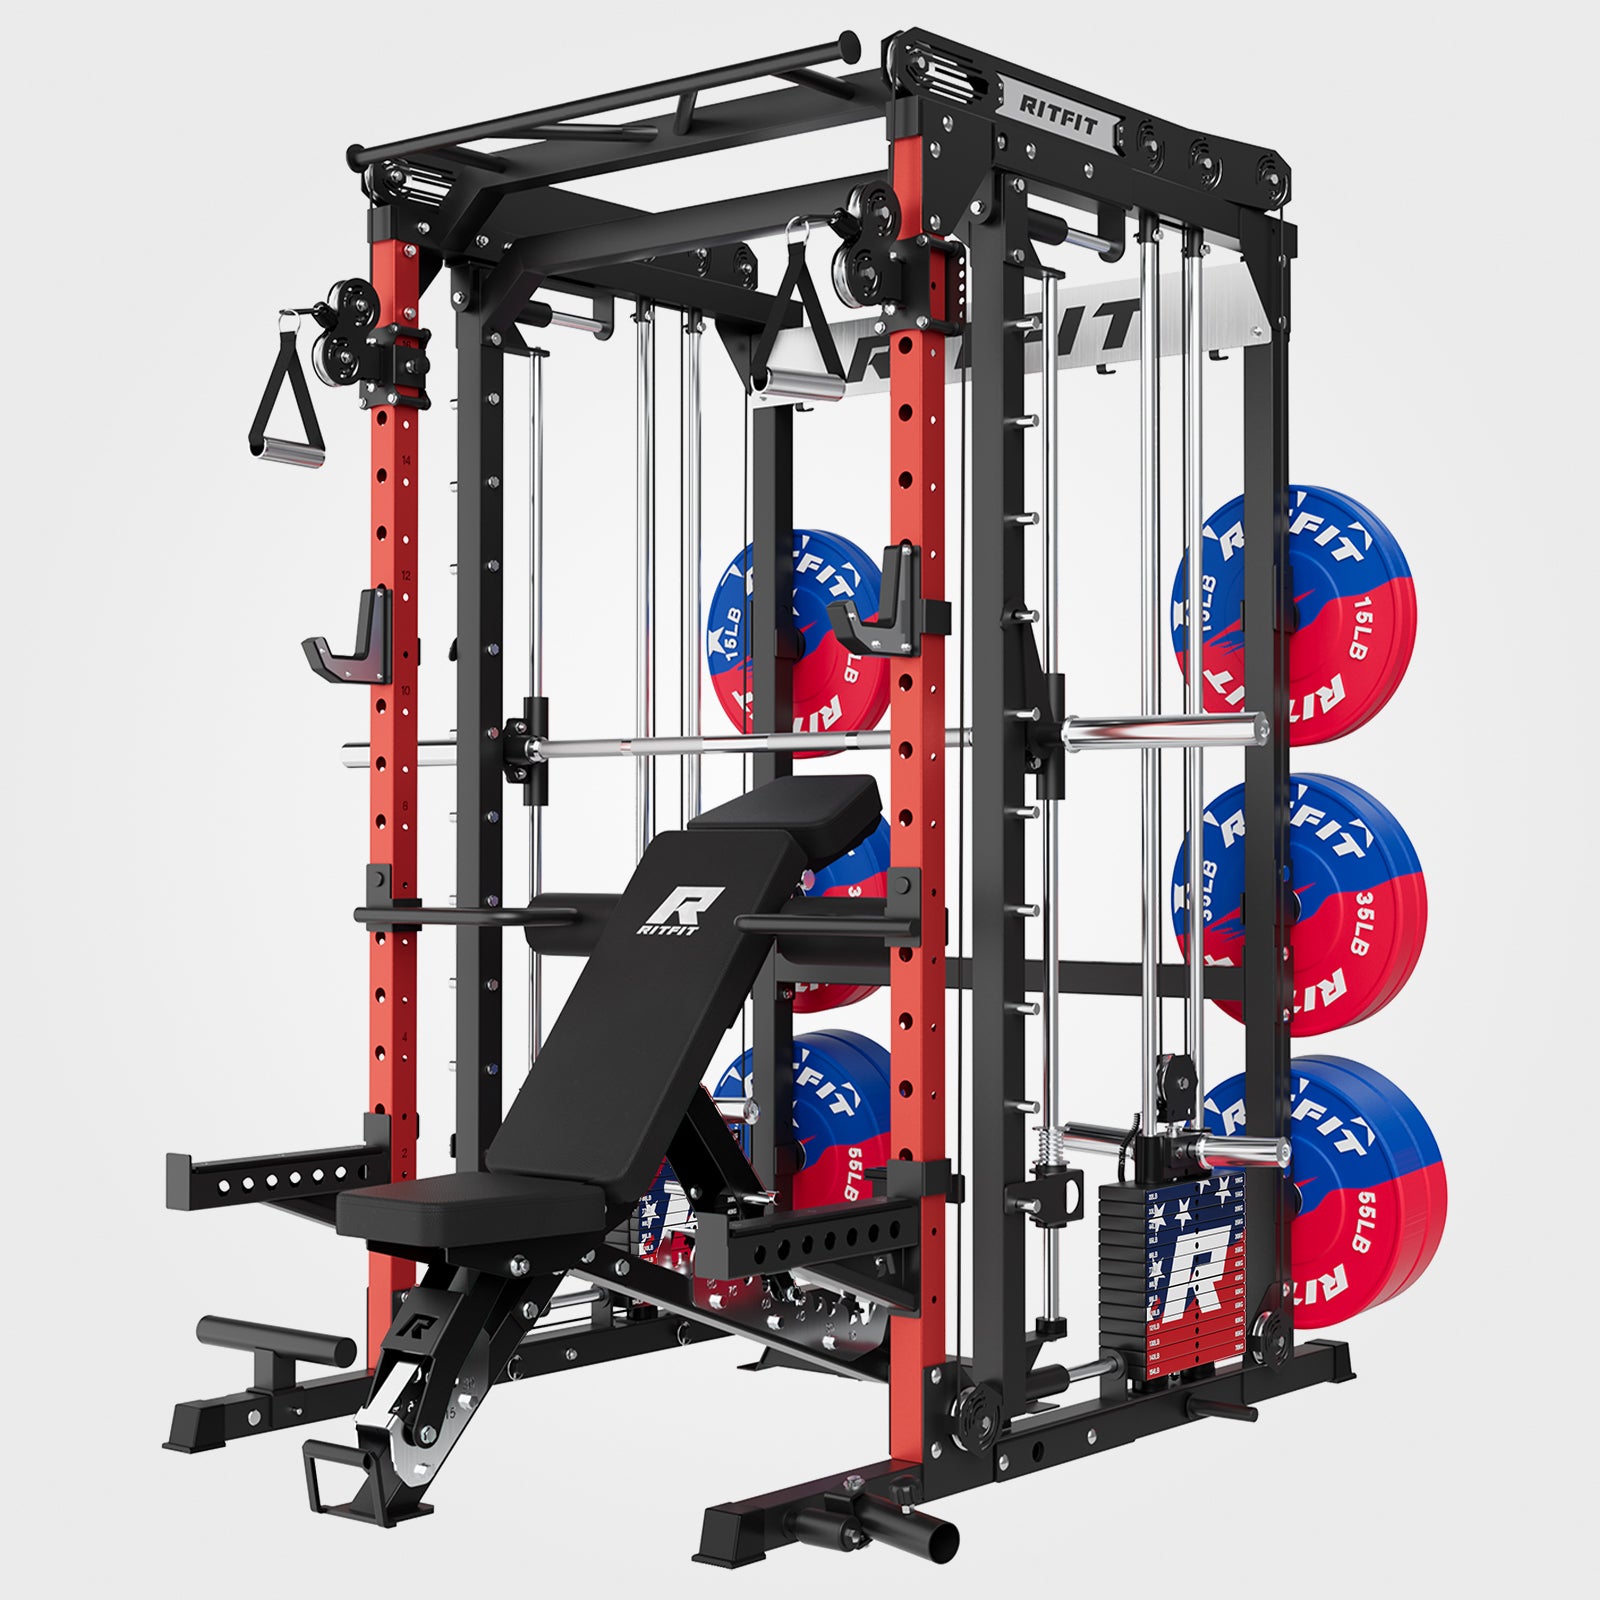
Watch how the RitFit PPC03 Power Cage with Cable Crossover handles full-body barbell and cable work in a single compact home gym footprint.
Which RitFit Bench and Rack Combo Is Right for You?
The right RitFit bench and rack combination depends on your budget, available space, and training goals, with the primary decision being whether you need a bench rated for moderate loading or one built for heavy progressive overload work.
Best Entry-Level Combo
The entry-level RitFit combo pairs the PPC03 Power Cage with the RitFit 1300lb Adjustable Weight Bench, giving you a 1,300 lb bench capacity and a full four-post cage with J-hooks, safety bars, and a pull-up bar at a price point accessible to most first-time home gym builders.
- Best for: Lifters pressing up to 250-300 lb combined body weight plus bar load, home gym budgets prioritizing value without sacrificing safety.
- Space footprint: Fits in a standard single-car garage bay or a 10 ft x 10 ft dedicated room with room to load the bar on both sides.
- Upgrade path: Add plate storage posts, a cable attachment, or a dip bar attachment over time without replacing the cage frame.
The RitFit 1300lb Bench in Pink offers the same structural specification in an alternate colorway, making it a popular choice for lifters who want the full safety margin with a distinct aesthetic.
Best for Progressive Overload and Accessories
The premium RitFit combo pairs the PPC03 Power Cage with the RitFit Gator Adjustable Weight Bench, which is rated to 1,600 lb and built with a thicker frame tube for noticeably greater rigidity under heavy pressing loads.
- Best for: Intermediate and advanced lifters regularly pressing over 225 lb, or anyone who plans to add cable pulley accessories that increase lateral forces on the bench frame.
- Rigidity advantage: The Gator's heavier frame construction reduces lateral flex during wide-grip pressing and dumbbell work, improving bar path stability and reducing shoulder drift.
- Long-term cost: Paying more upfront for a 1,600 lb bench eliminates the need to replace the bench when your lifts progress past the structural comfort zone of a lighter-rated option.
| Option | Bench Model | Bench Capacity | Best For | Upgrade Path |
|---|---|---|---|---|
| Entry-Level | RitFit 1300lb Adjustable Bench + PPC03 | 1,300 lb | Beginners, combined press loads up to 300 lb | Cable attachment, plate posts |
| Premium | RitFit Gator Adjustable Bench + PPC03 | 1,600 lb | Intermediate-advanced lifters, heavy pressing above 225 lb | Full cable system, dip bars |
RitFit Bench and Rack Comparison: Entry vs Premium
In this hands-on review, you can see an all-in-one power rack with smith machine used for a full home gym workout, giving a real-world sense of how a rack and bench station performs outside the spec sheet.
Browse all options at RitFit adjustable benches to compare pad thickness, back pad angle range, and current availability before deciding.
How Much Floor Space Does a Power Rack and Bench Setup Actually Need?
A power rack and bench setup requires a clear zone of approximately 8 ft wide by 10 ft deep as a practical minimum, accounting for the rack footprint, the loaded Olympic bar extending on both sides, and walking clearance around the front of the rack to position the bench.
- Rack footprint: Most full-size power cages occupy 50-55 inches deep by 48-52 inches wide on the floor, before adding bar clearance.
- Bar clearance: A standard 7 ft Olympic bar with 45 lb plates loaded on both sleeves needs roughly 86-92 inches of total width, which means at least 18 inches of clear space on each side of the rack uprights.
- Front clearance: Leave at least 3 ft of clear floor space in front of the rack for walking in and out with the bar, and to position the bench when sliding it in or out.
- Ceiling clearance: If the rack includes a pull-up bar at 84 inches, you need at least 8 ft of ceiling height to perform full pull-ups without hitting the ceiling, or 7 ft minimum if you plan to remove the pull-up bar.
- Flooring: Rubber horse stall mats 3/4 inch thick under the rack and bench protect the floor, reduce noise, and provide a non-slip surface under 5-10 ft x 6-8 ft of coverage.
Most full-size setups fit comfortably in a single-car garage once a vehicle is removed, but measuring actual floor-to-ceiling height and mapping the rack footprint with tape on the floor before purchase prevents the most common setup disappointments.
Add a RitFit dumbbell weight rack to an adjacent wall to keep the floor clear of loose dumbbells and maintain safe clear access around the power cage during all movements.
FAQs About Weight Bench With Squat Rack
Do I need both a weight bench and a squat rack for a home gym?
Yes. A squat rack lets you squat and overhead press, but adding a weight bench inside the rack enables safe solo bench press and incline press without a spotter, covering every major barbell compound movement in a single footprint and making the combo the most space-efficient foundation for a home gym.
How do I set J-hook height for bench press on a squat rack?
Position the J-hooks so the bar sits at roughly mid-chest height when you lie flat, high enough that you can unrack with a slight elbow bend without over-reaching, but low enough that you never have to sit up to reach it. Confirm both hooks are at the exact same hole before loading plates, as mismatched hook heights are the most common cause of shoulder strain during the unrack.
What weight capacity should a bench inside a squat rack have?
Choose a bench rated to at least 800-1,000 lb if you plan to bench press seriously, as the rating must account for both your body weight and the barbell load at the same time. For heavy pressing above 200 lb total load, a higher-rated bench like the RitFit Gator at 1,600 lb provides a larger safety margin and noticeably more frame rigidity under load.
How much floor space does a power rack and bench setup require?
A full-size power rack needs a footprint of roughly 4 ft wide by 6-8 ft deep, plus at least 18 inches on each side for the loaded Olympic bar. With the bench inside, plan for a clear zone of approximately 8 ft wide by 10 ft deep as a minimum, plus 8 ft ceiling height if the rack includes a pull-up bar.
Can I use a half rack instead of a full power cage with a weight bench?
Yes, but with an important safety trade-off. A half rack lacks the rear uprights and safety bars of a full power cage, meaning you cannot safely train to failure on bench press alone. For solo training, a full four-post power cage with adjustable safety bars is strongly recommended because it catches the bar on both squat and bench press missed reps.
What exercises can I do with just a weight bench and squat rack?
A power rack plus adjustable bench covers back squat, bench press, incline press, overhead press, barbell row, and deadlift. The pull-up bar built into most power cages adds vertical pulling work. Adjusting the bench angle adds incline and decline variations, and dip attachments or cable accessories can expand the station further as your training progresses.
Conclusion
A weight bench with squat rack is the most complete home gym investment you can make, covering every major barbell compound movement in a safe solo-training station. Choosing a four-post power cage with proper safety bars and a high-capacity bench gives you years of progressive overload training without a spotter.
Measure your floor space and ceiling height first, then explore the full range of best adjustable weight bench options to find the right pairing for your goals.
Disclaimer
This article provides general guidance on home gym equipment selection and is not a substitute for professional advice from a certified strength coach or structural engineer regarding load-bearing requirements. Always follow the manufacturer's assembly and load capacity instructions, and consult a qualified professional before training with maximal loads if you have pre-existing injuries or health conditions.