


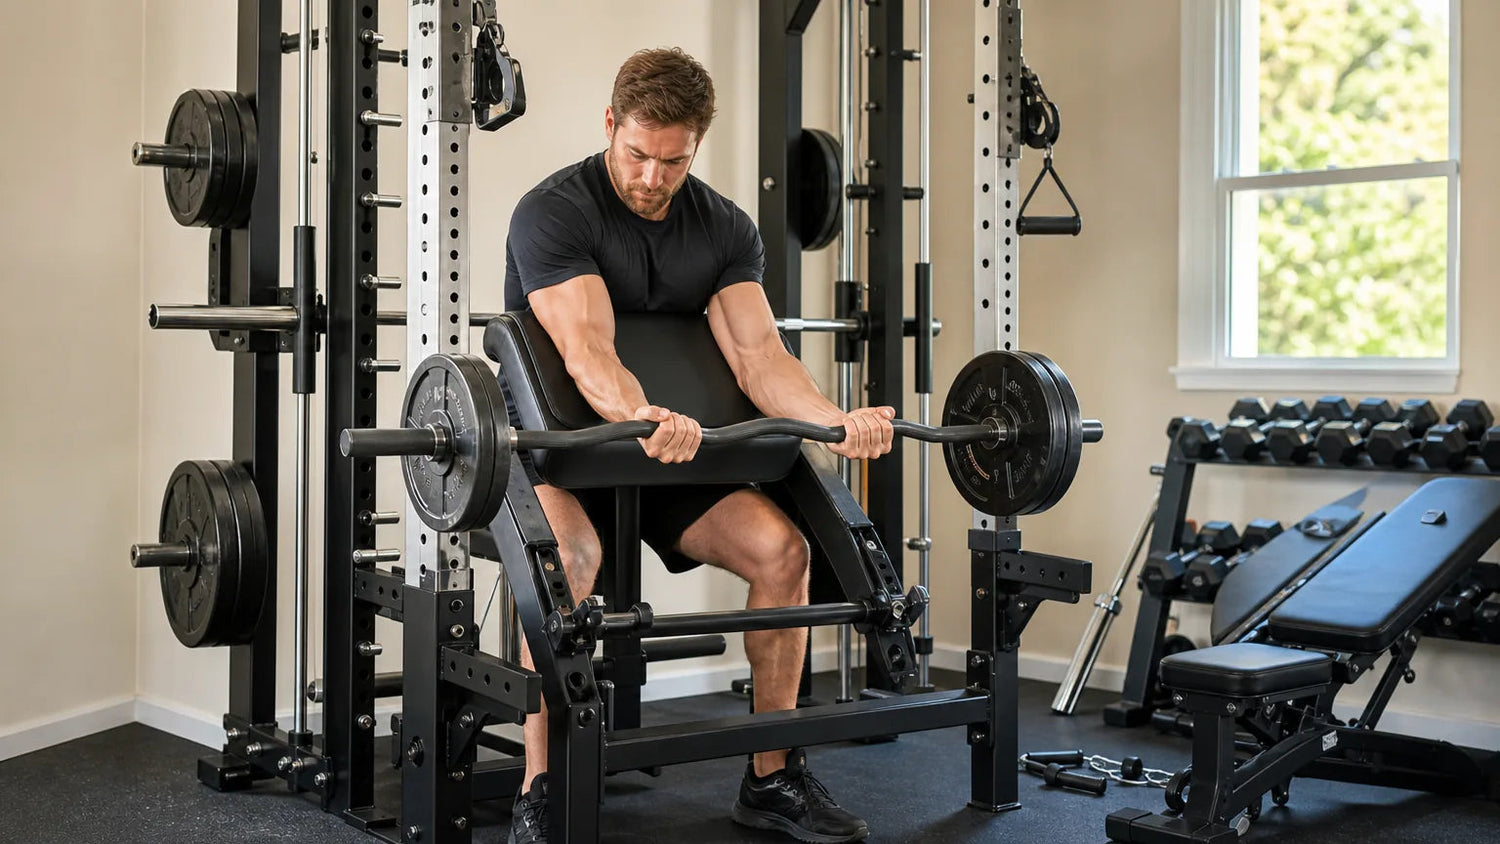
A preacher curl attachment for a rack lets you get strict, isolated bicep training without buying a dedicated preacher curl bench. You simply mount the padded arm support onto your power rack's uprights, lock it into place, and curl with a barbell, EZ curl bar, or dumbbells.
This guide covers everything you need to know: how these attachments work, what compatibility specs to check, step-by-step installation, how they compare to standalone benches, and how to train effectively once yours is set up.
Quick Answer: A preacher curl attachment for a rack is a padded arm support that mounts onto your power rack's uprights using a J-hook or pin-on system, letting you perform isolated bicep curls without a standalone preacher bench. Most fit 2x2, 2x3, and 3x3 inch uprights, install in under a minute, and save significant floor space compared to a full preacher bench.
Key Takeaways
- Mounting System: Most rack-mounted preacher curl attachments use a J-hook or pin-on system that slots directly into your upright's standard holes and locks in under a minute.
- Compatibility: Check upright dimensions (2x2, 2x3, or 3x3 inches) and hole diameter before buying, as most attachments require a specific upright size or include adapters.
- Space Savings: A rack-mounted attachment adds zero floor footprint since it installs inside your existing rack, making it ideal for home gyms under 200 square feet.
- Bar Versatility: You can use a standard barbell, EZ curl bar, or dumbbells with most rack-mounted preacher curl attachments, giving you full flexibility on grip angle and load.
- Bicep Focus: The preacher position locks your upper arm in place and places peak tension at the bottom of the curl, making strict form essential for both safety and results.
What Is a Preacher Curl Attachment for a Rack?
A preacher curl attachment for a rack is a padded, angled arm support that mounts onto your power rack's uprights, creating a preacher curl station within the rack's existing footprint. The pad locks your upper arms at a fixed forward angle so momentum from your shoulders and back is eliminated, directing all tension into the biceps brachii.[1]
- Padded arm rest: A slanted foam or vinyl pad that supports your upper arms from the tricep area down to the elbow, holding them in front of your torso throughout the movement.
- Mounting hardware: Either a J-hook style bracket that clips into upright holes or a pin-on plate that slides over the upright and locks with a pull-pin.
- Bar catch or spotter arm integration: Many designs rely on the rack's existing spotter arms or J-hooks to hold the bar at the start and end of each set.
- Compatible bar types: Standard barbells (straight), EZ curl bars, and dumbbells all work with most rack-mounted pad designs.
- Short head emphasis: Because the upper arm is held in front of the torso, the preacher curl targets the short head of the biceps brachii, complementing incline curls that stress the long head.
Why the Preacher Position Changes Bicep Activation
The forward-inclined pad places your shoulder joint in a flexed position, which slackens the long head of the biceps and shifts demand to the short head, a response well documented in EMG research on shoulder angle and biceps activation.[1]
This also means peak muscle demand occurs at the very start of the concentric phase, when your elbow is near full extension, making the bottom range of motion the most critical part of each rep.
Rack Compatibility: What to Check Before You Buy
Rack compatibility is the most important factor when choosing a preacher curl attachment, and the three numbers you need to confirm are upright dimension, hole diameter, and rack depth.
- Upright dimension: The three standard upright sizes are 2x2 inches, 2x3 inches, and 3x3 inches. Your attachment's mounting bracket must match your upright size exactly, or include adapters that bridge the gap. Check your rack's product page or measure the outer face of the upright directly.
- Hole diameter: Two common standards exist: 1-inch Westside holes (on most 3x3 commercial-grade racks) and 5/8-inch holes (common on 2x2 and 2x3 budget and mid-range racks). The pull-pin that locks the attachment must match. Mismatched pins lead to wobble or refusal to seat.
- Hole spacing (on-center): Most racks use 1-inch incremental spacing in the bench zone and 2-inch spacing elsewhere. Confirm the spacing matches the attachment's pin pattern so height adjustment is possible at your preferred range.
- Rack depth: The attachment extends inward from the uprights. Make sure your rack has enough interior depth to seat the pad at a comfortable working height without the arm rest fouling against the cross-members.
- Upright finish and coating: Powder-coated uprights are standard. Avoid forcing pins into galvanized or tightly-fitted uprights without confirming the pin diameter clears the hole without binding.
- Weight capacity of the attachment: Most steel rack-mounted attachments are rated for 150 lb to 300 lb of loading, well above typical preacher curl loads. Always confirm the stated capacity before use.
For a complete list of J-hook sizes and compatibility specs across RitFit rack models, check the J-hook technical specifications page before ordering.
How to Install Your Preacher Curl Attachment
Installing a rack-mounted preacher curl attachment takes under two minutes and requires no tools beyond the pull-pins that come with most units.
Step-by-Step Installation
- Step 1 - Choose your height: Stand next to the rack with your arm at your side, then identify the hole level where the top of the pad will sit just below your armpit. This is your starting reference point.
- Step 2 - Seat the J-hooks: Slide the attachment's J-hook brackets over the front uprights at that hole level, one bracket per upright. Align the pin slots with the matching holes on each upright.
- Step 3 - Insert pull-pins: Push the pull-pins through the J-hook and upright holes on both sides. You should feel a positive click or resistance when the pin passes through the upright hole. Verify both pins are fully seated before loading any weight.
- Step 4 - Test pad height: Sit or stand at the attachment and rest your upper arms on the pad. Your armpits should land at or just above the top edge of the pad. If the pad digs into your armpits or your elbows float too high, adjust one hole up or down.
- Step 5 - Set your bar height: Place your barbell or EZ curl bar on the rack's existing spotter arms or J-hooks at a height you can unrack with arms slightly bent. Never start a rep with your elbows already locked out under load.
- Step 6 - Verify stability before loading: Apply downward pressure to the pad with your hands before adding plates. The attachment should not shift, rock, or rotate. If it moves, re-seat both pins and confirm they pass completely through both the bracket and the upright hole.
The following video walks through a real-world installation and adjustment of a rack-mounted bicep attachment, including the J-hook pin setup and pad height adjustment:
Common Installation Mistakes to Avoid
- Uneven pin depth: One side seated, one side loose creates a tilting pad that shifts under eccentric load. Always confirm both pins are fully through before curling.
- Pad set too low: If the pad top sits below your elbow level rather than at your armpit, your elbows will pull off the pad at the top of the curl, turning a strict preacher curl into a loose standing curl.
- Skipping the stability check: Always apply hand pressure to the pad before adding weight plates. An unseated pin that fails mid-set is a safety hazard, not just an inconvenience.
- Using worn or undersized pins: Inspect pull-pins for deformation or corrosion before each session. Replace any pin that doesn't seat with positive resistance in the upright hole.
Rack-Mounted vs. Standalone Preacher Bench: Which Is Better?
A rack-mounted preacher curl attachment is the better choice for most home gym owners, primarily because it eliminates a separate footprint and works with equipment you already own.
| Factor | Rack-Mounted Attachment | Standalone Preacher Bench |
|---|---|---|
| Floor Space | Zero added footprint, sits inside existing rack | Adds 10-15 sq ft of dedicated floor space |
| Cost | Lower, since rack is already owned | Higher, standalone unit required |
| Stability | Tied to rack frame rigidity; very stable on heavy racks | Self-standing stability; quality varies by build |
| Height Adjustment | 1-inch or 2-inch increments via hole spacing | Typically infinite or multi-position adjustment |
| Bar Safety | Uses rack's existing spotter arms as bar catch | Dedicated bar catch integrated into the bench |
| Storage | Unhooks and hangs on rack or stores flat | Requires dedicated storage or leaves on floor |
Comparison based on general product category specifications; individual product performance varies.
When a Standalone Bench Makes More Sense
- You don't own a rack: Without an existing power rack, a standalone preacher bench is the only option in this category.
- You need infinite height adjustment: Some standalone benches offer micro-adjust seat and pad positions that rack hole spacing can't replicate, which matters for users at height extremes.
- Heavy volume training: If preacher curls are a primary movement with frequent heavy loading, a purpose-built standalone bench with its own integrated seat provides a more ergonomic setup for long sessions.
For most home gym users working in a garage or spare room, the RitFit Preacher Curl Pad paired with your existing rack is the most space-efficient and cost-effective solution. If you're building out a full rack ecosystem, see all available complete power rack packages to find a rack that accommodates the full range of attachments.
How to Train Effectively With Your Preacher Curl Attachment
Effective training on a rack-mounted preacher curl attachment starts with controlling the bottom range of motion, because that is where the biceps brachii generates peak mechanical tension.
Correct Arm and Shoulder Positioning
- Armpit contact: Your armpits should rest at the very top of the pad, not mid-tricep. This prevents the shoulder from rotating forward at the top of the rep and keeps the upper arm fixed throughout.
- Elbow alignment: Keep both elbows pointing straight down the pad, not flared outward. Flared elbows shift tension away from the biceps and toward the front deltoid.
- Grip width: A shoulder-width grip on a straight barbell or the angled grip of an EZ curl bar both work well. The EZ curl bar reduces wrist pronation stress on heavier sets.
- Full extension at the bottom: Lower the bar slowly until your elbows are as close to full extension as your flexibility allows without pain. This is the highest-tension point of the rep, so don't shorten the range to protect your ego on the weight.
- Controlled squeeze at the top: Curl to full flexion and pause briefly before lowering. Avoid letting momentum carry the bar; the pad eliminates swinging, so every rep relies purely on bicep strength.
Weight Selection
Beginners should start with a weight that allows 3 sets of 10-12 reps with controlled form, typically 20-35 lb for a barbell or EZ curl bar. Because the preacher position removes all momentum, expect to use 20-30% less weight than on standing curls for the same perceived effort.
Programming: Sets, Reps, and Frequency
- Frequency: Train biceps directly 2-3 times per week, allowing at least 48 hours between sessions for the same muscle group.
- Volume: 3-4 sets of 8-15 reps per session works well across most training goals. A study found that after 10 weeks of barbell preacher curl training, participants gained approximately 7-8% in biceps thickness, using 3 sets of 8-12 reps per session, three times per week.[2]
- Progressive overload: Add 2.5-5 lb when you can complete all sets at the top of your rep range with clean form for two consecutive sessions.
- Pairing: Preacher curls pair well with incline curls, which stress the long head of the biceps. Alternating the two in the same session provides balanced short-head and long-head stimulus.
Substitute Exercises When the Attachment Isn't Available
- Concentration curls: Performed seated with your elbow braced against your inner thigh, concentration curls replicate the upper-arm-fixed position of the preacher curl with a dumbbell.
- Cable preacher curl: If your rack has a cable pulley set for racks, attaching a low cable and using a bench for arm support creates a close preacher curl analog with a different resistance curve.
- Incline dumbbell curl: Set an adjustable bench to 45-60 degrees and perform curls with your arms hanging straight down. This targets the long head of the biceps, complementing the short-head emphasis of the preacher curl.
When to Stop: Pain Signals to Watch For
- Sharp elbow pain: Pain at the elbow joint during the lowering phase is often a sign of distal biceps tendon stress. Stop immediately, reduce weight, and limit range of motion until assessed.
- Pain at the shoulder: If your shoulder aches with the arm in the forward-flexed position, the pad may be set too high, forcing hyperflexion at the shoulder. Lower the attachment one hole and reassess.
- Forearm cramping: Mild forearm fatigue is normal, but cramping that prevents a full rep range suggests grip width or bar type needs adjustment. Try switching to an EZ curl bar to reduce supination stress on the forearm flexors.
A 9-week study in recreationally trained women found that preacher curls significantly increased distal biceps thickness, with the highest strain occurring in the range of motion where the arm muscles are more elongated, at the start of the concentric phase.[3] Maintaining full range of motion to near elbow extension is therefore essential to maximizing results.
"Exercises such as preacher curls and concentration curls (where the upper arm is positioned in front of the torso) work more in the short head, as do exercises such as cross cable curls on a high pulley apparatus."
Brad Schoenfeld, PhD, Exercise Science Researcher specializing in Muscle Hypertrophy, CUNY Lehman College
Getting the Most Out of Your RitFit Rack Setup
A preacher curl attachment adds genuine value to any power rack setup, but you get the most out of it when it's part of a well-planned attachment ecosystem.
- Pair with a bicep curl attachment: The 2-in-1 hip thrust and bicep curl attachment offers a second bicep isolation option with a different mechanical angle, giving you variety without buying another standalone unit.
- Use J-hook quality as a baseline: The stability of your preacher curl attachment is only as good as the J-hooks or mounting pins it relies on. Upgrading to the upgraded J-hook attachment for 2x2 racks reduces flex and wobble at the base, which matters when loading the pad asymmetrically with dumbbells.
- Expand beyond arm training: The same rack that holds your preacher curl attachment can also accept a leg extension rack attachment and a hack squat rack attachment, turning one piece of equipment into a full-body training station.
- Check the best attachment combinations: For a curated guide to building out your rack, see best power rack attachments for your home gym and the hack squat rack attachment guide for setup tips that apply across attachment types.
- Master the preacher curl form first: Before stacking weight, read how to do preacher curls with proper form so your technique is locked in from rep one.
FAQs About Preacher Curl Attachment for Rack
What power rack sizes are compatible with a preacher curl attachment?
Most rack-mounted preacher curl attachments fit uprights in 2x2, 2x3, and 3x3 inch sizes. Before purchasing, confirm your rack's upright dimension and hole diameter, as 1-inch Westside holes and 5/8-inch standard holes use different pin sizes, and always verify the spec sheet matches your specific rack model.
How do I set the correct pad height on my preacher curl attachment?
Sit or stand at the attachment and adjust pad height until your armpits rest at the very top edge of the pad with your upper arms flat on the surface. This locks the shoulder joint, prevents swinging, and ensures full range of motion from near elbow extension to complete flexion.
Can I use an EZ curl bar or dumbbells with a rack-mounted preacher curl attachment?
Yes. Most rack-mounted preacher curl attachments work with a straight barbell, an EZ curl bar, and dumbbells. The EZ curl bar reduces wrist strain on heavier sets, and dumbbells allow unilateral training to correct arm strength imbalances.
How much space does a rack-mounted preacher curl attachment save compared to a standalone bench?
A standalone preacher curl bench typically occupies 10-15 square feet of dedicated floor space, while a rack-mounted attachment adds zero separate footprint and unhooks when not in use. For home gyms under 200 square feet, this difference often determines whether the exercise fits your space.
What weight should I start with on a rack-mounted preacher curl?
Beginners should start with a weight that allows 3 sets of 10-12 reps with controlled form, typically 20-35 lb for a barbell or EZ curl bar. The preacher position eliminates momentum, so expect to use 20-30% less weight than on standing curls, and prioritize a slow lowering phase to full elbow extension.
Is a rack-mounted preacher curl attachment safe for heavy loading?
Yes, provided the attachment is correctly installed with both pull-pins fully seated before each set. Most steel rack-mounted attachments are rated for 150-300 lb of loading capacity, well above typical preacher curl loads, so verify both J-hooks are at the same hole level and inspect pins for wear periodically.
What muscles does a rack-mounted preacher curl work?
The primary mover is the biceps brachii, with emphasis on the short head because the upper arm is positioned in front of the torso. Secondary muscles include the brachialis and brachioradialis, while the pad minimizes deltoid and core recruitment compared to standing curls.
Conclusion
A preacher curl attachment for a rack delivers strict bicep isolation at a fraction of the cost and floor space of a standalone preacher station, and it works with bars and dumbbells you already own.
Confirm your rack's upright size and hole diameter before ordering, install with both pull-pins fully seated, and start lighter than you think you need. Browse the full range of rack attachments for power racks to build out your home gym one targeted upgrade at a time.
Disclaimer
The information in this article is for general fitness education only and does not constitute medical or professional training advice. Consult a qualified healthcare provider or certified strength coach before starting any new exercise program, particularly if you have a pre-existing injury or medical condition.
Save on your next RitFit order
Tap the button to copy your code, then paste it at checkout.
References
1. Oliveira LF, Matta TT, Alves DS, Garcia MA, Vieira TM. Effect of the shoulder position on the biceps brachii emg in different dumbbell curls. J Sports Sci Med. 2009;8(1):24-9. PMC3737788
2. Nunes JP, Jacinto JL, Ribeiro AS, et al. Placing Greater Torque at Shorter or Longer Muscle Lengths? Effects of Cable vs. Barbell Preacher Curl Training on Muscular Strength and Hypertrophy in Young Adults. Int J Environ Res Public Health. 2020;17(16):5859. doi:10.3390/ijerph17165859. PMC7460162
3. Zabaleta-Korta A, Fernandez-Pena E, Torres-Unda J, Frances M, Zubillaga A, Santos-Concejero J. Regional Hypertrophy: The Effect of Exercises at Long and Short Muscle Lengths in Recreationally Trained Women. J Hum Kinet. 2023;88:259-270. doi:10.5114/jhk/163561. PMC10407320


