The behind the neck press on smith machine rails is one of the most debated shoulder exercises in barbell training, and a smith machine is the most controlled place to attempt it. This guide walks through setup, step by step form, the muscles it targets, and honest screening for who should skip it.
You will also see how the lift compares to front pressing, how to pick your first weight, and exactly when to stop. Healthy shoulders and solid overhead mobility are the entry ticket here, not an optional extra.
Quick Answer: The behind the neck press on smith machine setups is an advanced shoulder press performed with the bar lowering behind your head, set up at upper chest height with a grip slightly wider than shoulder width. Only lifters with healthy shoulders and good overhead mobility should attempt it, starting far lighter than a front press and lowering to the base of the neck.
Key Takeaways
- Controlled venue: A smith machine gives this controversial press a fixed bar path and adjustable safety stops, which makes bailing safe when the groove is lost.
- Screening first: Lifters with a shoulder impingement history, rotator cuff problems, or limited overhead range of motion should skip the lift and press in front.
- Muscle bias: EMG work on competitive bodybuilders measured higher medial and posterior deltoid excitation behind the neck, while front pressing activated the pectoralis major more.
- Technique before load: Start around half of your front press weight and add small jumps only when every rep tracks smoothly behind the head.
- Hard stop rule: Any pinching, sharp pain, or drifting bar ends the set on the spot, and the front press carries the program from there.
How to Set Up the Behind the Neck Press on a Smith Machine
Setting up the behind the neck press comes down to bar height, grip width, and a bail plan you confirm before any plate goes on. Position the bar at about upper chest height so you can unrack and re-rack without shrugging under load. Set both safety stops just below your lowest controlled rep.
- Bar height: Align the bar with your upper chest or collarbone while seated or standing tall. A bar set too high turns every unrack into a shrug under load.
- Grip width: Take a grip slightly wider than shoulder width, the same one you trust for front pressing. A wider grip shortens the range and eases the bottom position.
- Safety stops: Place both stops just below the lowest position you can control with the empty bar. Failed reps rest on the stops instead of drifting toward your spine.
- Seat and posture: Sit on an adjustable weight bench with an upright back pad, or stand with your feet set. Your torso should stay vertical without leaning into the lift.
- Warmup check: Run two or three light front press sets first. If your overhead reach feels short that day, the behind the neck groove is not ready.
If you are still choosing the machine itself, the Multifunctional Smith Machine is the straightforward entry point for this lift. The full Smith Machine collection lists every current option.
How to Perform the Behind the Neck Press: Step-by-Step Form
Performing the behind the neck press comes down to five repeatable steps that keep the bar in one groove behind your head. Unrack with your elbows under the bar, lower to the base of the neck, and press back up without letting the bar drift. Move slowly enough that you could stop the bar at any point in the rep.
- Step 1: Sit tall against an upright back pad or stand with your feet set, head neutral and eyes forward.
- Step 2: Grip slightly wider than shoulder width and unrack with your elbows stacked under the bar, pointing down and slightly forward.
- Step 3: Lower the bar behind your head until it reaches the base of your neck. Keep your chest up and stop the descent the moment the bar wants to drift away from the groove.
- Step 4: Press the bar back up by driving your elbows toward the ceiling until they approach lockout. The bar should travel the same vertical path down and up.
- Step 5: Re-rack by guiding the bar back onto the hooks, or lower it straight onto the safety stops whenever the rep feels wrong. Bailing onto the stops is a skill, so practice it with the empty bar.
Speed is the first thing to sacrifice on this lift, and the last thing to add back. Every rep should look identical on video before the load climbs.
The Mind Pump TV tutorial above tags this press for advanced lifters only, which matches the screening logic in the safety section below.
Muscles Worked by the Behind the Neck Press
The behind the neck press works the same pressing muscles as the front version, with a stronger pull toward the medial and posterior deltoids. In an EMG trial of 8 competitive bodybuilders, behind the neck barbell pressing produced greater medial deltoid excitation during the lifting phase and far greater posterior deltoid excitation than front pressing.[1] The front press still activated the pectoralis major more.
- Medial deltoid: The clearest winner behind the neck, with an effect size of ES 3.68 for the ascending phase in the cited trial.
- Posterior deltoid: Far more involved than most lifters expect, at ES 9.00 versus front pressing.
- Pectoralis major: Front pressing wins here, with an effect size of ES 3.11 in the other direction.
- Triceps and upper traps: Both versions drive the lockout and steady the bar, and upper trapezius excitation did not differ between the two versions.
These effect sizes come from free barbell presses in competitive bodybuilders, so treat them as direction rather than a promise about machine pressing. The front and back versions still train the same deltoid roster.
Is the Behind the Neck Press Safe on a Smith Machine
The behind the neck press is demanding on the shoulder, and its safety depends on your mobility, your history, and your load discipline. The literature on shoulder impingement emphasizes load management and avoiding aggravating overhead positions while symptoms are present.[2] Reviews of weightlifting injuries likewise list shoulder complaints as a recognized category with established management pathways.[3]
- Screen yourself first: A history of impingement, rotator cuff problems, or limited overhead range of motion takes this lift off your list. Front pressing covers the same pattern with a friendlier angle.
- Why the machine lowers the control burden: A fixed path removes the free barbell balance problem behind your skull, and adjustable stops catch a failed rep. That combination is why smith machine work suits lifters who train alone.
- Mobility signals: Limited thoracic extension or an overhead reach that shortens under a straight bar leaves little room at the bottom of this press. If any warmup rep produces pinching, the experiment is over before it starts.
"The smith machine is great because it's going to take a lot of the pressure out of your shoulders because it's supporting itself and you can do a little bit more weight on here. So it can help you break some barriers too, and also if you don't have a spotter you can utilize the tabs, put that right here so if you drop it it'll just bounce and then you won't hurt yourself."
Scott Herman, YouTube Creator, ScottHermanFitness, Smith Machine Behind the Neck Press Tutorial
Behind the Neck Press vs Front Overhead Press on a Smith Machine
The behind the neck press and the front overhead press share a muscle roster but split the emphasis and the joint demand. The EMG data gives the back press the medial and posterior deltoid edge and gives the front press the pectoralis major edge. Both versions follow the same scapulohumeral rhythm, and the behind the neck version simply asks for it at a less forgiving angle.
| Factor | Behind the Neck Press | Front Overhead Press |
|---|---|---|
| Medial deltoid demand | Higher in the cited EMG trial | Lower |
| Posterior deltoid demand | Much higher | Lower |
| Pectoralis major involvement | Lower | Higher |
| Stabilization demand | Lower on the machine, bar fixed to the rails | Higher, you steer the whole path |
| Screening bar to clear | High, mobility dependent | Moderate |
Activation rows reflect an EMG trial of 8 competitive bodybuilders using free barbells, not machine pressing.
For the front version, our smith machine shoulder press guide covers the baseline groove, and the smith machine overhead press form guide adds the standing detail.
How to Choose Your Weight
Choose a weight you could press smoothly in front, then cut it to roughly half for your first behind the neck sessions. The groove behind the neck is weaker than the front groove, and ego loading is the fastest way to lose it. Keep the first sessions conservative even if the empty bar feels trivial.
- Starting point: Around half of your front press working weight, which lines up with the coaching rule of starting far lighter than you expect.
- Empty bar phase: Spend your first sessions with the bare bar learning the descent and the bail. The groove is the skill here, not the load.
- Failed test: If any rep tips your head forward or pulls the bar off its path, the weight is already too heavy. Strip plates before you repeat the pattern.
Sets, Reps, and Progression
Two to three sets of six to ten controlled reps fit this lift once the groove holds. Treat it as an accessory press once or twice a week rather than your main pressing day. Load climbs in small jumps, and only after every rep tracks the same path.
- Learning phase: Two to three sets of eight to ten reps with the empty bar or a very light load. End every set while the groove is still perfect.
- Working phase: Three sets of six to eight reps once a moderate load stays smooth. Rest long enough that technique, not fatigue, decides the next rep.
- When to add weight: After two straight sessions in which every rep stayed pain free and on path. Add the smallest jump your plates allow.
- Reset trigger: Drop back to the previous load whenever form slips. This lift punishes stubbornness faster than it rewards it.
The official RitFit walkthrough below shows a full upper body session built around the RitFit M2 Pro 3D Smith Machine, so you can see where pressing work sits in a complete day.
4 Behind the Neck Press Alternatives
Four alternatives cover every common reason to skip the behind the neck press, from joint comfort to equipment limits. Each one trains the same shoulders with a friendlier bar path. Pick the option that matches your screening result, not your curiosity.
- Front overhead press: The default substitute, with nearly the same muscle roster and a much friendlier shoulder angle. A dedicated station such as the Gorilla 2-in-1 Press Machine adds a guided press path without the behind the head position.
- Seated overhead press: Back support locks your torso in place so the press stays honest. Our seated overhead press guide covers the seated machine setup.
- Landmine press: The angled bar path keeps your shoulder out of the full overhead position, which suits lifters rebuilding pressing comfort. Any landmine attachment or corner setup works.
- Bradford press: A press that rolls the bar over your head in one rep, covered in our Bradford press guide. Keep it light, because it shares this lift's behind the head exposure.
Common Mistakes in the Behind the Neck Press
Most behind the neck press problems trace back to loading too heavy, drifting the bar off its groove, and craning the head forward. Each of those errors shifts stress onto tissue that never signed up for this angle. Lighter weight and honest video review fix all three.
- Loading the ego: Weight chosen by front press numbers is weight the groove cannot steer. The lift stalls and the shoulders absorb the difference.
- Bar drift: A bar that wanders away from the base of the neck changes the leverage mid rep. Catch it on the next warmup set, not the next failed rep.
- Head craning: Pushing the head forward buys a little clearance and costs a stable neck under load. Keep the head neutral and accept the honest range.
- Rushing the descent: A fast lower leaves no time to correct the path. The slow lowering pace from the form steps exists for exactly this reason.
When to Stop: Pain Signals and Safety Limits
Stop the behind the neck press immediately when you feel pinching, sharp pain, or any sensation that changes how the joint moves. Persistent discomfort after the set, or pain that alters your front pressing, ends the experiment too. Discomfort here is feedback about fit, not a challenge to push through.
- End the set: Lower the bar onto the safety stops and finish the session with front pressing. Do not test the same depth again that day.
- End the lift: Recurring pinching at the same depth, even with light weight, retires the movement from your plan. The front press delivers a similar stimulus without the angle.
- Outside the gym: Shoulder complaints that continue away from training belong with a qualified healthcare professional. Training guidance stops at stopping; it does not diagnose or treat anything.
Behind the Neck Press on the RitFit M2: Why the Fixed Bar Path Helps
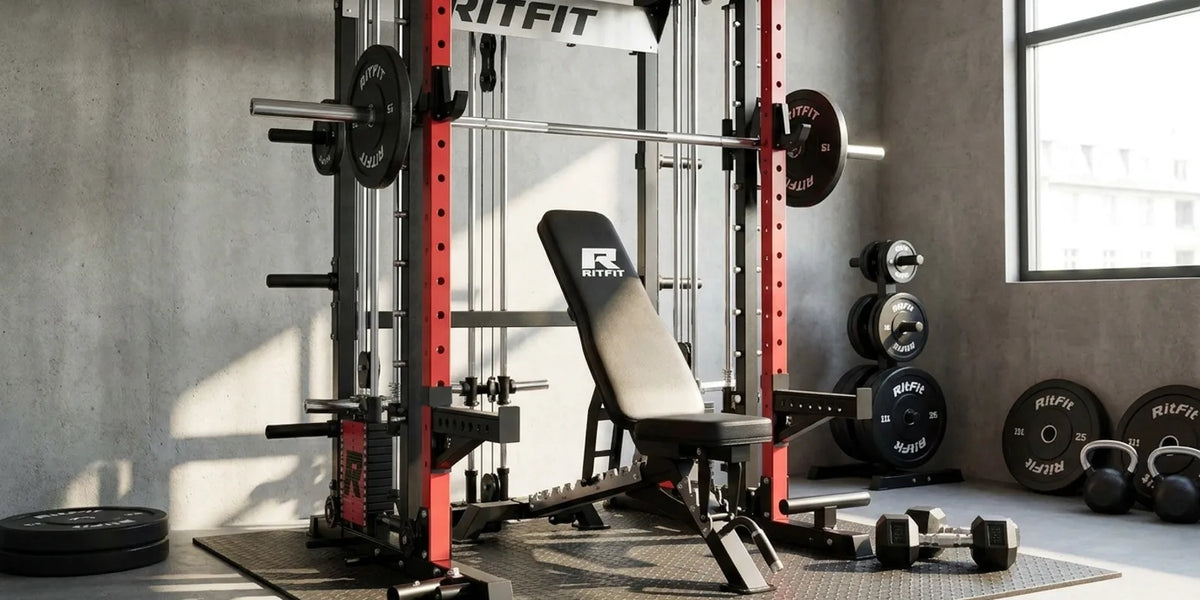
The RitFit M2 turns this controversial press into a controlled drill because the bar rides fixed rails and adjustable stops sit exactly where a failed rep should end. You rehearse the groove without balancing a free barbell behind your skull. In a home gym without a spotter, that pairing is the entire argument for attempting the lift on a machine.
- Fixed bar path: The bar can only travel where the rails allow, so a wobbling path cannot sneak up on you mid set. That consistency keeps video review clean and progression measurable.
- Adjustable safety stops: Set them once just below your lowest controlled rep and every failed attempt ends on steel instead of on your neck. Practice the bail with the empty bar until it feels boring.
- Home gym fit: One station covers this press, the front press variations, and the rest of your pressing day, which suits lifters who train alone in a garage. If space points smaller, the RitFit M1 Smith Machine runs the same fixed path idea in a compact frame.
"Best Piece of equipment that I've ever owned. Very smooth!"
Jacob S. Verified Buyer, RitFit M2 Multi-Functional Modular Home Gym Smith Machine Tailored to All Fitness Levels
FAQs About the Behind the Neck Press on a Smith Machine
Is the behind the neck press dangerous?
It is demanding but not automatically dangerous for lifters with healthy shoulders and good overhead mobility. The risks rise with poor mobility, heavy loads, and fatigue. The fixed bar path and adjustable stops of a smith machine make the movement easier to control and bail from safely.
What muscles does the behind the neck press work?
It targets the same shoulder press muscles as the front version, mainly the anterior and medial delts, with strong involvement from the triceps and upper traps. EMG research on bodybuilders found the behind the neck barbell press excited the medial and posterior delts more than front pressing.
Who should avoid the behind the neck press?
Skip it if you have a history of shoulder impingement, rotator cuff problems, or limited overhead range of motion. Front pressing delivers a very similar stimulus with less joint demand. If pressing behind the neck causes pinching or pain, stop and choose a front variation instead.
Why use a smith machine for the behind the neck press?
The fixed bar path removes the balance struggle of a free barbell behind your head, and the adjustable safety stops catch the bar if you fail or lose the groove. That makes the smith machine the most controlled venue for learning this advanced press.
How heavy should the behind the neck press be?
Treat it as a technique lift first. Start far lighter than your front overhead press, often around half the load, and earn range of motion before chasing numbers. Add weight in small jumps only when every rep tracks smoothly and pain free behind the head.
How does behind the neck press activation compare to front pressing?
Both versions train the same deltoid roster, but the emphasis shifts toward the rear of the shoulder behind the neck. EMG work on competitive bodybuilders measured higher medial and posterior deltoid excitation behind the neck, while front pressing activated the pectoralis major more. Upper trapezius involvement did not differ between the two versions.
When should you stop doing the behind the neck press?
Stop the set the moment you feel pinching, sharp pain, or a bar drifting off its path. Recurring pinching at the same depth, even with light weight, means the lift is not for you. Complaints that continue away from training belong with a qualified healthcare professional, and front pressing carries the program.
Conclusion
The behind the neck press on smith machine setups is an advanced tool, not a default shoulder day fixture. Screen your mobility first, learn the groove with an empty bar, keep the load near half of your front press, and let the fixed path and stops do their job.
If the screening says no, press in front and move on with your shoulder day. Before you build the setup, check the RitFit discount guide for current savings on the machine and bench.
Disclaimer
This article is for general fitness education and does not provide medical advice, diagnosis, or treatment for any shoulder condition. If you have an injury history or pain that persists outside training, consult a qualified healthcare professional before attempting any overhead press.
References
1. Coratella G, Tornatore G, Longo S, Esposito F, Cè E. Front vs Back and Barbell vs Machine Overhead Press: An Electromyographic Analysis and Implications For Resistance Training. Front Physiol. 2022;13:825880. doi:10.3389/fphys.2022.825880. PMCID: PMC9354811
2. Escamilla RF, Hooks TR, Wilk KE. Optimal management of shoulder impingement syndrome. Open Access J Sports Med. 2014;5:13-24. doi:10.2147/OAJSM.S36646. PMCID: PMC3945046
3. Golshani K, Cinque ME, O'Halloran P, Softness K, Keeling L, Macdonell JR. Upper extremity weightlifting injuries: Diagnosis and management. J Orthop. 2018;15(1):24-27. doi:10.1016/j.jor.2017.11.005. PMCID: PMC5895929