


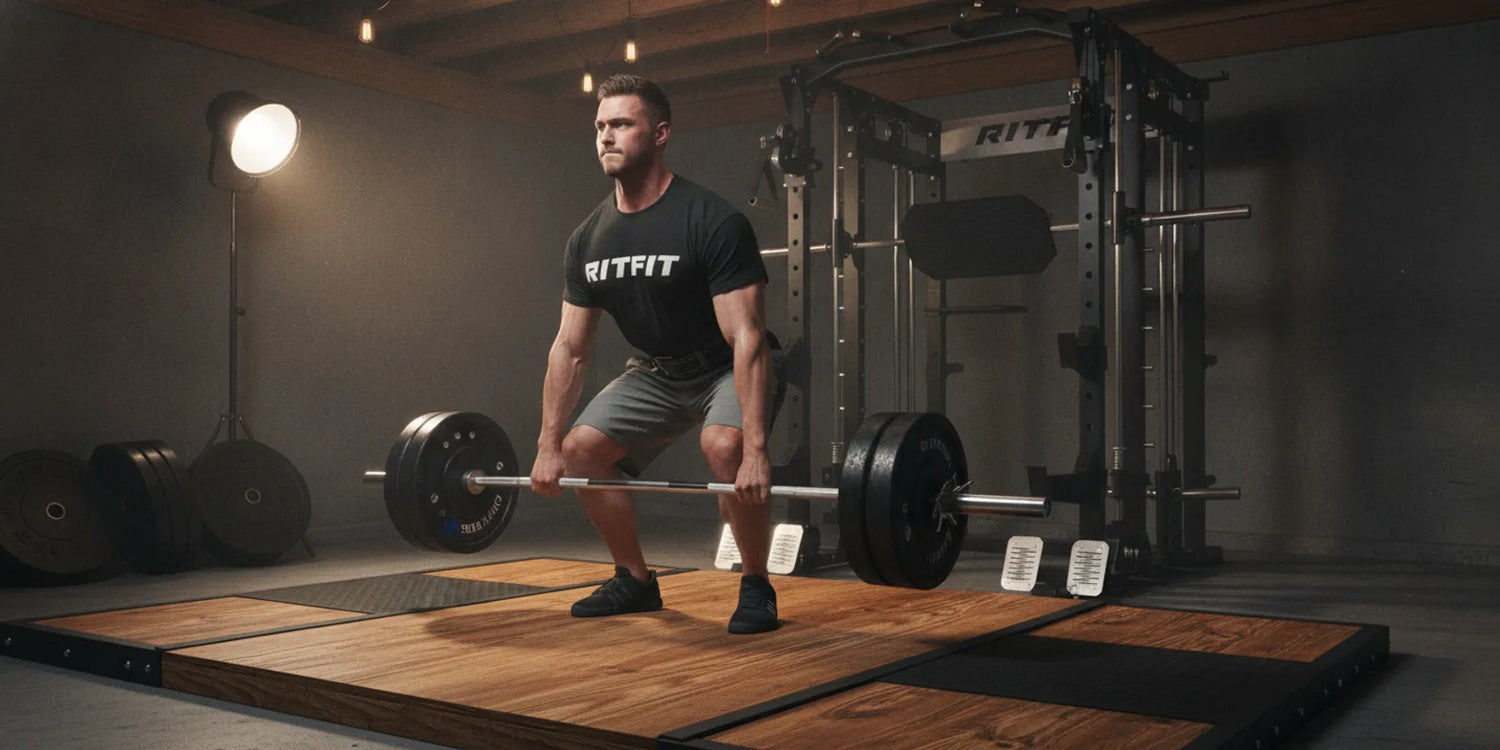
A wooden deadlift platform is one of the highest-value upgrades you can make to a home gym, protecting your floor, reducing noise, and giving you a stable, consistent surface for every heavy pull. Building one yourself typically costs $120-$200 for a 4x8-foot version, compared to $400+ for a pre-made commercial platform.
This guide covers everything a home gym lifter needs to build a durable wooden deadlift platform from scratch, including size selection, material choices, a step-by-step assembly sequence, and the most common mistakes to avoid at each stage.
Quick Answer
A wooden deadlift platform for a home gym is built using two layers of 3/4-inch plywood as the base, a maple or pine center lifting surface, and rubber horse stall mats as drop zones on each side. A 4x8-foot platform costs around $120-$200 in materials and takes two to three hours to assemble, protecting floors and improving deadlift stability.
Key Takeaways
- Floor protection and stability: A stable wooden platform surface allows greater force output during heavy deadlifts compared to rubber or unstable surfaces, making it a functional upgrade, not just a cosmetic one.[1]
- Two platform sizes: A 4x8-foot platform fits most basement or garage spaces and costs $120-$200 in materials; an 8x8-foot platform is the standard for dedicated gym rooms and costs $120-$300.
- Double-layer plywood is non-negotiable: A single 3/4-inch plywood layer will flex and crack under heavy loads. Two layers glued and screwed together with seams offset by at least 24 inches provides the rigidity needed for heavy training.
- Horse stall mats form the drop zones: Two 2-foot-wide rubber sections on each side of the center wood surface absorb barbell impact and protect both the platform and your floor from dropped weights.
- Common mistakes cost time and money: Aligned vertical seams, wrong saw blades, skipping the vapor barrier on concrete, and overtightening screws are the four most frequent build errors, each avoidable with a few minutes of planning.
Why Does Every Home Gym Need a Wooden Deadlift Platform?
A wooden deadlift platform solves three practical problems at once: it protects your floor from repeated barbell drops, reduces the noise and vibration that transmits to the structure below, and provides a firm, level lifting surface that stays consistent across every training session.
- Floor protection: Even with rubber gym flooring underneath, the concentrated impact of a loaded barbell over months of training will compress and eventually damage most floor coverings. A rigid wood-and-rubber platform distributes that force across a larger area, extending the life of both your floor and your equipment.
- Lifting surface quality: Stable ground conditions matter for deadlift performance. A peer-reviewed study found that traditional deadlifts performed on stable surfaces at 70-80% of 1RM produced greater erector spinae activation compared to exercises performed under unstable conditions, supporting the value of a firm, level platform.[1]
- Lumbar load management: Heavy deadlifts impose significant compressive and shearing loads on the lumbar spine. A consistent, stable platform surface removes variables in foot positioning and barbell path, helping you maintain the setup quality that keeps these loads manageable session to session.[2]
- Noise and vibration reduction: The rubber drop zone sections absorb the majority of impact energy from set-down weights, significantly reducing the thud and vibration that travels through the floor, which matters in apartments, basements, and shared living spaces.
- Consistency and confidence: Having a dedicated platform changes training psychology. The defined space gives you a consistent setup point for every pull, and knowing your surface will not shift or compress under load removes one variable from an already demanding lift.
For home gym lifters who use a proper deadlift setup with consistent foot placement and barbell position, a wooden platform is the foundation that makes that consistency possible across hundreds of training sessions.
"Hip extension strength is the primary limiting factor for the deadlift, everything about your setup and positioning should put you in a place where your hips can work as effectively as possible."
Greg Nuckols, MA, Strength Researcher and Coach, Stronger By Science
What Size Platform Should You Build: 4x8 or 8x8 Feet?
Platform size depends on your available floor space and how you plan to use the platform alongside other gym equipment. The two standard DIY sizes are 4x8 feet and 8x8 feet, each with distinct space requirements and use cases.
How Do You Measure Your Space Before Building?
Measure the open floor area where the platform will sit, then add at least 24 inches of clearance on all sides for safe lifting stance width and for loading plates onto the bar while it rests on the floor.
- Minimum floor area for a 4x8 platform: You need at least a 7x11-foot open zone to use the platform comfortably, accounting for stance width and plate-loading clearance on all sides.
- Minimum floor area for an 8x8 platform: Allow at least a 10x11-foot zone. The extra width accommodates both a power rack footprint and the full drop zones simultaneously.
- Ceiling height check: A finished platform sits approximately 2 inches above your existing floor surface. If you are using a barbell overhead in the same space, verify that your ceiling clearance accommodates that added height.
- Staircase and doorway access: A fully assembled 4x8 platform fits through most standard basement doorways and down standard basement stairs. An 8x8 platform must be assembled in place, so bring all materials down before assembly.
When Should You Choose 4x8 vs 8x8?
A 4x8-foot platform works well for most home gym setups with limited floor space, while an 8x8-foot platform suits dedicated gym rooms where a rack will also be bolted to the platform surface.
- Choose 4x8 if: Your gym space is a bedroom, garage bay, or small basement room; you need to transport the assembled platform through doorways; your primary lift is the deadlift without a rack mounted on the platform.
- Choose 8x8 if: You have a dedicated garage or basement gym room; you want to bolt a squat rack or power rack to the platform to prevent it from walking during squats; your training includes Olympic lifts that need a wider drop zone.
- Material difference: An 8x8 build uses four 4x8 OSB sheets (two layers) plus one center plywood piece and two horse stall mats. A 4x8 build uses just one OSB sheet and one plywood sheet, making it significantly cheaper and faster to assemble.
If you are unsure which size to build, start with a 4x8 platform. It satisfies all standard deadlift training needs, and the lower cost means you can upgrade to an 8x8 later without significant regret.
Check the RitFit Deadlift Platform Technical Specifications to compare DIY dimensions against a commercial-grade platform before committing to your build.
What Materials and Tools Do You Need for a Wooden Deadlift Platform?
A 4x8-foot wooden deadlift platform requires three primary materials: a sheet of OSB for the base layer, a sheet of maple or pine plywood for the center lifting surface, and one horse stall mat for the rubber drop zones on each side.
Which Wood Layers Does a Deadlift Platform Need?
The platform uses two distinct wood layers with different performance roles: a structural OSB base that provides rigidity and distributes load, and a finished plywood top that gives you the smooth, grippy surface you actually stand on.
- OSB base layer (5/8-inch or 3/4-inch thick): One full 4x8-foot sheet forms the bottom of the platform. OSB is inexpensive, dimensionally stable, and strong enough for this structural role. It does not need to look good because it will be fully covered.
- Maple plywood center surface (3/4-inch thick): One 4x8 sheet of maple plywood is cut in half to create two 2x8-foot pieces. One piece becomes the center lifting surface. Maple is dense, resists denting under heavy barbells, and holds screws reliably without splitting near edges.
- Pine plywood alternative: Pine is a budget-friendly option that works well for moderate training loads. It is softer than maple and will show more wear over time, but it is widely available and costs $15-$20 less per sheet.
- Avoid particle board for the top surface: Particle board chips easily under impact, does not hold screws well near edges, and will not hold the polyurethane finish that protects the wood from sweat and chalk buildup.
What Type of Horse Stall Mat Should You Use?
A standard 4-foot by 6-foot horse stall mat at 3/4-inch thickness provides enough rubber material to cut two 2-foot-wide drop zone sections for a 4x8 platform, with the cut sides facing inward toward the center plywood.
- Where to buy: Horse stall mats are sold at farm supply stores such as Tractor Supply Co. and typically cost $40-$50 per mat. They are the same rubber used in commercial gym flooring, just sold in a more economical format.
- Thickness: Use 3/4-inch thick mats only. Thinner mats compress under repeated barbell drops and lose their cushioning effect within months. Thicker mats are harder to cut and will raise the drop zones above the center plywood surface, creating an uneven edge.
- Surface texture: The textured side of the mat should face up to provide grip for plates when they land. The smooth underside bonds better to adhesive when gluing down to the plywood base.
What Fasteners, Adhesives, and Finishing Supplies Do You Need?
Proper fastening and finishing supplies are what separate a platform that lasts years from one that loosens and splinters after a few months of heavy training.
- Construction adhesive (Liquid Nails Heavy Duty): Apply in a zigzag pattern across each surface before screwing layers together. The adhesive does most of the structural bonding; the screws hold the layers while the glue cures. One full tube per 4x8 sheet is the right amount.
- Wood glue (Elmer's or equivalent): Apply to the underside of the center plywood lifting surface before screwing it to the OSB base, adding a second bonding layer to the most-used section of the platform.
- #8 wood screws (1-1/4-inch flat head Phillips): Use 24 screws total for a 4x8 build, spacing them every 10-12 inches in a grid pattern. Pre-drill near edges to prevent splitting.
- Stainless steel finishing washers: One washer per screw prevents the screw head from pulling through the rubber mat surface. Skip the washers on the plywood-to-OSB connection; they are only needed where screws pass through rubber.
- Polyurethane (Minwax semi-gloss): Two coats on the top surface of the center plywood lifting section. Let the first coat dry overnight before applying the second. This protects the wood from sweat, chalk, and cleaning products.
- 6-mil polyethylene vapor barrier (10x10-foot sheet): Lay this under the entire platform before assembly if your gym is in a basement or garage with a concrete floor. Concrete wicks moisture, and without a barrier the OSB base will absorb humidity over time, causing warping and eventual delamination.
What Tools Are Required?
Most of the required tools are standard household or entry-level workshop tools. The only specialized item is a plywood-specific saw blade, which is different from a standard wood-cutting blade.
- Circular saw with a plywood blade: A fine-tooth plywood blade (60-80 teeth) makes clean cuts without tearing the maple veneer. A standard wood-cutting blade will tear the surface and make the cut significantly harder to control.
- Cordless drill: For pre-drilling pilot holes and driving screws. A standard 18V cordless drill is sufficient.
- 1/4-inch drill bit: For pre-drilling pilot holes near plywood edges to prevent splitting.
- Utility knife with fresh blades: For cutting horse stall mats. Replace the blade after each mat cut if it starts dragging rather than slicing cleanly.
- Random orbit sander: For smoothing cut edges and scuffs on the plywood surface before applying polyurethane.
- 4-foot level: For checking that the base layer is flat before gluing and screwing the top layers. An unlevel base cannot be corrected after assembly.
- Two 2x4 boards and clamps: Used as a straight-edge cutting guide when cutting horse stall mats with a utility knife.
- Tape measure and chalk line: For marking cut lines accurately across the full width of plywood and rubber sheets.
Pair your completed platform with the RitFit Deadlift Jack Barbell Stand to make loading and unloading heavy plates on a floor-level barbell fast and effortless, which is one of the most practical quality-of-life additions to any dedicated deadlift setup.
How Do You Build a Wooden Deadlift Platform Step by Step?
Building a wooden deadlift platform follows a five-step sequence: lay and level the base layer, add the second plywood layer with offset seams, install the center lifting surface, cut and secure the drop zone rubber mats, then finish and seal the wood surfaces.
Step 1: Lay and Level the Base Layer
Place the vapor barrier sheet flat on the floor first, then lay the OSB base sheet on top and check it with a 4-foot level before doing anything else. A level base is the structural foundation of the entire build; low spots cannot be corrected after upper layers are glued and screwed.
- Vapor barrier first (concrete floors only): Unroll the 6-mil polyethylene sheet so it covers the entire footprint with a few inches of overlap on all sides. This prevents moisture from the concrete from wicking into the OSB base over time.
- Check for low spots: Place your 4-foot level in multiple directions across the base. If you find low spots, slide thin plywood shims underneath until the entire sheet reads flat before proceeding.
- Mark your final position: Once level, mark the platform outline on the floor with tape or chalk so you can confirm alignment after adding upper layers.
Step 2: Add the Second Plywood Layer with Offset Seams
The second plywood layer must have its seams offset from the first layer by at least 24 inches, because aligned vertical seams between layers create a hinge point that flexes under load and eventually cracks the platform.
- Apply construction adhesive first: Spread Liquid Nails Heavy Duty in a zigzag pattern across the entire top surface of the base layer, using roughly one full tube. The adhesive does the primary structural bonding; the screws hold the layers in position while the glue cures.
- Offset the seams: Position the second layer so its seams fall at least 24 inches away from any seam below. This staggered pattern distributes stress evenly across the platform surface rather than concentrating it at a single joint line.
- Drive screws in a grid pattern: Use #8 wood screws (1-5/8-inch) spaced every 10-12 inches across the full surface. Pre-drill pilot holes near edges to prevent splitting. Drive screws snug but not overtight, as cranking them too hard causes the wood to split around the screw head and weakens the joint.
Step 3: Install the Center Lifting Surface
The center lifting surface is the piece of maple or pine plywood you will actually stand on during every deadlift, so it should be installed with both adhesive and screws for maximum bonding strength.
- Position center-out: Place the center plywood piece in the middle of the base layer, leaving equal amounts of base layer exposed on each side for the rubber drop zones. For a 4x8 platform, the center plywood should leave 2 feet of exposed base on each side.
- Glue and screw: Apply wood glue to the bottom of the center piece, press it firmly into position, then drive screws every 10-12 inches. Use finishing washers if any screws pass through particularly dense grain that might crack without the washer reinforcement.
- Sand and seal: Sand the top surface and cut edges with a random orbit sander, then apply the first coat of polyurethane. Let it dry overnight before applying the second coat. Two coats protect the wood from sweat, chalk dust, and the occasional spilled water bottle.
Step 4: Cut and Secure the Drop Zone Rubber Mats
Cutting horse stall mats is the most physically demanding step of the build, but using a fresh utility knife blade and two clamped 2x4 boards as a straight-edge guide makes the process straightforward and produces clean, straight cuts.
- Mark the cut line: Measure 2 feet from one long edge of the 4x6 mat and mark a chalk line across the full width. This gives you two 2x6-foot pieces, one for each side of the platform.
- Set up the cutting guide: Clamp two 2x4 boards together with the mat squeezed between them along the cut line. The clamped boards prevent the rubber from flexing during the cut and keep the knife tracking straight.
- Score with firm, even passes: Use a utility knife with a fresh blade and make three to four firm passes along the line. Replace the blade immediately if it starts to drag or tear rather than slice. The cut should go all the way through in four passes on a 3/4-inch mat.
- Position cut sides inward: When laying the mat sections on the platform, place the rough cut edges facing the center plywood. The factory-straight uncut edges face outward and give the platform a clean look along the visible perimeter.
- Secure with screws and washers: Pre-drill through the rubber and into the base layer below, then drive screws with stainless steel finishing washers. The washers distribute the clamping force over a larger rubber area and prevent the screw heads from pulling through the mat surface over time.
Watch the full build process from material cutting to final assembly in this step-by-step video from Kaizen DIY Gym:
Step 5: Finishing Touches
Optional finishing steps like spray painting the exposed OSB side edges and adding a custom logo significantly improve the platform's appearance and protect the exposed edges from moisture absorption.
- Paint the sides: Use matte or satin black spray paint on the exposed OSB edges all around the platform perimeter. OSB absorbs moisture readily on cut edges; paint seals them and gives the platform a clean, commercial look.
- Add a logo (optional): Stencil or vinyl-cut a logo onto the center plywood section before the final polyurethane coat. Apply the logo, let it dry completely, then seal over it with polyurethane so the image is permanently protected under the clear coat.
- Allow adhesive to cure: Do not load the platform with heavy weights for at least 24 hours after the final assembly step. Construction adhesive reaches its rated bonding strength after a full 24-hour cure, and loading it early can shift layers before they have fully bonded.
Understanding how your deadlift mechanics work as a push or pull movement helps you appreciate why platform design matters: the conventional deadlift involves greater hip extension demands and posterior chain activation, which both depend on foot position stability that only a firm, level surface can provide.[3] Once your platform is complete, use the deadlift jack guide for loading plates on the floor to make every training session faster and safer.
What Are the Most Common Mistakes When Building a Deadlift Platform?
The four most common build mistakes are aligning plywood seams vertically between layers, using the wrong saw blade for plywood cuts, skipping the vapor barrier on concrete floors, and overtightening screws through rubber mat sections.
Aligning Seams Vertically Between Layers
Vertical seam alignment between plywood layers is the single most structurally damaging mistake you can make, because aligned seams create a continuous hinge line that concentrates all flexion stress at one point and eventually cracks the platform.
- Why it fails: When both plywood layers have a seam running across the same line, the platform behaves as two separate boards at that joint instead of one unified structure. Every heavy deadlift set-down flexes that joint slightly, and over time the repeated micro-movement fractures the adhesive bond and cracks the wood fibers.
- The fix: Offset seams by a minimum of 24 inches between layers. This staggered pattern distributes stress across both layers evenly, so there is no single point of concentrated flexion.
Using the Wrong Saw Blade for Plywood
Cutting 3/4-inch maple plywood with a standard wood-cutting blade rather than a fine-tooth plywood blade makes the cut significantly harder to control and tears the veneer surface, leaving a rough edge that splinters under foot traffic.
- What blade to use: Use a circular saw blade specifically labeled for plywood, with 60-80 teeth. The higher tooth count produces a finer, cleaner cut through hardwood veneer without tearing.
- Blade direction matters: For the cleanest top surface finish, cut with the finished face of the plywood facing up so the blade enters from the top. For circular saws that cut on the upstroke, cut face-down to keep tear-out on the hidden underside.
Skipping the Vapor Barrier on Concrete Floors
Installing a wooden platform directly on bare concrete without a moisture barrier allows the concrete to wick humidity into the OSB base year-round, leading to warping, swelling, and delamination within 12-18 months in most climates.
- What to use: A 6-mil polyethylene vapor barrier sheet, cut to 10x10 feet, costs around $8 at any hardware store and sits under the entire platform footprint.
- How to install it: Lay the sheet flat before placing the base layer. Overlap edges by at least 6 inches on all sides. The vapor barrier does not need to be taped or sealed; its mass and the platform weight above it hold it in place.
- When you can skip it: On wood subfloors, plywood-over-joist floors, or gym flooring tiles that already sit on a moisture-managed subfloor, the vapor barrier is not necessary. It is only critical when OSB or plywood sits directly on concrete.
Overtightening Screws Through Rubber Mats
Overtightening screws through rubber mat sections causes the wood beneath to split around the screw head, weakening the joint rather than strengthening it, and causes the rubber to cup slightly around each fastener location.
- The right technique: Drive screws snug until the washer seats flat against the rubber surface, then stop. The rubber's natural compression holds the screw securely; further tightening only splits the wood fibers below.
- Washer requirement: Never drive screws through rubber without a stainless steel finishing washer. A bare screw head pulls straight through rubber under repeated impact loading because the small head area concentrates all the clamping force onto a tiny rubber circle that eventually tears.
- Pre-drill all rubber fastener locations: Mark screw positions before drilling, using a consistent grid pattern with even spacing on each side of the center plywood. Even spacing distributes the mat's clamping force uniformly and prevents the rubber from lifting or curling at the edges during use.
Avoiding these four errors saves you from having to rebuild sections of the platform later. If you plan to use your platform for trap bar deadlifts or kettlebell deadlifts in addition to conventional barbell pulls, a properly built platform handles all of these variations without modification.
The single-leg Romanian deadlift and suitcase deadlift also benefit from a stable, non-slip platform surface for balance-dependent variations.
How Much Does a DIY Platform Cost vs Buying Pre-Made?
A DIY wooden deadlift platform costs $120-$200 for a 4x8-foot version and $120-$300 for an 8x8-foot version depending on material choices, compared to $400-$800 or more for a commercial pre-made platform of equivalent size and construction quality.
- 4x8 DIY material cost breakdown: Maple plywood sheet (~$50-$65), OSB base sheet (~$25-$30), one horse stall mat (~$40-$50), screws and washers (~$15), wood glue and adhesive (~$15), polyurethane (~$10), vapor barrier (~$8). Total: approximately $163-$193.
- 8x8 DIY material cost breakdown: Four OSB sheets (~$100-$120), one maple plywood center piece (~$25-$35), two horse stall mats (~$80-$100), fasteners and finishing supplies (~$30-$40). Total: approximately $235-$295.
- Time investment: A 4x8 platform takes two to three hours of active build time, not counting overnight polyurethane drying. The 8x8 version adds roughly one hour due to the additional material handling and fastener count.
- Pre-made platform cost: Commercial platforms from major gym equipment brands range from $400-$800 for a 4x8 size and $600-$1,200 for an 8x8 version, with the higher prices reflecting welded steel borders and integrated rack attachment points.
- When pre-made makes sense: If you need bolt-down rack attachment points built into the platform frame, or if you want a certified load rating for a commercial gym setting, a commercial platform justifies the premium. For home gym use, a well-built DIY platform performs identically to a commercial one for standard deadlift training.
For lifters who want a RitFit-grade platform without the build time, the RitFit Weightlifting Deadlift Platform offers commercial construction standards at a home gym price point. Browse the complete range of functional training equipment to pair your new platform with the right accessories for your home gym setup.
FAQs About Wooden Deadlift Platforms
What size wooden deadlift platform should I build for a home gym?
A 4x8-foot platform works well for most home gyms with limited space, fitting easily through standard doorways and covering the essential lifting zone. If you have a dedicated garage or basement gym with at least a 10x10-foot open area, an 8x8-foot platform gives you more drop zone coverage and better stability when using a full rack alongside your platform.
What wood is best for a deadlift platform lifting surface?
Maple plywood is the most recommended wood for the center lifting surface because it is dense, resists denting under heavy loads, and holds screws reliably without splitting. Pine is a budget-friendly alternative that works well for moderate loads. Avoid OSB or particle board for the top surface, as these materials chip easily and will not hold the polyurethane finish that protects the wood from sweat and chalk buildup.
How thick should a DIY deadlift platform be?
A properly built DIY deadlift platform should be approximately two inches thick total, achieved with two layers of 3/4-inch plywood for the base totaling 1.5 inches, plus the top lifting surface or rubber mats bringing the full height to around two inches. This thickness provides enough rigidity to prevent flex under heavy loads while keeping the platform low enough to avoid creating a significant height discrepancy with your floor.
Do I need to glue the layers of a wooden deadlift platform?
Yes, applying construction adhesive between the plywood layers is strongly recommended and does most of the structural bonding work. Use a generous zigzag pattern of Liquid Nails or similar heavy-duty adhesive across the full surface before adding the top layer. Skipping the glue and relying only on screws risks the layers separating or flexing over time under repeated heavy impact from dropped barbells.
Can I build a deadlift platform on a concrete floor?
Yes, you can build a deadlift platform on a concrete floor, but you should place a 6-mil polyethylene vapor barrier sheet between the concrete and the bottom plywood layer before assembly. Concrete wicks moisture, and without a barrier the OSB or plywood base will absorb humidity over time, causing warping, swelling, and eventual delamination. The vapor barrier costs around eight dollars for a 10x10-foot sheet.
How do I cut horse stall mats for a deadlift platform drop zone?
Use a sharp utility knife with a fresh blade and clamp two 2x4 boards on either side of the mat as a straight-edge guide. Score the cut line with firm, even passes, typically three to four passes to cut through 3/4-inch rubber. Clamping the 2x4s together tightly with the mat sandwiched between them keeps the cut straight and prevents the rubber from shifting. Replace the blade if it starts to drag rather than slicing cleanly.
How long does it take to build a wooden deadlift platform?
A 4x8-foot deadlift platform can be completed in two to three hours of active build time, not counting overnight drying time for polyurethane coats. The most time-consuming steps are cutting the plywood lifting surface and cutting the rubber mats. Plan for at least 24 hours between applying the first and second polyurethane coats, and allow construction adhesive to cure for 24 hours before placing heavy loads on the finished platform.
Conclusion
A wooden deadlift platform built with double-layer plywood, a maple center surface, and rubber horse stall mat drop zones gives your home gym a durable, floor-protecting foundation for heavy training that costs a fraction of a commercial platform.
Start with a 4x8-foot build using the material list and step-by-step sequence in this guide, offset your plywood seams, lay a vapor barrier on concrete, and let the adhesive cure fully before loading the platform. Visit the Romanian deadlift guide to expand your pulling repertoire once your platform is ready.
Disclaimer
This article provides general DIY construction guidance for home gym equipment and is intended for informational purposes only, not as professional structural engineering or safety advice. Consult a qualified professional before undertaking any construction project if you have concerns about load-bearing capacity, building codes, or structural safety in your specific space.
Save on your next RitFit order
Tap the button to copy your code, then paste it at checkout.
References
1. Behm DG, Colado JC. The Effectiveness of Resistance Training Using Unstable Surfaces and Devices for Rehabilitation. Int J Sports Phys Ther. 2012;7(2):226-241. https://pmc.ncbi.nlm.nih.gov/articles/PMC3325639/
2. Bazrgari B, et al. Low Back Biomechanics during Repetitive Deadlifts: A Narrative Review. IISE Trans Occup Ergon Hum Factors. 2022;10(1):34-46. https://pmc.ncbi.nlm.nih.gov/articles/PMC9837526/
3. Hanen NC, Ben Mansour K, Ertel GN, Gauchard GC. Biomechanical analysis of conventional and sumo deadlift. Front Bioeng Biotechnol. 2025;13:1597209. https://pmc.ncbi.nlm.nih.gov/articles/PMC12148905/


